Monday, February 22, 2010

Volcanoes, Aliens, and Hot Springs

We got an unexpected visit from Sebastian, one of Romy’s army friends that he was deployed with when they were both in the 1244th. Sebastian just got back from a second deployment to Afganistan and had a few weeks before he had to go back to work, so he drove out in his STI to Vegas and LA with one of his friends, and then when the friend had to leave, he drove up the coast to San Francisco to come visit us. We got a phone call while Nicole was still here helping sew the yurt, and it was Sebastian asking if it would be alright to come and visit for the weekend. He got here Thursday night, and we came up with a crazy plan for the weekend.

Sebastian heard of a ranch in Washington state where there were supposedly a high frequency of UFO sightings. The guy who owned the ranch invites people to come and camp on his land and watch the skies for UFOs and other weird lights. The owner claimed that there was a lot of activity in the skies over his ranch on a nightly basis. Sebastian, being into aliens and stuff, was going to go drive up there for the weekend, and asked us if we were free and if we wanted to come with. Not being able to resist such a crazy road trip, we said wtf why not? And so it was in the plans to leave at 4am Saturday morning and drive north along the Cascade Mountains into southern Washington.


Sebastian
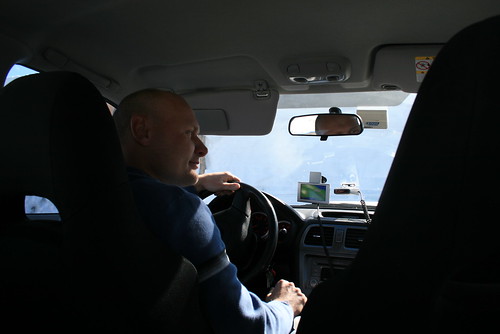
Road trip! Sebastian driving.


At 4am, we promptly jumped into Sebastian’s Subaru STI and hit the road. I was still really tired, so I fell asleep in the backseat, and didn’t wake up until we were almost at Mt Shasta. We got coffee in Mt Shasta City and kept going north along the Cascade Range heading towards Klamath Falls. We saw all kinds of volcanic things, mainly lava cones and rounded volcanic peaks. As we crossed into Oregon, we decided to make a quick detour to Crater Lake National Park. Romy and I were there once before in the summer time, but we were afraid it might be closed in the winter. We drove along the road into the park, and the snow kept getting higher and higher on the side of the road, although the road itself was completely clear. We got to the Rim Village, the only thing open in the park, and parked the car. We couldn’t actually see the lake because the snow drifts were so high around the rim until we climbed up the snow bank. We got a blast of freezing cold wind as we topped out over the snow bank to get an incredible view of the crater lake. The wind was so cold, it chilled us to the bone within 10 seconds, so after getting a short glimpse, we ran back into the car and started making our way back. The only other people there were cross country skiers. The rim road was closed, so the village was the only thing you could drive to. The rim road is only open 3 months out of the year in summer when all of the snow melts. The lake doesn’t freeze over in winter.


Crater Lake
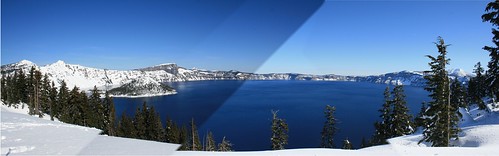
I created this panoramic picture out of four photos at Crater Lake.


We drove further north, on the east side of the Cascade Range, and started seeing all kinds of volcanic peaks. It was amazing to see the dark green cascades with large white snow covered cones sticking up. We saw The Three Sisters, a triplet of 10,000ft + peaks, and then we saw Mt Jefferson and topping it off in Oregon, we saw Mt Hood. We could see Mt Hood from really far away, and it was so clear and cloud free that day that we saw the entire mountain. The road took us right to its base, and one spot in the road allowed a clear view to the top – it was huge and looked so frozen!


Mt Hood
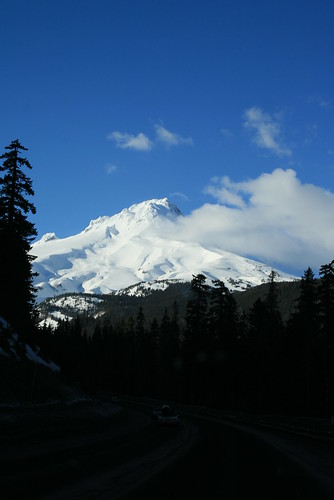
Mt Hood from the road.


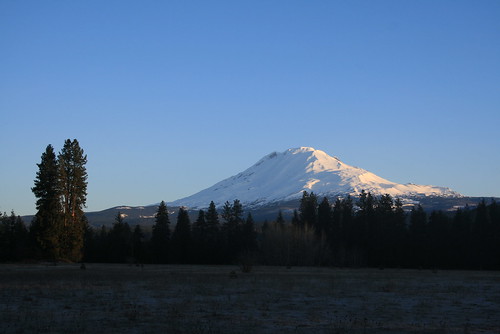
After being awed by Mt Hood, we reached the Columbia River which separates Oregon and Washington. We crossed it on a small toll bridge. The river creates a gorge which looked awesome in the setting sunlight. We were now less than ½ hour away from the UFO ranch. Off in the distance we could see Mt Adams, getting bigger and bigger as we approached it. It seemed is if the GPS was pointing us straight into Mt Adams, and it was – the ranch ended up being near the base of the large volcanic peak! We pulled into ECETI ranch about an hour before sunset. Sebastian and Romy went into the ranch house to announce our arrival, but we kept the car engine on in case the people were really crazy and we needed to make a quick get away or something like that. We were the only ones there, being the middle of February! They get most of their campers and RVs in the summer, of course. But there we were, setting up the tent in a clearing, with Mt Adam looming over us. The snow on the peak turned brilliant colors of orange, red and purple as the sun set.


ECETI Ranch
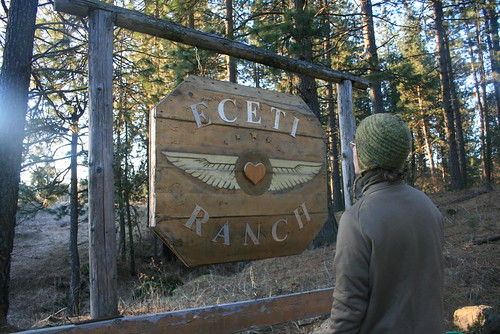
ECETI Ranch where the aliens might land.


ECETI Ranch
The view of Mt Adams from the ranch.


We were notified of ‘the program’ when we finished setting up the tent. They pulled out three lawn chairs for us to sit in out on the field and watch the sky. The dude there, Dan, and one of the women (who I forgot her name) told us about the frequent ships which were flying overhead, and said that we would see most of the activity around 10pm. They said that most of the stuff wasn’t possible to see with the naked eye, so they brought out a pair of night vision goggles for us to look through when it got dark. The temperature was dropping, so we all got out the army sleeping bags and bundled up inside them as we sat in the chairs. The people at the ranch stayed out there with us for a while telling us about the ships they’d seen, and how they believe that the aliens are watching over us. They also said that they’ve seen them flying into the side of Mt Adams in the summertime, and they believe there is a ‘door’ in the mountain where the aliens fly their ships into. The woman believed that there was a tunnel system from Mt Adams all the way south to Shasta. Good thing it was already dark because I could not hold back my smile, and I tried really hard not to laugh out loud at such an absurd statement/idea! As we watched the skies, we were seeing a lot of satellites, although the people at the ranch kept getting excited because they believed they were alien ships flying high. The woman said she loved it when they would ‘power-up’ which she described as an increase in brightness of the ship. Its funny how just the summer before in an astronomy program at Bad Lands National Park, I listened to the ranger and amateur astronomer give a talk about orbiting satellites and why we can even see them in the night skies. Most of them reflect sunlight, which is coming from the other side of the earth at night, just like the moon. Depending on what direction their orbit path is relative to the sun, they can be lit up the entire way across the sky, or only partially. Sometimes they can weakly reflect sunlight until they reach a certain angle in the sky and then brightly reflect the light for a certain arc across the sky. The woman at the ranch was so convinced that satellites could only stay at one level of brightness (she probably thought they had their own source of light, like a star, instead of just reflecting it) that she was sure it was an alien ship powering up.


ECETI Ranch
Getting ready to watch the skies for alien ships.


ECETI Ranch
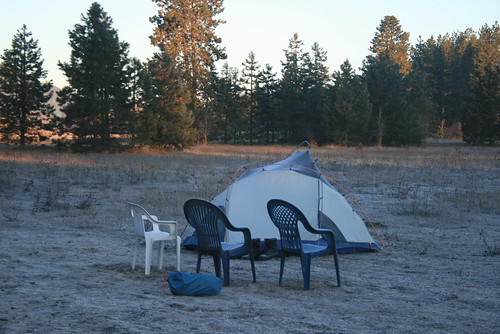
We sat on these chairs all evening watching for UFOs.


However, they also described some things that could not be explained by anything rational. And I don’t doubt they’ve seen a bunch of things in the sky - they probably did. We kept watching the sky until about 10:30pm. We saw a bunch of small shooting stars, and then one streak of light which seemed to zig-zag, but it was so fast. I don’t know what that was. We didn’t make alien contact, but we did have a beautiful relaxing (although chilly) night star gazing. It was getting really cold, so they offered for us to stay in the heated guest room instead of camping out in the field at no charge. I really appreciated that. The weather prediction said it was supposed to be in the 40s overnight, but when I got up to go to bed, the breath that condensed around the head part of my sleeping bag was frozen. The moisture in the air froze on our sleeping bags and we were all sparkling in the moonlight because of the thin layer of ice crystals. It was way cool! We looked like aliens, all bundled up in camo and sparkling in the moonlight!


ECETI Ranch
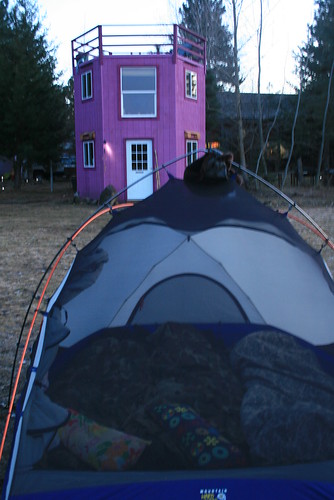
The purple viewing tower at ECETI Ranch.


ECETI Ranch
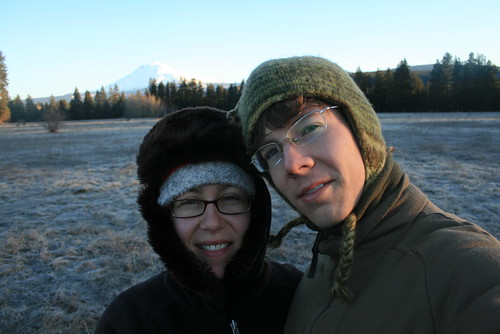
The next morning, me and Romy in front of Mt Adams on ECETI Ranch.

ECETI Ranch
The morning sun on Mt Adams.


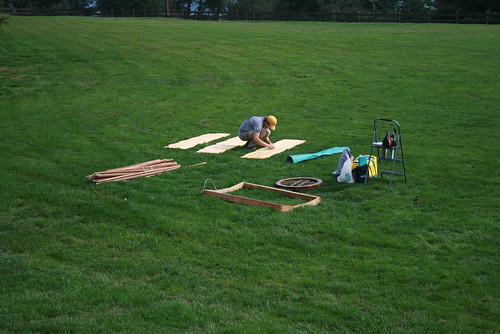
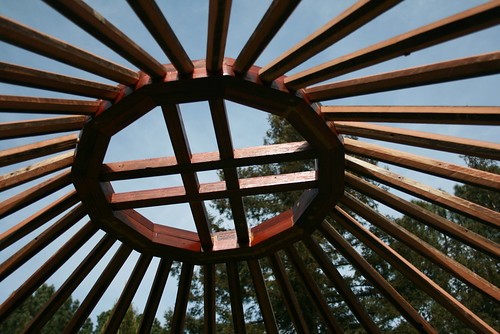
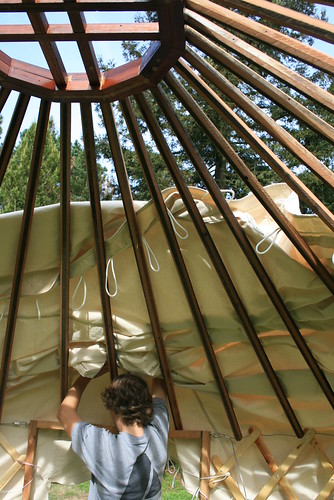
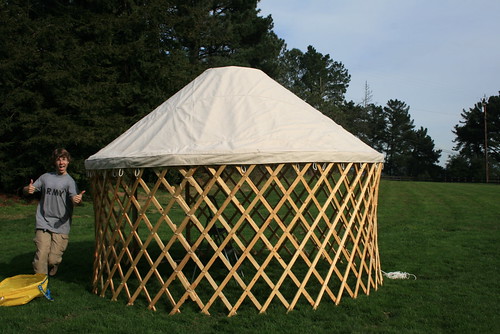
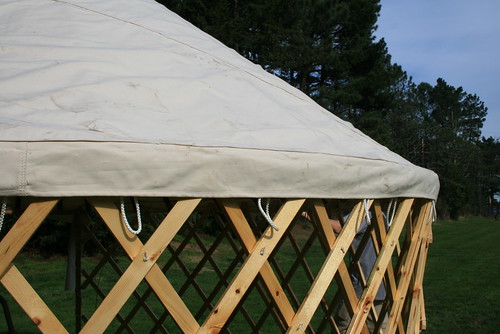
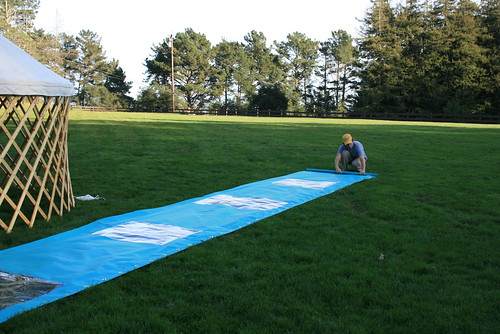
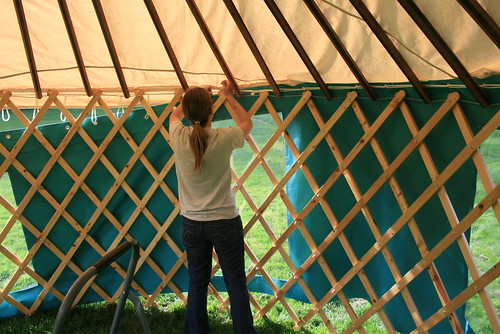
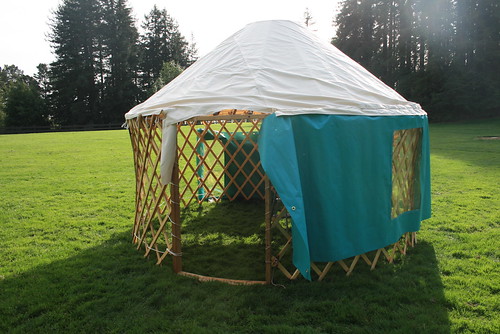
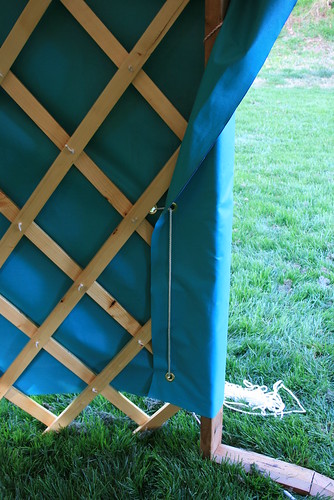
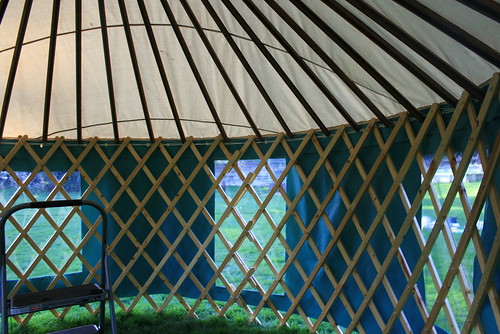
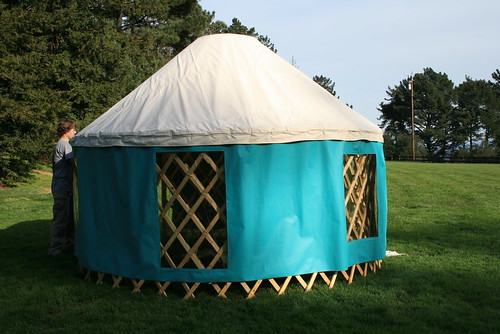
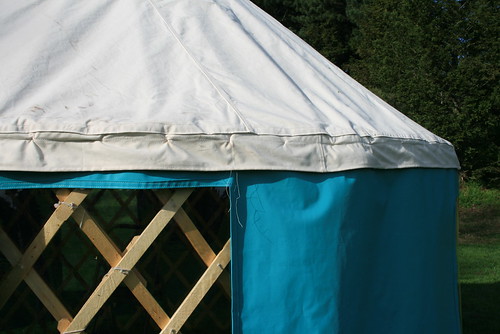
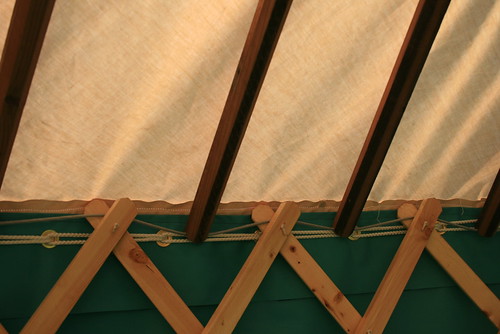
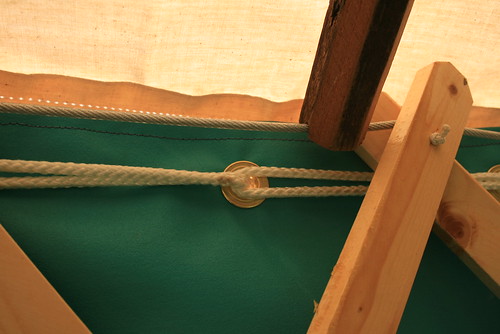
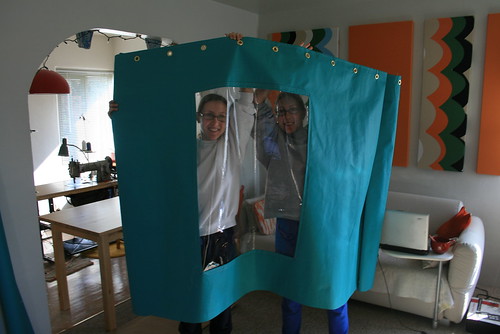
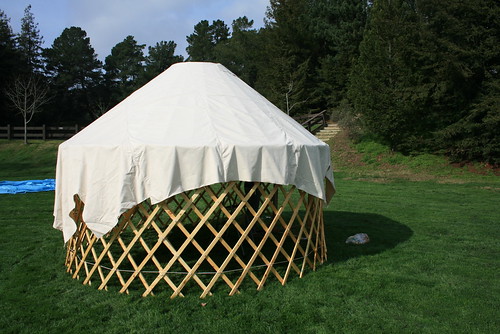
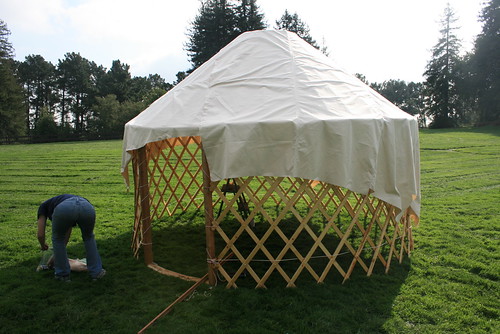
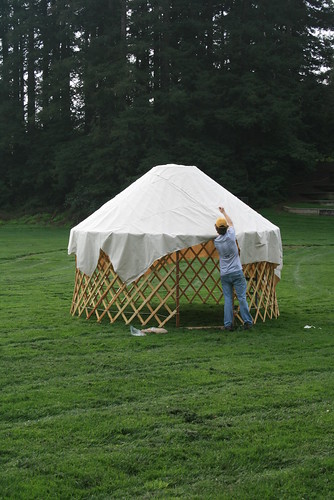
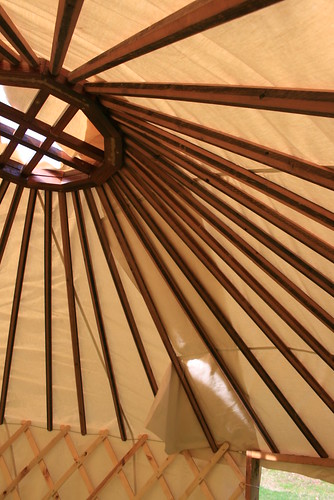
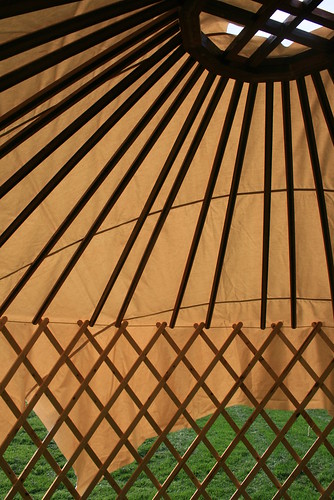
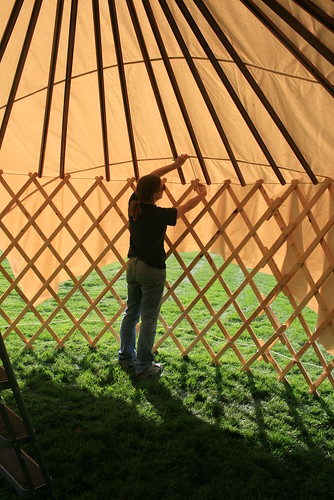
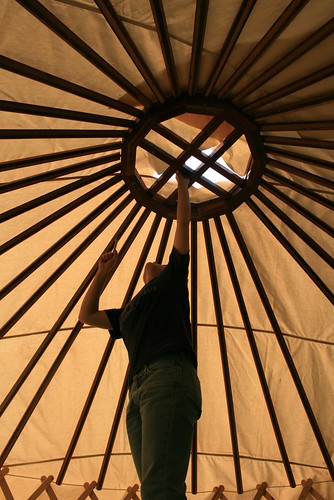
The next morning, we woke up, and checked on Sebastian, who stayed out in the tent the whole night because he was determined to see some aliens. When we went to go see if he was awake (to check if he was still alive or frozen into a brick) we found the tent coated in ice. He was still sleeping, so we took a walk around the ranch. They had a large yurt and two tipis. I couldn’t resist checking them out and took a lot of pictures. The tipis especially were so beautiful! Now I also want a tipi!


Tipis at ECETI Ranch
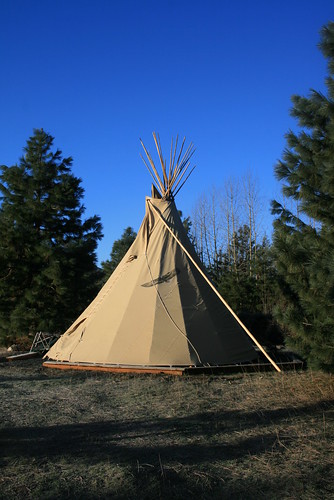
A tipi at ECETI Ranch.


Tipis at ECETI Ranch
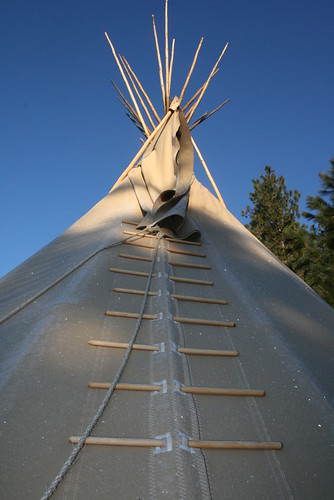
Frost sparkles on the tipi at ECETI Ranch.


At 8am we finally decided to wake up Sebastian, and we quickly packed the tent up and warmed up the car. We were ready to make our way back south into Oregon and decided to take a trip to Bagby Hot Springs, in northern Oregon Cascade Mountains. Bagby is a popular natural hot spring where there are two bath houses built that house large cedar logs which were carved out hollow and made into natural hot tubs. The drive down into the mountains was very scenic, and the road followed a couple different rivers. We got to the parking lot at Bagby to find there were already quite a few people there, but of course, it was Sunday and the weather was great. Not even the 1.5 mile hike to the bath houses deters that many people from going, I guess!


Bagby Hot Springs
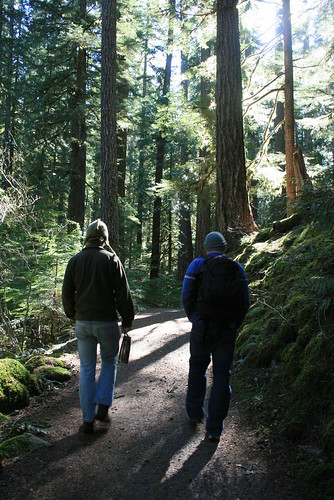
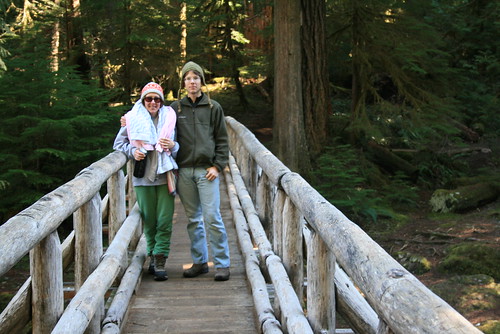
Romy and Sebastian walking to Bagby Hot Springs.


Bagby Hot Springs
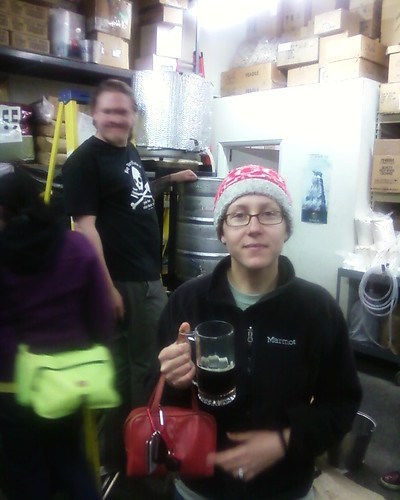
Towels all ready for the hot springs!


We walked along the trail to the springs, which followed a crystal clear river and wound through a dense forest. It didn't take anytime at all, because we walked quickly being really excited to finally get a chance to visit Bagby. Sebastian never went to a natural hot spring in his life, so he was excited to see what it was all about. The trail crossed over a couple of wooden bridges, and soon we saw the bath houses in the distance. When we got there, all of the private tubs were full, and it looked like the communal deck was full too. There were some people waiting in line, so we also decided to wait. We came all that way, so we were pretty determined to get in! After about 45 minutes of waiting and getting pretty chilly, the first tub on the left opened up! The tub we got was also the first to tap the hot spring, which was so hot that you needed to get cold buckets of water from a cold spring and mix it into the hot water that was tapped from the nearby hot spring. It was fed into the wooden bath house by a wooden aqueduct thing (you can see pictures on the Bagby website). The tub was HUGE! And it was carved out of a giant cedar log hollowed out. We all got in a started the hot water flowing. Then we relaxed and enjoyed the hot water and watched the steam rise up into the forest canopy above.


Bagby Hot Springs
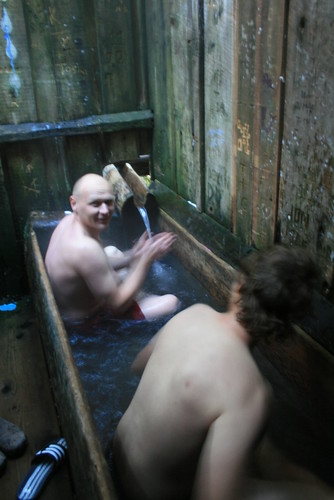
Sebastian and Romy sitting in the hot water.

Bagby Hot Springs
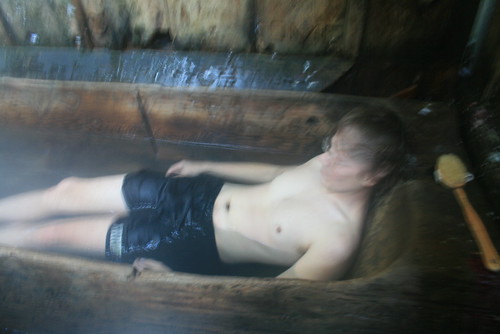
Romy soaking in the cedar tub at Bagby.


There were other large round tubs made like barrels, but a group of drunk fat people came and monopolized them. They were so rude and inconsiderate! They were very loud and annoyed everybody. But we had a nice time in the tub we got, and after about 45 minutes we drained the pool and let the next group come in. There were even more people waiting in line, as as we hiked back, more and more people were coming. Its crazy how popular it is on the weekends! I would not recommend going on a weekend.

After Bagby, we drove to I-5 and continued driving south until we got near the California border. Then we headed towards the coast, although it was already night time and dark outside. We were looking for a campground in Redwoods National Park, but the ones we drove past were closed, so we ended up sleeping in the car on the side of the road. It was really funny how squished all of us were, but we didn't care, and actually had fun making jokes that we shouldn't get too comfortable because in 10 minutes a cop or ranger would come by and tell us to get the f* out! Hahaha! No cop ever came, even though we were really visible. Oh well, we had a so-so night sleeping, but at least it was peaceful. My cell phone alarm woke us up at 7:30am, and we promptly hit the road to check out the redwoods and the Avenue of the Giants. We decided to go see the Giant Tree in the Rockefeller Forest in Humboldt Redwoods State Park, but in order to see it, you had to cross the river. The seasonal bridges were taken down, since it was the middle of February, so we found a log and crossed it. I was wearing large rubber clunky snow boots, so it was pretty slippery, and I ended up crawling half way down the log across the river!


Humboldt Redwoods State Park
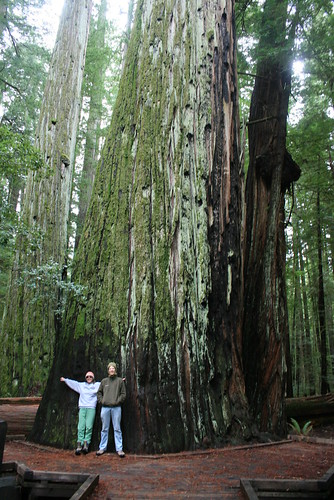
The Giant Tree at Humboldt Redwoods State Park.

Humboldt Redwoods State Park
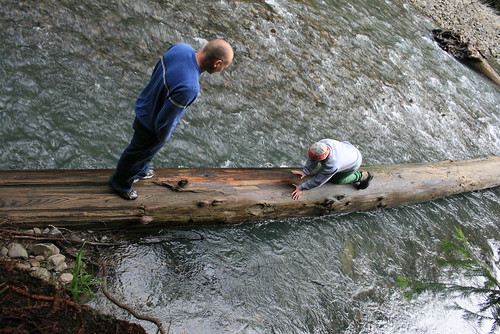
Me all scared to cross the river on a log, so I crawled half way. Sebastian is probably laughing at me! Haha! I look funny.


After that we drove back home, and made it to Oakland around 3pm on Monday. In the two and a half days we were gone, we saw so many things! After we got home today, we had a lot of laundry to do, and now Sebastian and Romy are working on the STI's brakes, so that Sebastian could continue his big road trip safely. I think he'll be heading to Yosemite or Sequoia National Park next, and also Mt Rushmore on his way home.

Thursday, February 18, 2010

Yurt Almost Done!

Before my sister, Nicole, left we put up the yurt at the park to see how well everything we sewed went together. This post will mainly be pictures, since they explain a lot more than what I could say in words.


Yurt 02-16-2010
Romy setting the pieces of the yurt out in the grass. It really helps to have a step ladder.


Yurt 02-16-2010
The redwood crown.


Yurt 02-16-2010
Romy pushing the roof canvas on top. Its actually pretty heavy!


Yurt 02-16-2010
Alright! Romy gives thumbs - the roof fits and the roof band is tight.


Yurt 02-16-2010
A close up of the roof and roof band. You can see some of the rope loops hanging down - that's where the wall will attach.


Yurt 02-16-2010
Unrolling the yurt wall. You can see all of the windows are sewn in. The wall is 36ft long.


Yurt 02-16-2010
Nicole attaches the wall to the roof using the loop-rope system. The wall must be attached from the inside of the yurt by design.


Yurt 02-16-2010
The roof had to be pushed up while tying the wall to the roof.


Yurt 02-16-2010
The wall wraps around the door frame and is tightened with rope.


Yurt 02-16-2010
The wall is fully attached. The bottom band isn't sewn on yet, that's why the wall is just short of the ground. The bottom band will be made out of vinyl which will not absorb water and rot.


Yurt 02-16-2010
An outside view of the yurt. You can see the two sizes of windows.


Yurt 02-16-2010
The roof line and a window.


Yurt 02-16-2010
You can see in this picture how the walls attach to the roof. The loops of rope interlock with each other as you feed them through the grommets. The wall is not supported by the tension cable, as many popular designs call for.


Yurt 02-16-2010
Close up of the rope loop system.


You might notice that the yurt doesn't yet have a door flap and the wall doesn't reach all the way to the ground. I still have to complete the bottom band, which will extend the wall to the ground and connect to the vinyl floor (still have to make the floor to!) with velcro. I have to finish this all in the next two weeks because that's when the maiden yurt voyage will be to the hot springs near Mammoth Lakes!

Tuesday, February 16, 2010

Sewing the Canvas Wall

This past weekend, Nicole flew here to Oakland to come and help me sew the canvas wall of the yurt, and help me finish the canvas roof. It was really nice having a second person help measure, cut, and handle the fabric because the canvas is sooooo heavy, and the wall canvas in particular was a little stiff, making it hard to handle. Sometimes, we needed a third person (Romy), to help align and push fabric through the sewing machine. We worked all day, and late into the night sometimes too. It was really fun work, even though sometimes we got frustrated, broke a few needles, ran out of bobbin at the worst times, etc. But the sewing machines never let us down!

I used a 13oz water, mildew, and fire resistant canvas, which was dyed turquoise for the walls. The roof canvas was also a natural 13oz canvas, but was only treated for water and mildew resistance. The fire resistant coating makes a huge difference in the way the fabric looks and feels (and smells). The turquoise fire resistant canvas is stiffer and kind of shiny. The natural canvas is more flexible and easier to handle in the machine.

I also bought a 20 gauge clear plastic "fabric" for the yurt windows. It was really clear, and cost about $10/yd. There is no need to go any heavier, unless you are making large windows. I limited the width of each window to about 2.5ft so that the windows didn't take too much of the weight of the walls. We made 5 windows total, two of them were long (spanned almost the whole height of the wall), and two of them were medium length.


Yurt 02-14-2010
Cutting out the fabric behind the window.


To sew the windows on the walls, we first sewed the plastic onto the side of the fabric which will be the inside of the wall. Once it was sewn in place, we cut the back of the fabric away, exposing the window. In the picture above, you can't see the plastic window, but its there, believe me! We left about 2.5 inches of scrap so that it was easy to fold it back to make a nice border around the window. The corners were left exposed (they had no border), but we decided that it can be covered by a small triangle shaped trim I'll sew over it later.


Yurt 02-15-2010
Sewing the flaps into a nice border around the windows.


We also placed brass spur grommets at the top of the wall every 7.25 inches. Why 7.25in? I don't know, I just made that number up. I thought that spacing would be good to support the wall. The total amount of grommets was about 60, I think, supporting a wall 36ft long. I used 1/2inch spur grommets (#4), which required a special tool. The tools, called a die set, and hole puncher, are specific to the grommet size, so you will have to buy the same size tools and hole puncher as you do grommets. I ordered my tools and grommets from Sailrite.


Yurt 02-15-2010
Me and Nicole (my twin sister) with a finished window. You can also see the grommets.


Once the windows and grommets were done on the wall, that was about all that needed to be done (for now). So next we moved on to finishing the roof. We first sewed together the final seam which completed the cone shape of the roof. Then we cut off the scraps which hung over the sides to make the roof circular. Then we sewed a roof band along the circumference of the roof to make a tight roof line. On the inside of this roof band, we sewed a series of rope loops which were spaced at 7.25 inches, the same as the grommets. The loops of rope fit through the grommets at the top of the wall to join them together.


Yurt 02-15-2010
The rope loops sewn on the underside of the roof, along the circumference.


Just getting to this point took us almost two days. The wall was still not completely done, because we still had to sew on the bottom band, a strip of vinyl or plastic material (not canvas) which will be in contact with the ground and be tucked underneath the khana (the wooden part of the wall). This band is there because you don't want the canvas to be in contact with the ground because it will absorb water and possibly start to rot. Plus we didn't make a door flap yet. But at this point we were really excited to get the yurt built to see if what we sewed so far was okay or not.

Monday, February 15, 2010

Baja update! (and some other stuff)

Jenn usually posts like crazy about the yurt building adventures, but I thought I'd leave an update here on how the baja is progressing. The plan is to take it in March over spring break to Utah and meet up with our friends Mark and Emma (M&E), who are driving from Michigan. M&E will be coming in an old Toyota pickup and we'll be meeting either Friday or Saturday of the first spring break weekend somewhere in Utah. I hesitate to say where since we keep changing our minds. It's either Bryce, Moab, or some other nice and scenic location.

As such, the baja needed/needs a bit of prep work. I had originally thought to lift it higher than it currently is to clear these massive tires we got for it, but that's not practical given the amount of time until we leave. I'll probably start that sometime after we return. But there are still many things that have to be done before we leave anyhow. One of them I got finished this weekend - the front bumper.

The baja had a front bumper when we bought it, but it was flimsy like a noodle, and probably would have done little in an accident. And it was really bent. And the previous owner instead of unbending it, just cut the fender to accommodate. Classy. Luckily, the same dude we got the big rompa-stompa tires from also had a front bumper he was getting rid of. We got it for pretty cheap, and I painted the bumper over this past week and put it on.

Something else I noticed while driving off-road was that the headlights somewhat followed the bumps. It was kind of like the baja having a lazy eye, they would sort of point straight but drift around when you hit a bump. Off-road, that's frequently. Fiberglass fenders aren't too stiff and the metal headlight buckets were too heavy so I put plastic ones in. It seems better, but I added two mega-huge-ass lights for insurance. And because they're cool. Plus, they'll help.

The baja with new lights and a sweet bumper!


You can see the yurt on the roof rack in the pic as well. I'm sure Jenn will post up a storm about this weekends yurt activities.

I also painted the nerf bars while I was at it. Nerf bars (don't know the source of the word 'nerf') are installed in front of the rear tire. Their purpose is to keep a tree/rock/bystander from ramming the rear tire. I didn't put them on yet and won't until the roll cage is in.

Oh, and a small update about the engine. When we got the baja, it had a 'performance' distributor in it (called a 009). But it's a stock engine. So that's retarded. The bug gets about 20mpg because of this thing. So I wanted to put the original type back in and luckily a friend of mine had one. It needed to be rebuilt, but whatever. I just have to put it in now.

The correct and original distributor for a 1970 VW Bug. Shiny.


But wait, there's more car stuff! This weekend we also got a data logging device that will record in real time the stoichiometry of the exhaust products! This may not excite you, but I think it's awesome! I can now tune the fuel injection on the bus to actually deliver the correct amount of fuel when it should. This should resolve some issues we've been having with the bus. And I can use it to tune the baja. And it reads from OBD2 ports (all cars made since 1996 have OBD2) all the sensor info as well as reset trouble codes. Sweet.

I also recently acquired a taco plate to put an oil temperature sensor on the bus. Yes, taco. It's apparently called a taco plate because it looks like a taco. I don't see it, do you?

Taco plate! Do you see a taco? I don't, but I'm not too mexican. No se puede.


That's about all for the car stuff update. Nicole was/is here and the three of us were yurt constructing. It was mainly a Jenn & Nicole production, but when needed, the team was formed, the power was had, and victory was ours. Yes, that's meant to be silly and refers to some crazy Russians we met in crazy Russia. When I wasn't in team formation, I was working on school stuff. I've been trying to find a bug in this code I'm working with, and although I know what the bug is, I can't seem to identify where the hell it's coming from. Really annoying. But I guess that's how programming goes.

Oh, I just realized that Jenn never put up pictures of the big rompa-stompa tires I referred to earlier. So...

From left to right: 30x10.5x15 ROMPA-STOMPA! ; Street tires 205/75/R15 ; Stock VW 165/R15


They rub because they're too big for the current ride height, hence why it needs to be lifted which will happen after the Utah trip.

Saturday, February 13, 2010

Fitting the Canvas Roof


Fitting Yurt Roof Cover
The yurt roof cover being fitted.


It finally got sunny outside and dry enough to take the yurt out and fit the canvas cover that I made almost one month ago. It started out flat - a bunch of 36" wide strips of canvas sewn together, so that when brought to a cone shape, there would be just enough overlapping material to cover the roof. I used Paul King's book and his 12 foot yurt patterns, although I didn't like following his measurements. If anybody is making their yurt roof canvas following his pattern, be aware that some dimensions are missing, and that you will have to make some of the strips considerable longer (he only marks the shortest dimensions). WARNING! Make sure you look hard and think about each strip before you cut. I almost screwed up.


Fitting Yurt Roof Cover
Don't look at my butt!


When fitting the roof material, you have to allow the shortest section to come right above the door. That's where the fabric comes and overlaps. That's where we pinned the overlapping flaps together with safety pins so that we could keep the roof on tight. It helped that it wasn't windy at all. It turned out a very nice, sunny, warm, and wind-free afternoon. We got lucky!


Fitting Yurt Roof Cover
Romy pinning some of the canvas in place.


You might also notice that there is an excess of fabric hanging off the sides. Not all of this is needed, but I am going to save about 8" to make a roof band. The band will have two layers, one to protect the side of the yurt when it rains, and the other flap to attach the yurt wall canvas to. I decided to go with the method that Colorado Yurt CO uses, which is to attach the yurt wall canvas directly to the roof instead of the khana (lattice wall). This makes the roof line tighter because there is an even weight always pulling down on the roof. The grommet work and ropes that connect the wall canvas to the roof canvas will be hidden by the flap of roof band that also serves to protect the the top of the walls from rain.


Fitting Yurt Roof Cover
Inside the yurt.


After pinning everything, I also had to mark out where the crown was, so that the fabric all bunched up on the top could be cut away, allowing a nice hole for the crown. I will later integrate a bug screen in the crown so that we can keep the crown 'open' but keep the bugs out. I will also make a removable rain cover for the crown, which can be thrown over the crown to keep the rain out (or keep extra heat in).


Fitting Yurt Roof Cover
The characteristic rainbow arc, created by the seams of the roof canvas.


If you use the strips of canvas pattern, made popular by Paul King, you will find these beautiful rainbow arcs that are created by the seams in the canvas, where each strip was connected to the next. If your seams are tight and straight, it looks awesome! Some yurt companies make custom roof covers which have an insert of heavy duty clear plastic instead of one of the canvas strips, so it looks like you have a rainbow of sky!


Fitting Yurt Roof Cover
Jenn noting some measurements/dimensions.


When we built the roof this time, almost all of our poles fit how they should, so we got it in the circle shape better. Our roof angle ended up being 35 degrees exactly. The canvas roof cut off angle ended up being between 110 degrees and 112 degrees. Paul King suggests 117 degrees in his pattern, but this must correspond to a roof angle closer to 30 degrees or so. Since we had a slightly higher angled roof, our cone must be tighter, hence the smaller cut off angle.


Fitting Yurt Roof Cover
Canvas material all bunched up over the crown.


At the park that we built the yurt, Robert's Regional Park in Oakland, the rangers and the managers already know us! The first time we came there, last month, the rangers and other park patrol people kept talking to us wondering what we were doing. But when we fit the canvas, they didn't bother us, except for the one manager on his golf cart (he didn't bother us, he just came to talk to us). He came as we were packing up, and was upset that he missed seeing the yurt up with the roof. He really liked the yurt, and told us that next time we come, we should let the rangers in the office know so that they can take pictures and put it up on the park website! Haha, my yurt will be famous!


Fitting Yurt Roof Cover
Marking the crown.

Thursday, February 11, 2010

SF Beer Week at The Oak Barrel Brewshop

Romy found out about the San Francisco Beer Week, a kind of festival which isn't really a festival, which is going on this week. Basically, local breweries, and some bars and restaurants do special events all week long to get people drinking beer. They bust out special brews, or run demos on the beer brewing process, etc. We went out tonight to The Oak Barrel, which is a local brewshop in Berkeley on San Pablo Ave. They sell ingredients and supplies to brew your own beer at home. They had local brew-masters come and share special brews on tap. There were 6 different kinds, and we tried all of them! While we were there, I took some pictures on my cell phone.


Beer Week @ The Oak Barrel
Checking out the bulk aisle of grains at The Oak Barrel, beer in hand.


The first one I had was a red, which was really spicey. Romy had a double IPA for his first. I know, we started out kind of heavy for our first beers, but they brought out kegs one or two at a time, and those were the first ones out. Then we tried a honey hopped wine, which was sweet and reminded us of kvas that we drank in Russia, which is a fermented drink made out of stale bread. Sounds gross but its sooooooo good!!! The honey hopped wine was really too sweet for me. Then we tried an amber ale, that was over 9%. I didn't taste any alcohol in it, it was the lightest tasting one one I had. There were two brown ales, which I liked the best.


Beer Week @ The Oak Barrel
Part of the beer brewing demo set up.


The tasting was going on outside in the small parking lot. They gave you a large glass stein and you could taste as much as you want, all for free. Then, to top it off, they had a big BBQ, with ribs, pulled pork, sausages, and hamburgers. That was all free too. It was a great time.


Beer Week @ The Oak Barrel
Romy eating some BBQ and having a southern brown ale.


Inside, the local brew-masters gave a beer brewing demo. It started at 5pm when they started cooking. Whenever we came inside to check out what they were doing, it seemed like it was always just cooking. They had huge containers, basically kegs which they cut up so that they would be large pots. It had three levels of burners. They had quite a system set up. I don't know much about home brewing, but Romy and I are thinking of starting. We checked out the brewshop's homebrewing starting kits, but for now, they are a bit expensive. We'll be looking on craigslist for a while to see if we can score anything from there first.


Beer Week @ The Oak Barrel
Beer brewing demo in the back room at The Oak Barrel.