Showing posts with label yurt. Show all posts

Friday, June 25, 2010

The Limber Flag Yurt

The place where we decided to meet Nicole and Marcel was in northeastern Utah in the Ashley National Forest in the Uinta mountains. We were driving our baja from Oakland, CA and they were driving their baja from Chicago. We met roughly in the middle at the Limber Flag Yurt, which is a 20 ft diameter yurt that is rented out by the ranger station of the national forest. There are two more in the area also. We were driving all day to get there. The morning was filled with driving through the basins and ranges of central Nevada, and the afternoon and evening we drove through central Utah, finally getting into the northeast corner by 11pm or so. In Vernal, UT, which is the closest town to where the yurt is, we called Nicole and Marcel and told them we would be there soon.


The Limber Flag Yurt

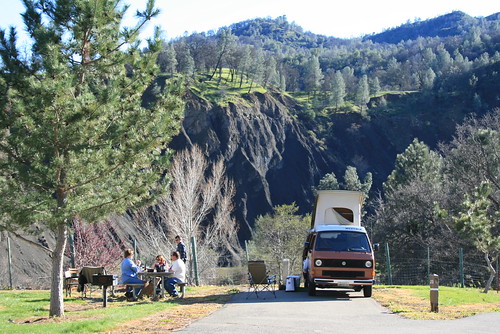
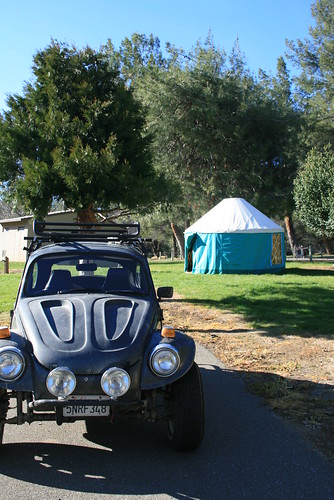
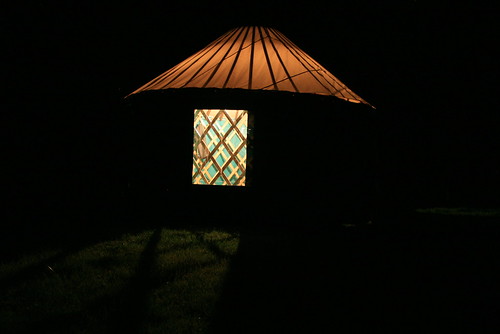
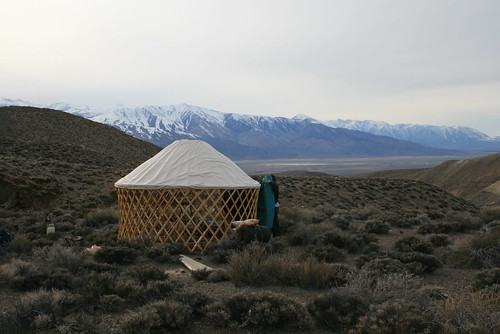
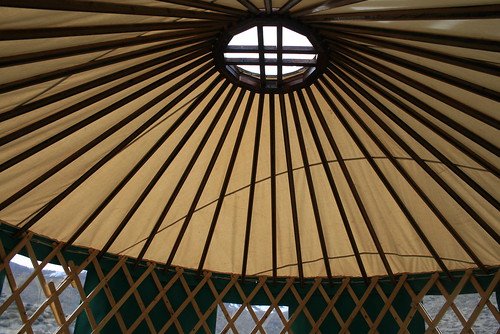
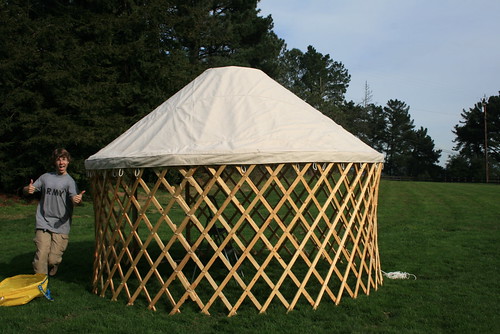
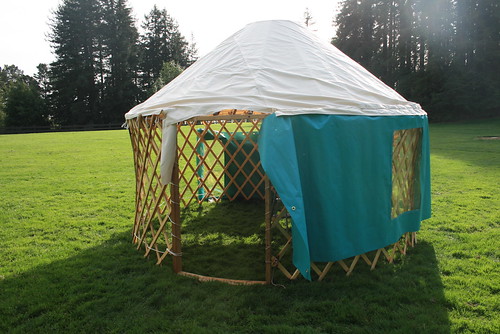
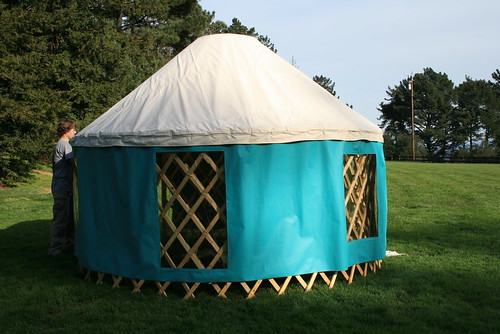
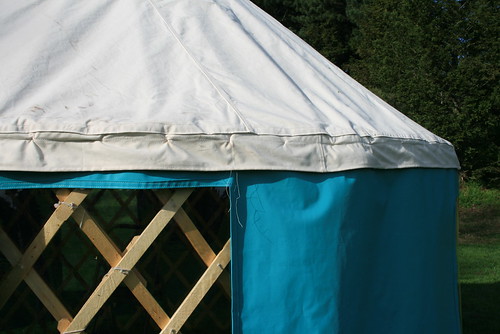
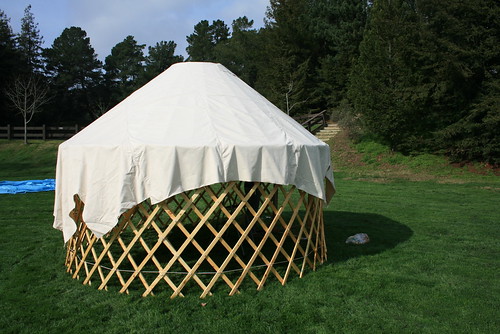
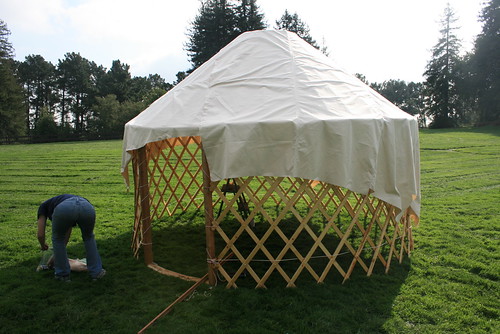
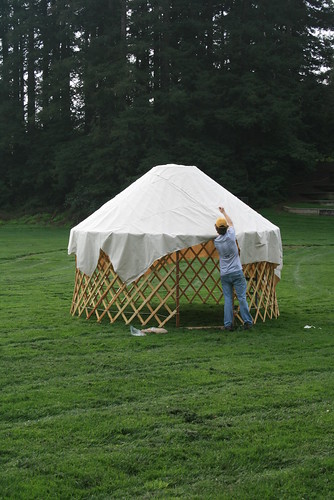
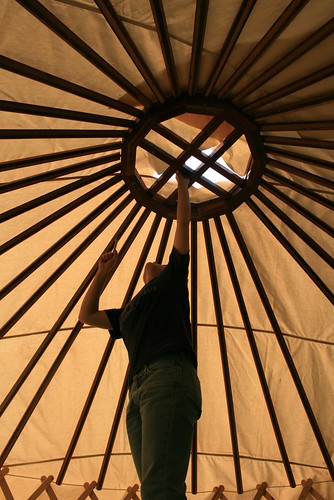
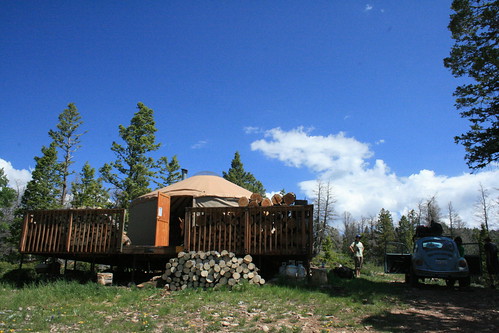
The Limber Flag Yurt, available to rent from the Ashley National Forest.

Then we headed up a bunch of switchbacks out of Vernal on Hwy 191, climbing to 9,000ft into the Ashley National Forest. In the dark, we drove down some dirt roads, until finally we got to one section of forest road 254 that was just too steep for us. The carburetor was starting to get bad, and we didn't have the full power we normally have in the baja. So we couldn't make it up and we were a mile short of the yurt! But Nicole and Marcel also couldn't make it all the way up either, and in the dark, we saw their baja parked off the road in a grassy field on the mountainside. We had no other choice but to pack our hiking backpacks with what we needed for the night and start hiking up the mountain. It was midnight, but a bright moon again lit our way. We told N&M that if they didn't see us at the yurt by midnight, then they should come look for us. Half a mile or so up the trail, we saw flashlights and heard voices. It was N&M on their way - search and rescue! Nothing like hiking up a mountain at midnight and be greeted by family. So we finally made it to the yurt at about 1am, and we were ready to go to sleep!

Dashwood in the Uintas

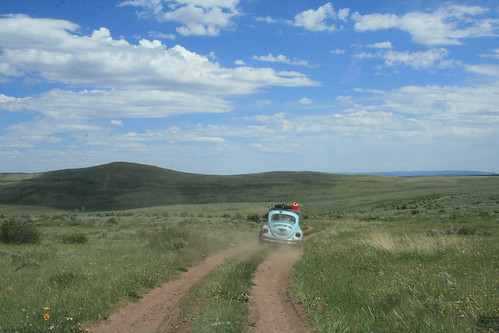
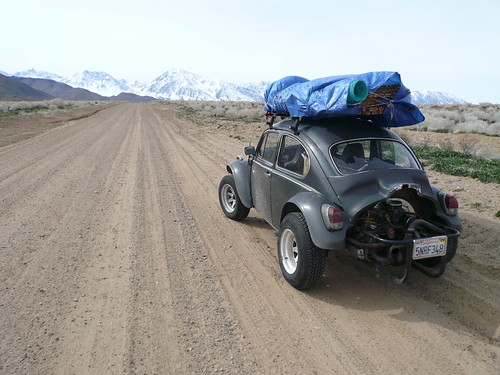
Driving behind N&M's baja at 9,000ft in the Uinta mountains.

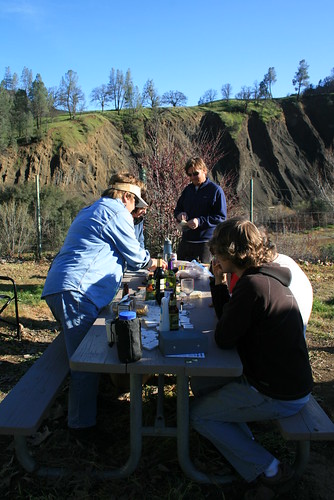
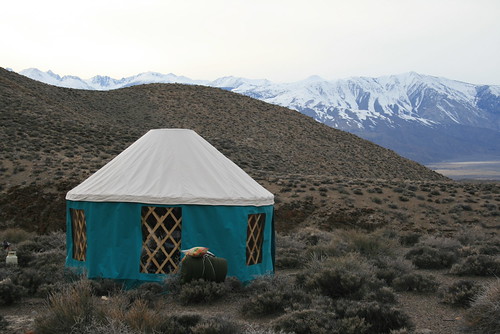
The next morning, we woke up to an awesome view of the mountain range we were in, and a nice forested mountainside with pine trees and birch trees. There were wildflowers everywhere! But we didn't hike up last night with anything but the bare essentials: sleeping bag, water, and warm cloths. So all of our food was down by the car. After having coffee we hiked back down to the cars. Then we worked on them for a good few hours, fixing this and that, trying to see why the carb was suddenly not wanting to cooperate. Romy determined that the throttle shaft had too much play and didn't seal, so air was constantly leaking into the fuel system. The car wouldn't idle at all, and every time we let off the gas suddenly, the engine would backfire a lot! But we could still drive. After fiddling with it for a few hours, we decided to drive down into Vernal to see the famous petroglyphs.

Fixing the Bugs in the NF

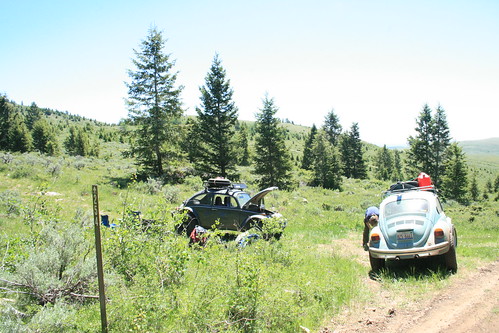
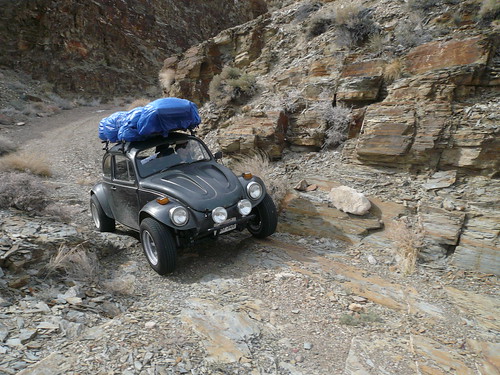
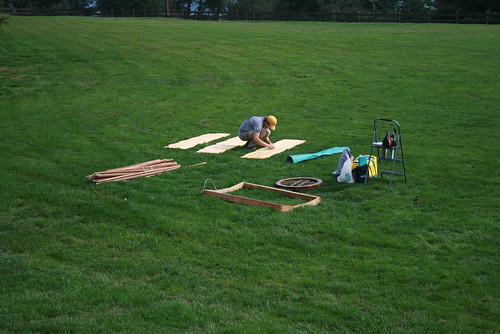
Fixing up the bajas down the mountainside from the yurt.

Petroglyphs near Vernal

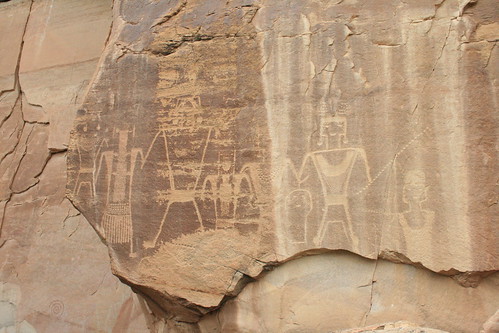
The petroglyphs near Vernal, UT.

The petroglyphs were on private property, along a sandstone cliff wall that was eroded by a river that flowed right near Vernal. The ranchers who owned the cliffs made a little parking area and trail so that the public could see the petroglyphs. And it was free, and nice that nobody tried to profit off of it. We went far along the cliffs, and saw a lot of glyphs which represented head hunters or something. Lots of drawings of men in costume and necklaces holding small heads in both hands. Weird!


Entering Ahsley NF

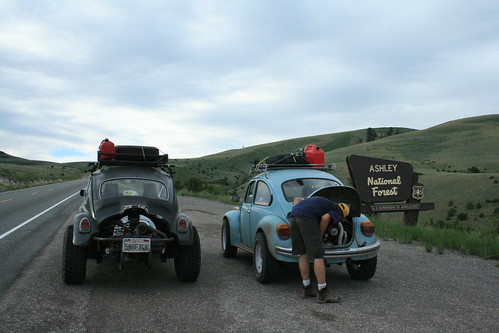
Stopping on the side of Hwy 191 to let N&M's baja cool down, after going up so many switchbacks. 8% grade!

Then we went back to the yurt when the sun was going down. We drove up and up and up, until we got to the turn off on Hwy 191 that took us off road to the yurt. Nicole wanted to drive her baja off road, and I went with her in the passenger seat. At first she was driving like a grandma, but then she finally picked up some speed. She just pressed down the gas and with all the speed, we made it higher up the steep part of the road then they had the night before. Nicole thought that they would have enough power to make it up the steep road all the way to the yurt if they unloaded the car a little and picked up speed and never let off the gas. So we tried it. We packed all of the unnecessary stuff into our baja, and drove N&M's baja down the hill to get a good running start. We instructed Marcel to just step on the gas and never let off until he was at the yurt. Thats one mile uphill, over dirt and rocks and uneven terrain. I started walking up to the yurt about 15 minutes before he started the drive, and when I was almost up, I just heard the baja engine in high revs and saw a little blue bug ripping up the road with a huge cloud of dust behind it! It was Marcel going crazy up the mountain! He made it all the way. The best part was, we didn't have to carry anything up the road anymore!


Celebration!

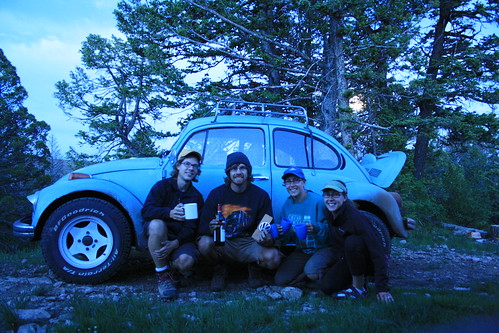
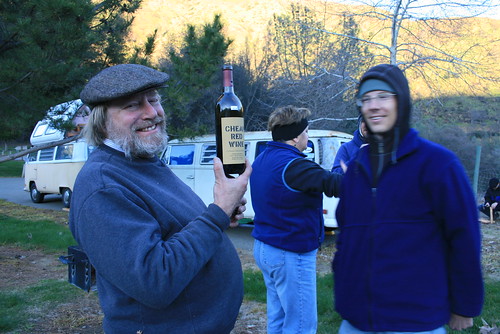
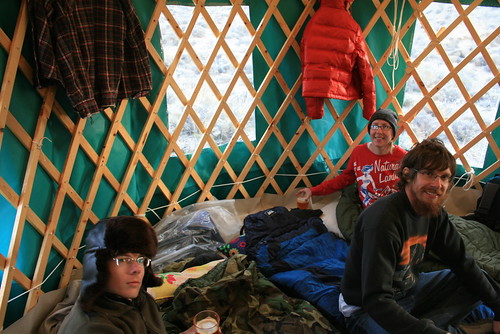
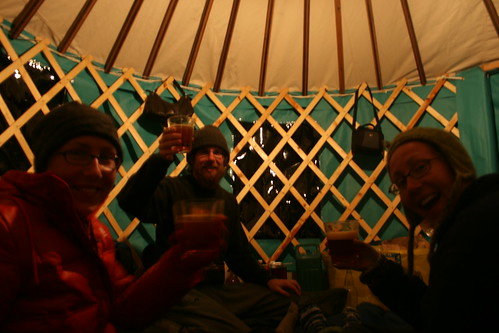
We made it up to the yurt with N&M's baja and now we're celebrating with a bottle of wine!

We spent the second night at the yurt with a nice big campfire outside (and one inside later in the wood burning stove) and we opened up a bottle of wine that N&M bought over a year and a half ago in Sonoma Valley, CA. They were saving it for the first trip they would take in their baja long distance. We had a ton of fun that night, and cooked brats over the open fire.

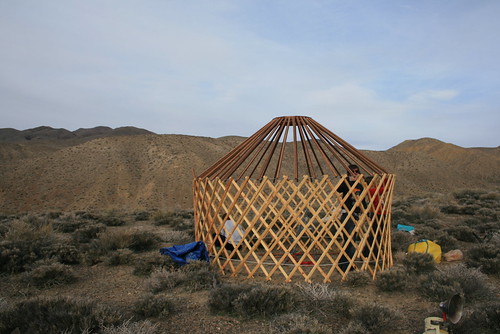
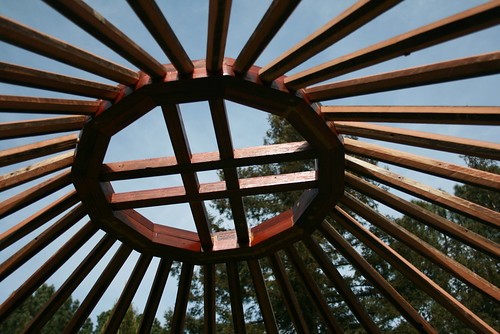
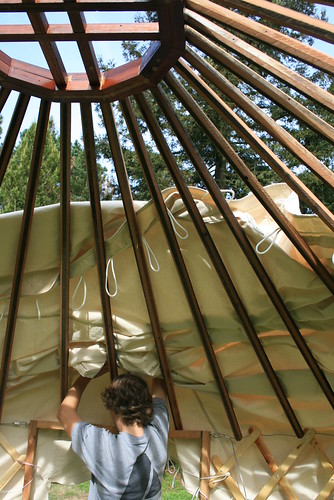
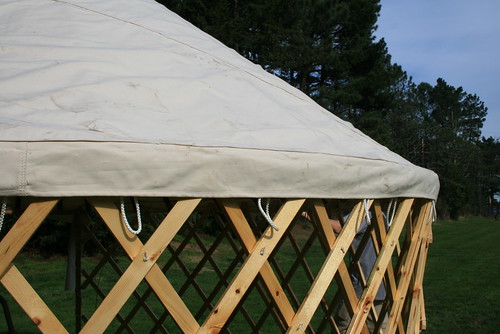
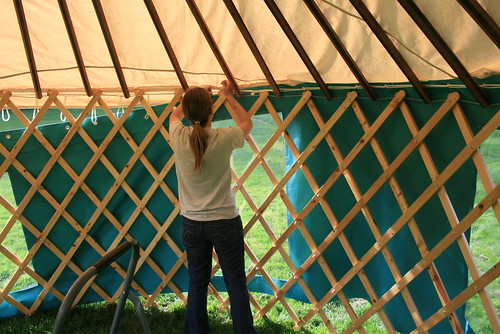
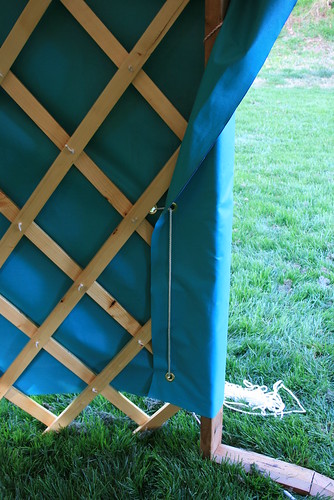
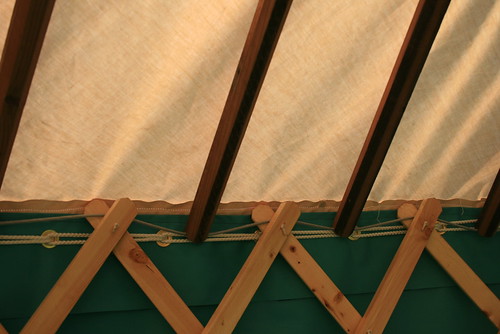
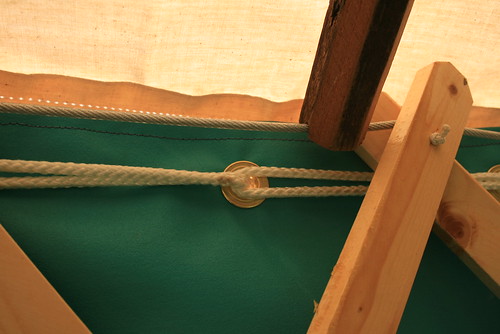
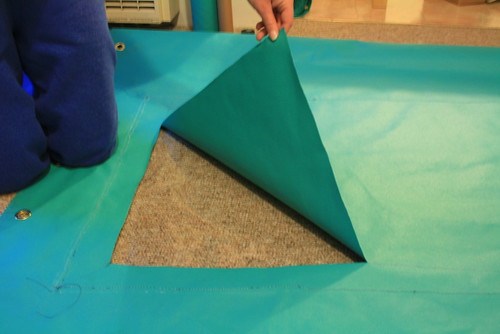
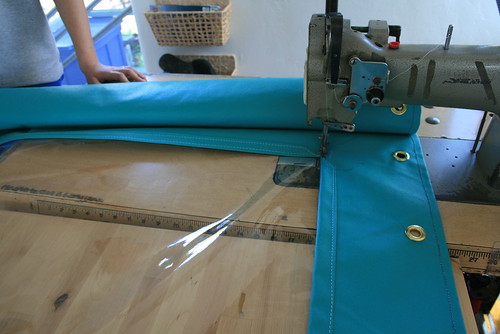
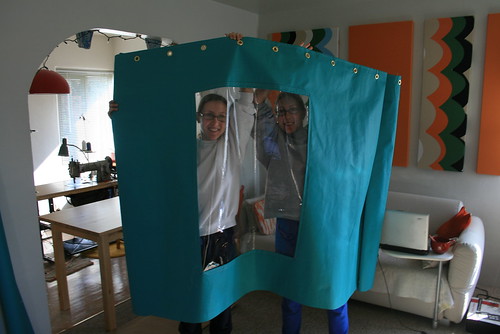
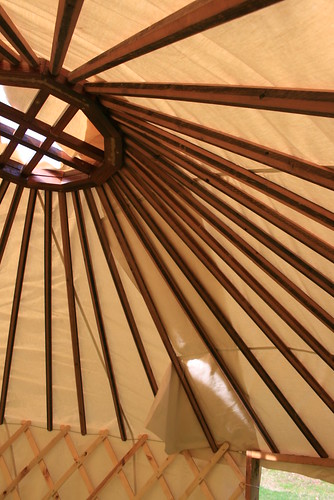
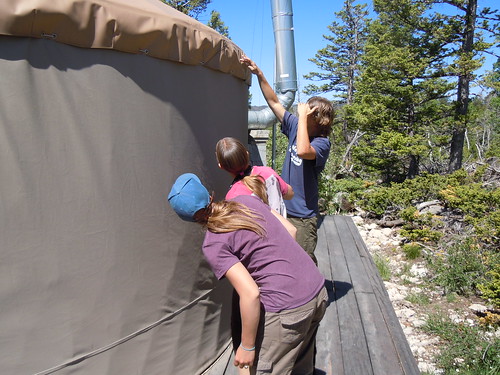
The next morning it was time to leave! The time flew by too fast up at the yurt! Before we left though, we wanted to check out how the yurt was built. Romy was examining the roof flap to see how the roof was attached and when he peeled back the vinyl, he disrupted a sleeping bat! It squeeked and after we all took a look, we left it alone. Then it was time to head out.

A Bat!
Discovering that there was a bat under the yurt's roof!

The Limber Flag Yurt

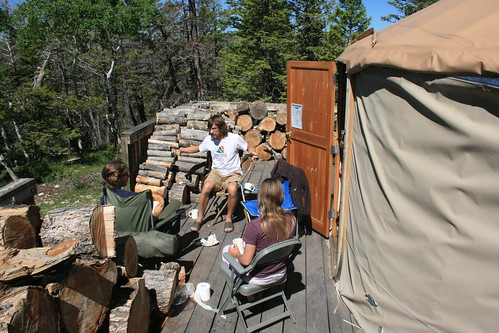
Relaxing on the yurt's front porch!

Sunday, March 14, 2010

VW Camp Out at Cache Creek

We just got back from a quick camp out at the Yolo County Cache Creek campground, which is at the north end of the Napa area, near the Capay Valley. It was a small quiet campground (except for the asshole with the generator who ran it almost 24/7 and then many many motorcycles riding past on Hwy 16). I just finished the yurt a week prior, and John LaTorre, who lent me the industrial sewing machine, was going to be there, so Romy and I decided to bring the yurt along so we could show him. Normally, we wouldn't take it out just for one night of camping because of the 1-2 hr set up time, but we figured it would be nice to show John what I did with his machine!


Cache Creek VW Camp out
Blake and Shelby's bus against Cache Creek below. Enjoying wine and cheese.


When we arrived on Saturday afternoon, almost everybody from the vwcamperfamily was there who rsvp'd (Blake and Shelby, Brett and Elizabeth, Joe, and John). We promptly started building the yurt, and in the middle of it Melissa showed up in her vanagon. Everybody sat on the grass and watched Romy and I build the yurt while they sipped wine/beer and other beverages.


Cache Creek VW Camp Out
The yurt is built and the baja.


After what felt like a long time, the yurt was finally built and we could relax! We then moved on to the picnic tables set up near the main camping area (we had to build the yurt a little ways away because we needed level ground) to have some wine and cheese and crackers as an appetizer. Mmmmm. There was quite an assortment that Shelby brought with.


Wine and Cheese
The sun is going down - soon time to start a fire!


When the sun started dipping behind the cliffs, it started to get chilly (although during the day it was about 70 degrees F! More wine was busted out, and even though we thought we'd be rebellious and drink beer this time, wine was pushed upon us! So was food, which we gladly accepted. All we brought for dinner was a can of chili and a bag of tortilla chips (we had to rush out of the house and didn't think about packing more than the yurt and beer).


Cheap Red Wine
John and his cheap red wine.


We also went around the campground scavenging for fire wood, and found a few good pieces to add to the firewood pile. We ended up having just enough wood for a fire that lasted well past everybody's bed time. We had a great time and can't wait until the next camp out that we can make it to.


Cache Creek VW Camp Out
Big Blue, John's Dormobile, and Joe's bus.

Night at Cache Creek
Good night!

Monday, March 08, 2010

Maiden Yurt Voyage: Have Yurt, Will Camp


Warm Springs Rd
Yurt on the roof of the baja, heading into the mountains!


The day had finally come when all of the months of work on my yurt came to a finish (not exactly) and we were able to pack it up and take it to the mountains on its maiden yurt voyage. I know, I could of taken it somewhere easy and simple, like the local campground or something, but as with most of the things Romy and I seem to do, we go big or go home! So there we were, driving the baja over to the Eastern Sierra.


Baja-ing
Driving off-road in the Inyo National Forest to find a perfect spot to set up the yurt.


We picked a spot east of the Owen's Valley, in the Inyo National Forest, just outside of Death Valley National Park. We found an off shoot road from CA 168 out of Big Pine which headed into Death Valley, called Death Valley Rd, and it was off another off shoot road where we drove the baja off road into a canyon and found a nice place to set up on the top of a ridge. We were situated at about 5,500 ft with an awesome view of the Sierra Nevada mountains across the Owen's Valley. Before we left on the trip, I had visions in my head of setting up the yurt in the valley near Mammoth Lakes, CA, but it had too much snow. That's why we headed farther south instead.


Maiden Yurt Voyage
Setting up the yurt near Death Valley National Park.


Nicole and Romy found a section of a ridge that happened to have large flat spots in between desert scrub plants (I don't know what they are called). We needed to find a place that had at least a 12 foot diameter circular area clear of vegetation. We ended up having to pull a few plants out of the rocky and dry soil to clear one of the largest spots we found, but made an attempt at replanting them elsewhere. So hopefully we didn't kill any plants! The baja couldn't drive up the ridge, so we had to carry the pieces of the yurt up a steep hill. It was worth doing that in order to have the awesome view that we were able to have being on top of a ridge.


Maiden Yurt Voyage
Marcel holding the yurt wall as it is attached to the roof.


There was a steady wind blowing from the east as we worked to get the yurt put together. It took us about 2 hours to put it up, which was slow compared to how fast we were able to assemble it in the park. It was hard to get the yurt completely flat and level of the ground and perfectly round. I don't think we were ever able to achieve the round-ness and I also think we constructed it slightly less than a 12 ft diameter. But it was close! Consequently, I felt like the walls of the yurt were slightly sagging or bunched up in areas. However that didn't effect much except the aesthetics, so as the sun went down, we crawled inside and started up the lantern for light, and propane heater for warmth.


Maiden Yurt Voyage
The yurt, finally all built!


Maiden Yurt Voyage
Romy, Marcel, and Nicole relaxing in the yurt.


The yurt retained a lot of heat from the propane heater, which we nicknamed "the sunflower" due to its shape. We left the door flap cracked open for ventilation. We had it running the whole evening, but turned it off when we went to sleep, and turned it back on in the morning. Nicole and Marcel brought a bunch of 1 liter bottles of home brewed beer, which we drank merrily each and every night of camping in the yurt. Mmmmm. My favorite was the blonde ale.


Yurt Party!
Cheers! Enjoying a home brewed beer in the yurt.


When the sun went down behind the mountains, we were able to see a lot of stars in the sky. We hung a Coleman lantern from the crown by a short rope, so we had a soft light source inside the yurt, and it looked really cool from outside. I wasn't able to sew window covers yet, however I will have to finish them this week! The wind steadily blew all night, but inside the yurt it was quiet and peaceful. When we finally went to sleep, I liked laying and staring at the roof. There was enough light outside from the moon that you could see the roof poles and the star shaped crown rain cover through the roof making a cool pattern.


Maiden Yurt Voyage
The yurt at night, lit up by our Coleman lantern inside.


After having the yurt up for only two short nights, we had to break it down and go home. Putting it up for the first time and camping inside of it was really exciting and made me feel great after all of the hard work building it. I feel like I'm done, but there are still a few things here and there that I have to finish off, like the floor, and the window covers. But nevertheless, its ready for another camping trip soon!


Maiden Yurt Voyage
Inside the yurt, with an open crown.

Thursday, February 18, 2010

Yurt Almost Done!

Before my sister, Nicole, left we put up the yurt at the park to see how well everything we sewed went together. This post will mainly be pictures, since they explain a lot more than what I could say in words.


Yurt 02-16-2010
Romy setting the pieces of the yurt out in the grass. It really helps to have a step ladder.


Yurt 02-16-2010
The redwood crown.


Yurt 02-16-2010
Romy pushing the roof canvas on top. Its actually pretty heavy!


Yurt 02-16-2010
Alright! Romy gives thumbs - the roof fits and the roof band is tight.


Yurt 02-16-2010
A close up of the roof and roof band. You can see some of the rope loops hanging down - that's where the wall will attach.


Yurt 02-16-2010
Unrolling the yurt wall. You can see all of the windows are sewn in. The wall is 36ft long.


Yurt 02-16-2010
Nicole attaches the wall to the roof using the loop-rope system. The wall must be attached from the inside of the yurt by design.


Yurt 02-16-2010
The roof had to be pushed up while tying the wall to the roof.


Yurt 02-16-2010
The wall wraps around the door frame and is tightened with rope.


Yurt 02-16-2010
The wall is fully attached. The bottom band isn't sewn on yet, that's why the wall is just short of the ground. The bottom band will be made out of vinyl which will not absorb water and rot.


Yurt 02-16-2010
An outside view of the yurt. You can see the two sizes of windows.


Yurt 02-16-2010
The roof line and a window.


Yurt 02-16-2010
You can see in this picture how the walls attach to the roof. The loops of rope interlock with each other as you feed them through the grommets. The wall is not supported by the tension cable, as many popular designs call for.


Yurt 02-16-2010
Close up of the rope loop system.


You might notice that the yurt doesn't yet have a door flap and the wall doesn't reach all the way to the ground. I still have to complete the bottom band, which will extend the wall to the ground and connect to the vinyl floor (still have to make the floor to!) with velcro. I have to finish this all in the next two weeks because that's when the maiden yurt voyage will be to the hot springs near Mammoth Lakes!

Tuesday, February 16, 2010

Sewing the Canvas Wall

This past weekend, Nicole flew here to Oakland to come and help me sew the canvas wall of the yurt, and help me finish the canvas roof. It was really nice having a second person help measure, cut, and handle the fabric because the canvas is sooooo heavy, and the wall canvas in particular was a little stiff, making it hard to handle. Sometimes, we needed a third person (Romy), to help align and push fabric through the sewing machine. We worked all day, and late into the night sometimes too. It was really fun work, even though sometimes we got frustrated, broke a few needles, ran out of bobbin at the worst times, etc. But the sewing machines never let us down!

I used a 13oz water, mildew, and fire resistant canvas, which was dyed turquoise for the walls. The roof canvas was also a natural 13oz canvas, but was only treated for water and mildew resistance. The fire resistant coating makes a huge difference in the way the fabric looks and feels (and smells). The turquoise fire resistant canvas is stiffer and kind of shiny. The natural canvas is more flexible and easier to handle in the machine.

I also bought a 20 gauge clear plastic "fabric" for the yurt windows. It was really clear, and cost about $10/yd. There is no need to go any heavier, unless you are making large windows. I limited the width of each window to about 2.5ft so that the windows didn't take too much of the weight of the walls. We made 5 windows total, two of them were long (spanned almost the whole height of the wall), and two of them were medium length.


Yurt 02-14-2010
Cutting out the fabric behind the window.


To sew the windows on the walls, we first sewed the plastic onto the side of the fabric which will be the inside of the wall. Once it was sewn in place, we cut the back of the fabric away, exposing the window. In the picture above, you can't see the plastic window, but its there, believe me! We left about 2.5 inches of scrap so that it was easy to fold it back to make a nice border around the window. The corners were left exposed (they had no border), but we decided that it can be covered by a small triangle shaped trim I'll sew over it later.


Yurt 02-15-2010
Sewing the flaps into a nice border around the windows.


We also placed brass spur grommets at the top of the wall every 7.25 inches. Why 7.25in? I don't know, I just made that number up. I thought that spacing would be good to support the wall. The total amount of grommets was about 60, I think, supporting a wall 36ft long. I used 1/2inch spur grommets (#4), which required a special tool. The tools, called a die set, and hole puncher, are specific to the grommet size, so you will have to buy the same size tools and hole puncher as you do grommets. I ordered my tools and grommets from Sailrite.


Yurt 02-15-2010
Me and Nicole (my twin sister) with a finished window. You can also see the grommets.


Once the windows and grommets were done on the wall, that was about all that needed to be done (for now). So next we moved on to finishing the roof. We first sewed together the final seam which completed the cone shape of the roof. Then we cut off the scraps which hung over the sides to make the roof circular. Then we sewed a roof band along the circumference of the roof to make a tight roof line. On the inside of this roof band, we sewed a series of rope loops which were spaced at 7.25 inches, the same as the grommets. The loops of rope fit through the grommets at the top of the wall to join them together.


Yurt 02-15-2010
The rope loops sewn on the underside of the roof, along the circumference.


Just getting to this point took us almost two days. The wall was still not completely done, because we still had to sew on the bottom band, a strip of vinyl or plastic material (not canvas) which will be in contact with the ground and be tucked underneath the khana (the wooden part of the wall). This band is there because you don't want the canvas to be in contact with the ground because it will absorb water and possibly start to rot. Plus we didn't make a door flap yet. But at this point we were really excited to get the yurt built to see if what we sewed so far was okay or not.

Saturday, February 13, 2010

Fitting the Canvas Roof


Fitting Yurt Roof Cover
The yurt roof cover being fitted.


It finally got sunny outside and dry enough to take the yurt out and fit the canvas cover that I made almost one month ago. It started out flat - a bunch of 36" wide strips of canvas sewn together, so that when brought to a cone shape, there would be just enough overlapping material to cover the roof. I used Paul King's book and his 12 foot yurt patterns, although I didn't like following his measurements. If anybody is making their yurt roof canvas following his pattern, be aware that some dimensions are missing, and that you will have to make some of the strips considerable longer (he only marks the shortest dimensions). WARNING! Make sure you look hard and think about each strip before you cut. I almost screwed up.


Fitting Yurt Roof Cover
Don't look at my butt!


When fitting the roof material, you have to allow the shortest section to come right above the door. That's where the fabric comes and overlaps. That's where we pinned the overlapping flaps together with safety pins so that we could keep the roof on tight. It helped that it wasn't windy at all. It turned out a very nice, sunny, warm, and wind-free afternoon. We got lucky!


Fitting Yurt Roof Cover
Romy pinning some of the canvas in place.


You might also notice that there is an excess of fabric hanging off the sides. Not all of this is needed, but I am going to save about 8" to make a roof band. The band will have two layers, one to protect the side of the yurt when it rains, and the other flap to attach the yurt wall canvas to. I decided to go with the method that Colorado Yurt CO uses, which is to attach the yurt wall canvas directly to the roof instead of the khana (lattice wall). This makes the roof line tighter because there is an even weight always pulling down on the roof. The grommet work and ropes that connect the wall canvas to the roof canvas will be hidden by the flap of roof band that also serves to protect the the top of the walls from rain.


Fitting Yurt Roof Cover
Inside the yurt.


After pinning everything, I also had to mark out where the crown was, so that the fabric all bunched up on the top could be cut away, allowing a nice hole for the crown. I will later integrate a bug screen in the crown so that we can keep the crown 'open' but keep the bugs out. I will also make a removable rain cover for the crown, which can be thrown over the crown to keep the rain out (or keep extra heat in).


Fitting Yurt Roof Cover
The characteristic rainbow arc, created by the seams of the roof canvas.


If you use the strips of canvas pattern, made popular by Paul King, you will find these beautiful rainbow arcs that are created by the seams in the canvas, where each strip was connected to the next. If your seams are tight and straight, it looks awesome! Some yurt companies make custom roof covers which have an insert of heavy duty clear plastic instead of one of the canvas strips, so it looks like you have a rainbow of sky!


Fitting Yurt Roof Cover
Jenn noting some measurements/dimensions.


When we built the roof this time, almost all of our poles fit how they should, so we got it in the circle shape better. Our roof angle ended up being 35 degrees exactly. The canvas roof cut off angle ended up being between 110 degrees and 112 degrees. Paul King suggests 117 degrees in his pattern, but this must correspond to a roof angle closer to 30 degrees or so. Since we had a slightly higher angled roof, our cone must be tighter, hence the smaller cut off angle.


Fitting Yurt Roof Cover
Canvas material all bunched up over the crown.


At the park that we built the yurt, Robert's Regional Park in Oakland, the rangers and the managers already know us! The first time we came there, last month, the rangers and other park patrol people kept talking to us wondering what we were doing. But when we fit the canvas, they didn't bother us, except for the one manager on his golf cart (he didn't bother us, he just came to talk to us). He came as we were packing up, and was upset that he missed seeing the yurt up with the roof. He really liked the yurt, and told us that next time we come, we should let the rangers in the office know so that they can take pictures and put it up on the park website! Haha, my yurt will be famous!


Fitting Yurt Roof Cover
Marking the crown.

Thursday, January 14, 2010

Starting to Sew

I am now starting to sew the canvas cover for the yurt. I am using a 13oz Sunforger canvas for the roof. It is all cotton that has been treated for water and mildew resistance. The color is natural. The roof should be light in color to let in the sun and also the lighter the color, the longer it will last against UV (since it reflects more light away instead of absorbing it if it was a darker color). I needed 34 yards for the roof, and the roll is 36 inches wide. I ordered the natural canvas from Kronke Co. in Hayward, CA. It was very convenient that they weren't too far away, because I went to their store to pick up my order instead of shipping it. Plus, the guy there was really nice over the phone.


34 Yards of Natural Canvas 13oz
34 yards of Sunforger canvas, 36 inches wide.


I also bought thread from Kronke Co., as it was convenient to just get everything together. To sew heavy duty material like a 13oz canvas, you have to use heavy thread as well. I bought a V92 weight polyester thread which is bonded. Make sure you buy the bonded stuff, because that really increases the strength. It feels thicker than normal thread, and it almost feels like there is a layer of wax or something over it, making it smooth. I bought 4 spools which were 4oz each.


V92 Bonded Thread
Two spools of V92 polyester bonded thread.


The sewing machine also must accept at least a No. 20 size needle. John, who let me use his industrial sewing machine (THANK YOU JOHN!), also gave me a set of No. 24 size needles, which I have been using with the V92 thread. It has worked fine so far. In addition to the industrial sewing machine, I bought an old White brand home sewing machine on craiglist for $25. I really love it! It is teal, chrome, and black. I think it must be from the early 70s. The home sewing machine was able to accept the No. 24 needle as well as the V92 thread. Before I started sewing, I made sure to oil the machines.

Today I began sewing the roof together. It involves sewing long strips of the canvas together, and then making a cone shape. I only got to sewing three strips together, because it took a long time. Each strip was about 16 to 18 feet long, and each seam involved three length-wise stitches. I made french seams, which are strong and water resistant. I am using the pattern provided in Paul King's book, The Complete Yurt Handbook, although I double checked all his measurements (they check out).


Starting a French Seam
Starting a French Seam on my home sewing machine.


When I used scrap fabric as a test, I learned that the home sewing machine can only punch through two layers of the canvas. When I added a third layer, the belt which drives the machine started slipping. But that was okay, because I didn't want to over work the machine, since I did have the industrial sewing machine too. The problem with the industrial one is that it is VERY hard to control. When you press down the foot pedal, the machine goes crazy - it sews very fast and hard. It has a motor which weighs 50lbs or more, and can seriously drive an air compressor. The machine can probably sew through metal! Not really, but it is a crazy machine. So first, what I did was sew the two canvas pieces together in two layers with the home sewing machine to start the french seam, since I was able to better control it. Then I took the fabric to the industrial machine to finish the seam, which involved sewing through four layers of canvas. Since the two pieces were already together, it didn't matter how crazy the machine got on me, at least I didn't have to line anything up. All I had to do was hope to sew in a straight line.


Completing the Seam
Completing the french seam with the industrial sewing machine.


So that's it so far. My sister is coming to visit in February and we will have a yurt canvas sewing party. The goal is to finish all of the sewing and have the cover completely done by the time she leaves. I think we can do it!


French Seam
A close up the a completed french seam.