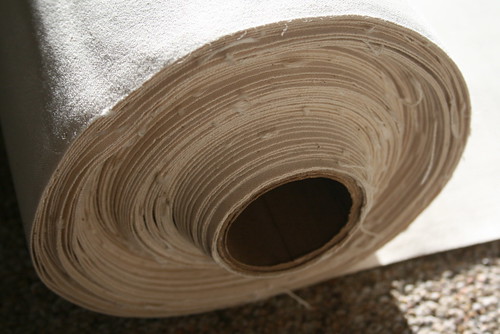
34 yards of Sunforger canvas, 36 inches wide.
I also bought thread from Kronke Co., as it was convenient to just get everything together. To sew heavy duty material like a 13oz canvas, you have to use heavy thread as well. I bought a V92 weight polyester thread which is bonded. Make sure you buy the bonded stuff, because that really increases the strength. It feels thicker than normal thread, and it almost feels like there is a layer of wax or something over it, making it smooth. I bought 4 spools which were 4oz each.
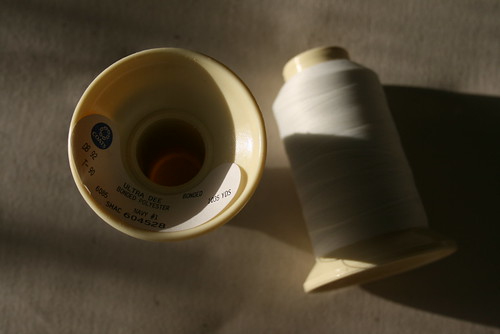
Two spools of V92 polyester bonded thread.
The sewing machine also must accept at least a No. 20 size needle. John, who let me use his industrial sewing machine (THANK YOU JOHN!), also gave me a set of No. 24 size needles, which I have been using with the V92 thread. It has worked fine so far. In addition to the industrial sewing machine, I bought an old White brand home sewing machine on craiglist for $25. I really love it! It is teal, chrome, and black. I think it must be from the early 70s. The home sewing machine was able to accept the No. 24 needle as well as the V92 thread. Before I started sewing, I made sure to oil the machines.
Today I began sewing the roof together. It involves sewing long strips of the canvas together, and then making a cone shape. I only got to sewing three strips together, because it took a long time. Each strip was about 16 to 18 feet long, and each seam involved three length-wise stitches. I made french seams, which are strong and water resistant. I am using the pattern provided in Paul King's book, The Complete Yurt Handbook, although I double checked all his measurements (they check out).
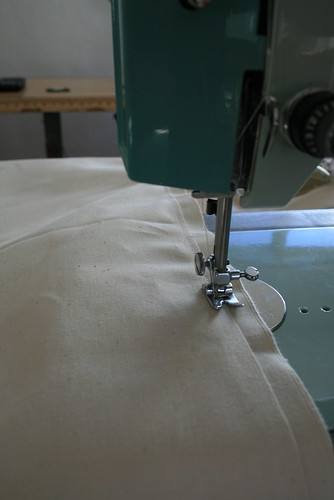
Starting a French Seam on my home sewing machine.
When I used scrap fabric as a test, I learned that the home sewing machine can only punch through two layers of the canvas. When I added a third layer, the belt which drives the machine started slipping. But that was okay, because I didn't want to over work the machine, since I did have the industrial sewing machine too. The problem with the industrial one is that it is VERY hard to control. When you press down the foot pedal, the machine goes crazy - it sews very fast and hard. It has a motor which weighs 50lbs or more, and can seriously drive an air compressor. The machine can probably sew through metal! Not really, but it is a crazy machine. So first, what I did was sew the two canvas pieces together in two layers with the home sewing machine to start the french seam, since I was able to better control it. Then I took the fabric to the industrial machine to finish the seam, which involved sewing through four layers of canvas. Since the two pieces were already together, it didn't matter how crazy the machine got on me, at least I didn't have to line anything up. All I had to do was hope to sew in a straight line.
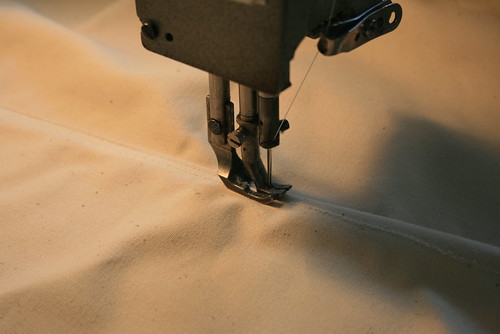
Completing the french seam with the industrial sewing machine.
So that's it so far. My sister is coming to visit in February and we will have a yurt canvas sewing party. The goal is to finish all of the sewing and have the cover completely done by the time she leaves. I think we can do it!

A close up the a completed french seam.

1 comments:
Thanks for the detailed post! Congratulations on your progress! The seam looks lovely.
Post a Comment