Wednesday, January 27, 2010

In All the World, No Waters Like These

So its an interesting story of why we ended up going to visit Wilbur Hot Springs, a hot spring resort near the intersection of Hwy 16 and Hwy 20 northwest of Sacramento California in the mountains where Cache Creek runs through. One of the employees at Wilbur read my blog post about the natural hot springs of the Eastern Sierra, and left me a nice comment. I didn't get around to reading it for a while because I am not notified right away after people leave comments on my blog, but I finally did see it and read it about three weeks later. I was surprised to see that in the comment was an offer for a free day pass at the hot springs for me and Romy to come check it out!

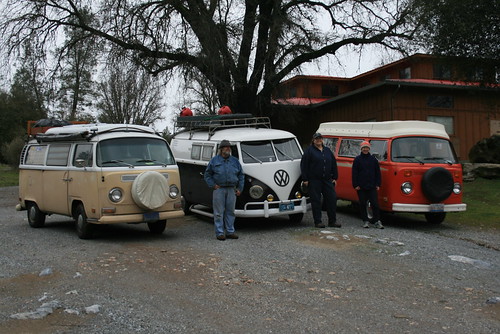
So I got in contact with Wilbur Hot Springs, and again to my surprise, they really arranged for a free guest pass at the resort. Now I was getting excited to go check out the springs, because I had no idea there were hot springs so close. We arranged to go on Monday Jan 25th, right after the Caverns VWcamperfamily get-together.

It was a rainy wet day as we drove north from San Andreas, CA where the caverns were, through Sacramento and on through the Capay Valley. What a beautiful valley! I think it was nicer than Napa Valley, hands down! It was very narrow, with nice oak tree covered hills on either side. The valley was enshrouded with a hanging mist due to all of the moisture from the rain. We drove through it as the sun was going down. As we exited the valley, the road climbed through the hills, and we saw a bunch of BLM parking areas off the side of the road. Then we all of a sudden saw a bunch of elk in the hills. Elk!? I wondered if they might be farmed, because I thought elk only lived in the big mountains. Then there was another BLM pull off, so we pulled over to try to see the elk a little better and noticed an information sign. It was about the elk! The sign read that there used to be millions of wild Tule Elk that roamed the hills here, but they were all hunted to near extinction. Just 30 elk remained in the area until they were protected. Now there are a couple hundred and the population is rebounding. These are the same elk that I once saw in the Owens Valley by the Sierra Nevada mountains. We saw two herds along Hwy 16 by the BLM pull offs. In one of them, we saw an alpha male with his huge antlers looking over about 15 females. They were scared of the bus because it was loud. And just as we were going to drive a little closer, the bus gave out a loud lurch as Romy shifted into gear. Time for a clutch adjustment!


A picture of Tule Elk near Point Reyes (picture by kqedquest on flickr.com)


Anyways, back to the story about Wilbur Hot Springs. When it got dark Sunday night, we found a dirt access road on BLM land for hunters. I'm not quite sure what you could hunt, but the road was right off of Hwy 20, close to Wilbur where we were going to the next morning, and quiet and lots of level places where we could park the bus and stealth camp. It rained all night, and continued to into the morning. It was still raining when we woke up, and as we drove to Wilbur. The resort is totally off grid. They generate all of their own power with solar panels. The springs are tucked in between the hills in a canyon. They smell a bit of sulfur, which hits you as you get close, but then you get used to it.

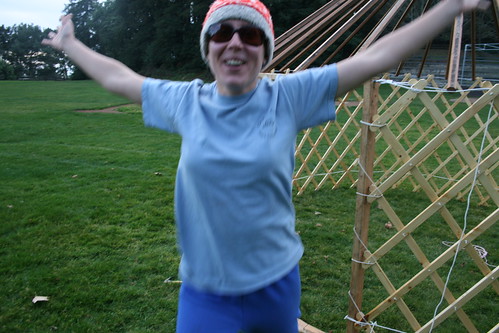
After we checked in and they explained to us all of the rules, we were ready to check out the hot springs. The resort plumbed the hot source water into a Japanese style wooden open building which enclosed three flumes. The flumes were three long tubs, each had a different temperature. The coolest was 98F, then 105F, and the hottest was 110F. We tried all three. The water felt a little slimey, but I think it was because of the minerals in it. The tubs were pretty clean, and they were really big and room-y. We also had access to a dry sauna, and an outdoor cold pool, which was too cool to swim in for me.

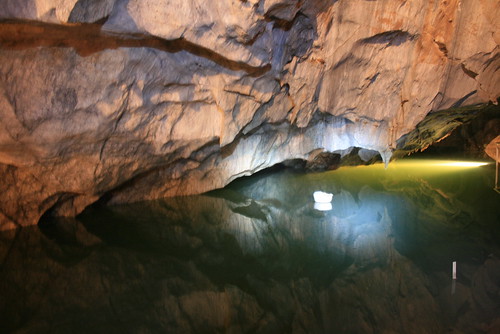
We couldn't take any pictures by the pools, so here is a picture of the tubs from another website:


I read somewhere that the waters also have trace amounts of lithium in them. A lot of people at the resort who were there for a few days sure seemed loopy and uber relaxed. Especially in the communal kitchen, the people were all quiet and a little weird. But I don't know. . . I felt like I normally feel after being in a hot spring. Very nice and relaxed.

And of course, a big thank you to Michael who got us the day pass to Wilbur!

Monday, January 25, 2010

Caverns VW Camp Out


Caverns VW Camp Out
John, Shari, and me at the Caverns VW Camp Out vwcamperfamily event.


This weekend we joined Shari and her 1960 splitty and John and his 1971 Dormobile bus at the California Caverns. The camp out couldn't of been timed any better, as we had sunny skies driving across the valley and into the Sierra Nevada foothills. It was a nice break from all the crazy rain we've been getting. We arrived at the caverns around 2pm on Saturday, and found Shari already there behind the cavern welcome building. They had a small field set up for boy scouts in the back, which the cavern manager let us camp out at for free. There were picnic tables and even a rickety stage which had seen better days. We parked on a nice level grassy field right next to a stream which had swollen with all of the rain. In fact, a few days before, the grassy field that we were camping on was under water, but it was dry and pretty firm for us that weekend.

Shari had a bunch of firewood, and Romy and I brought kindling. We hung out till dark, debating whether or not we should wait for John (who said he was coming) to take the cavern tour. But we decided to wait, and it was a good thing, because John came rumbling in just after sunset in his bus. We had just started the fire.

John found an old Dietz lantern in Arizona when he went to Buses By the Bridge last weekend. Since he had a lot of them already, he sold it to us, and we are now the newest members of the Dietz lantern vwcamperfamily craze/club! Woo hoo!


Our Very Own!
The Dietz lantern from John.


The next morning we went on the 11am cavern tour. We were the only ones there that morning, so we had a kind of private tour. The tour guide took us on a short hike to the historical entrance to the cave along the (usually) small stream. It was mined during the mid 1800s part of the California gold rush. I think she told us that about 28,000 ouces of gold were mined out of that stream, and you can see that there were a lot of piles of dirt and rocks that the miners threw around as they were hunting for gold. The story is that the miners were shooting empty whiskey bottles along a rock wall next to the stream, and as they climbed up to retrieve some of the bottles, rocks gave way underneath them and they felt cold air blowing out of the hole. They had discovered the first entrance to the cavern (back then called Mammoth Cavern). Some of the miners were determined to find gold inside, but they had no luck. Instead they found a cave filled with many large rooms, and underground lakes.


California Caverns
The historic entrance to Mammoth Cavern (now California Caverns)


California Caverns
Getting our safety hard hats on before we go into the cave.


We got to see almost all of the cave that you could walk through except one room which was flooded due to all of the rain. It was really beautiful! There were many soda straws hanging from the ceiling, and cave bacon, and flow-stone and the bridal room was really cool! I tried taking pictures, but many of them were blurry because it was so dark in there.

In the late 1800s, the cave started to be toured, and the tourists all carved their name into the stone. Then for some reason, the cave was abandoned by 1920, and was left abandoned until 1983. During that time, people broke off a lot of the hanging features in the cave (which is sad). But there was also one man from Berkeley who found a secret room in the cave in the 60s and didn't tell anybody about it until the 80s. Because he kept it secret, it was preserved and we got to go see it. It was called the Jungle room, and had a lot of hanging formations. Many of them looked like animals, and there was even a Buddha!


California Caverns
Romy in the Jungle room (extremely blurry)


California Caverns
A flooded room in the cave, and a floating hard hat.


In 1983 (I think) the cave was protected, and it is now part of the California State Historic Landmark system. It was also renamed to California Caverns. There are a few other caverns in the area, like Merced Caverns.

After our tour was over, we packed up and started heading home. Well, Shari and John headed home. We were off to Wilbur Hot Springs. . . .

Friday, January 22, 2010

Romy Passed Prelim Exams at Berkeley!

Today the Mechanical Engineering department posted the test results of all of the graduate students who took the prelim exams in mid January. In order to be allowed to pursue a PhD in the Mechanical Engineering department, you must pass a set of exams. There are 10 exams, of which you must pass in at least three of the subjects, and one of the subjects must be your major.

The subjects are: Dynamics, Controls, Heat transfer, Design, Solids, Materials, Thermodynamics, Fluid mechanics, and Manufacturing. Romy took the thermodynamics, fluid mechanics, and solid mechanics subject exams in August, but did not pass the solid mechanics subject exam. Since he passed his major subject area (thermodynamics), he was allowed a second chance (as are almost all of the grad students who don't pass all three the first time) so he tried the solid mechanics and heat transfer subject exams this January. He only needed to pass one of the subjects to pass the prelim exam, but he actually passed both of them. I went today to check the results which were posted near the student services office, and took a picture because I was so happy to see the results!!!


Romy Passed Prelim Exams!
Romy passed the prelim exams! He was #4.


In case you're wondering about my exam results, I don't need to take the prelim exams because I am only doing a Master's of Science degree in Mechanical Engineering. I will be finishing my Master's at the end of summer 2010 (I hope!) and then I'll be starting the PhD program in the Earth and Planetary Science department researching geological fluid mechanics.

Thursday, January 21, 2010

My Blog Has A New Address!

Old links to my blog will still work (they will be forwarded to my new address). The new address is now:

www.jennandromy.com

Yes, I went ahead and bought a domain name through Google, but from Godaddy.com and I pay $10/year. My blog is still hosted by Google for free, and I also have the ability of making my own webpage (hosted by Google) for free off of jennandromy.com. I plan on making a homepage about me and school related stuff, like my research at Berkeley.

Tuesday, January 19, 2010

Crazy Drive to School

Today was the first day of classes this semester at Berkeley. For the past few days, its been raining here, and last night through this morning its been really coming down. We take Skyline Blvd and Grizzly Peak Rd up along the top of the Oakland hills all the way to the Lawrence Berkeley National Lab where we park and take the bus to campus. The road winds through the hills, which are steep, rocky, and have many houses perched off the cliffs. The houses cut down vegetation to clear out their land so that they can have a million dollar view of the San Francisco Bay. A lot of the road cuts deep into the hillsides and when it rains, there is a lot of erosion from the running water. Sometimes the water forms a small river following the side of the road.

This morning started out like any other morning, driving to school along the route, except that there was a lot of debris on the road, like fallen eucalyptus bark and branches, and small rocks and mud. As we were a little more than half way to the Lab, we saw a huge boulder rolling falling down the steep hillside to the right of the road. It kept rolling until it hit the road, and rolled right across it! The boulder was as large as me (if I went into the fetal position) and it rolled from about 50 to 100ft above, down a 75 degree slope. It rolled with so much momentum, it bent and wedged itself into the metal guard rail on the other side of the road.


Falling Rocks!
The boulder.


The scary thing is that the boulder rolled across the road just 5 seconds before we would've crossed its path, and it also missed clipping a Prius from behind by just a second! The Daewoo (and Prius) just narrowly missed being hit. That would've sucked! On the way home, the rock was still there and I took a picture of it on my cell phone. Then we saw about 4 different rainbows along the drive home. We also picked up a hitchhiker. He was jogging when it all of a sudden started to pour hard outside. He lived just down the road, on our way home, so we dropped him at his house.

Thursday, January 14, 2010

Starting to Sew

I am now starting to sew the canvas cover for the yurt. I am using a 13oz Sunforger canvas for the roof. It is all cotton that has been treated for water and mildew resistance. The color is natural. The roof should be light in color to let in the sun and also the lighter the color, the longer it will last against UV (since it reflects more light away instead of absorbing it if it was a darker color). I needed 34 yards for the roof, and the roll is 36 inches wide. I ordered the natural canvas from Kronke Co. in Hayward, CA. It was very convenient that they weren't too far away, because I went to their store to pick up my order instead of shipping it. Plus, the guy there was really nice over the phone.


34 Yards of Natural Canvas 13oz
34 yards of Sunforger canvas, 36 inches wide.


I also bought thread from Kronke Co., as it was convenient to just get everything together. To sew heavy duty material like a 13oz canvas, you have to use heavy thread as well. I bought a V92 weight polyester thread which is bonded. Make sure you buy the bonded stuff, because that really increases the strength. It feels thicker than normal thread, and it almost feels like there is a layer of wax or something over it, making it smooth. I bought 4 spools which were 4oz each.


V92 Bonded Thread
Two spools of V92 polyester bonded thread.


The sewing machine also must accept at least a No. 20 size needle. John, who let me use his industrial sewing machine (THANK YOU JOHN!), also gave me a set of No. 24 size needles, which I have been using with the V92 thread. It has worked fine so far. In addition to the industrial sewing machine, I bought an old White brand home sewing machine on craiglist for $25. I really love it! It is teal, chrome, and black. I think it must be from the early 70s. The home sewing machine was able to accept the No. 24 needle as well as the V92 thread. Before I started sewing, I made sure to oil the machines.

Today I began sewing the roof together. It involves sewing long strips of the canvas together, and then making a cone shape. I only got to sewing three strips together, because it took a long time. Each strip was about 16 to 18 feet long, and each seam involved three length-wise stitches. I made french seams, which are strong and water resistant. I am using the pattern provided in Paul King's book, The Complete Yurt Handbook, although I double checked all his measurements (they check out).


Starting a French Seam
Starting a French Seam on my home sewing machine.


When I used scrap fabric as a test, I learned that the home sewing machine can only punch through two layers of the canvas. When I added a third layer, the belt which drives the machine started slipping. But that was okay, because I didn't want to over work the machine, since I did have the industrial sewing machine too. The problem with the industrial one is that it is VERY hard to control. When you press down the foot pedal, the machine goes crazy - it sews very fast and hard. It has a motor which weighs 50lbs or more, and can seriously drive an air compressor. The machine can probably sew through metal! Not really, but it is a crazy machine. So first, what I did was sew the two canvas pieces together in two layers with the home sewing machine to start the french seam, since I was able to better control it. Then I took the fabric to the industrial machine to finish the seam, which involved sewing through four layers of canvas. Since the two pieces were already together, it didn't matter how crazy the machine got on me, at least I didn't have to line anything up. All I had to do was hope to sew in a straight line.


Completing the Seam
Completing the french seam with the industrial sewing machine.


So that's it so far. My sister is coming to visit in February and we will have a yurt canvas sewing party. The goal is to finish all of the sewing and have the cover completely done by the time she leaves. I think we can do it!


French Seam
A close up the a completed french seam.

Tuesday, January 12, 2010

Yurts Are Hyperboloids

Today, Mark turned me on to the connection between yurt walls, and a hyperboloid, which is a 3D geometrical surface. But what is special about the surface is that you can create it, although it is curved, using only straight lines!

A hyperboloid 3D surface. Source: www-lm.ma.tum.de


This is exactly how the walls of a yurt are put together! The individual long khana pieces are not bent, although it creates a round wall. Compare the 3D surface to the yurt:


Yurt Frame Raising
The yurt.


On wikipedia, it says that since the hyperboloid shape can be built with straight beams, it allows minimization of wind cross-section while retaining structural integrity with minimal material.

Other structures which are made of the same shape are cooling towers.

A power plant cooling tower.

Thursday, January 07, 2010

Yurt Frame Raising

The day has finally come - This morning I finished making the door frame, the last piece in the wooden frame of my yurt. Now that everything is done, Romy and I were ready to take it to the park and put it up to see if everything worked. The park we chose to go to was Roberts Regional Park, just a mile or two up the hill from where we live. It has a nice flat field cleared out surrounded by redwood trees.


Baja with Yurt on Roof Rack
Packing up the yurt on the baja roof rack.


The whole yurt frame fit nicely on the roof rack. When we got to the park, we unpacked and walked the pieces of the frame onto the grassy field. The first part of the set up was getting the khana sections stretched out and connected together and connected to the door frame.


Spreading out the khana
Jenn is stretching out the khana sections and connecting them to the door frame.

Connecting the khana
Romy is connecting khana sections together with rope.


The khana sections connect to each other by rope. They slightly overlapped each other so that they could form a stronger link. The khana connected to the door frame with rope also. If this was a permanent yurt, the pieces would be bolted or screwed together. The rope, surprising, worked really well. I guess, why wouldn't it? That's how the yurts are traditionally put together.


Khana Connection
A close up of how the khana sections overlap and are tied together.


After the khana sections are connected, the next step is to band the khana into a circle. This was tricky, because every time we moved one part of the circle to fix it, another part went out of shape! We spent a lot of time trying to get this right, because if the yurt frame isn't in a perfect circle, then the roof poles will not sit right. When it looked all in place, we measured out the diameter to see if we had set it correctly to 12 feet. Amazingly, it was just 2 inches shy of 12 feet.


Khana in circle
We finally got the walls of the yurt into a perfect circle.


Next it was time to raise the roof! It is a Mongolian yurt building superstition that the roof must be raised from within the yurt. You can NEVER pass a pole over the walls (or you will have bad luck with your yurt, or maybe bad luck in general). You have to have them inside and raise them upwards. So that's what we did. The roof poles are connected to the walls by a cable that remains under tension, which is tied around the circumference of the yurt and rests on top of the walls.


Romy putting up poles
The yurt roof and crown stands with less than half of the poles in place.


Yurt Frame Raising
A close up picture of how the roof poles connect to the tension cable on top of the khana walls.


Yurt Frame Raising
All of the roof poles are in place.


In addition to the tension cable, which serves dual purpose to hold up the roof poles and keep the khana from spreading outward from the weight of the roof, there is also a belly rope I weaved through the wall towards the bottom to support the khana there too. The final test to see if the roof poles and crown are properly seated is to hang from the crown. This was by far the scariest and the most fun part about the frame raising! But no matter how much we tugged down on the crown, it didn't want to come down lower. We didn't measure the angle of the roof, but to me, the roof seems to be sitting at slightly too sharp of an angle. I designed it to sit at 32 degrees, but it seems more like 35 degrees.


Romy Hanging!
At first conservatively, Romy hung from a rope slung over the crown.


Jenn Hanging!
Then Jenn was hoisted up and hung directly from the crown. Weeeeee!


Romy Hanging!
Romy hanging from the yurt crown.


After having lots of fun hanging from the crown, we took more measurements which we will need to started making the canvas cover. We didn't find any odd things, which is good. Everything was just as it was designed to be! Some tricky things that happened when we were putting up the roof poles, was that some of them seemed too short. But Romy later discovered that they weren't really too short, but the yurt was not in a perfect circle. Also, some of the roof poles that seemed short were not coming out of the crown at the correct angle. Once we shifted them left or right, they reached the tension cable with no problem. Here are more pictures from the frame raising (and even more here):


Yurt Frame Raising
Its a bit dark, but this is another view of how the roof poles connect to the walls.

Yurt Crown
View of the crown from inside the yurt looking up.

Jenn Really Happy!
Jenn really happy that the yurt went up smoothly! Success!

Tuesday, January 05, 2010

Second & Third Khana Sections Finished

It took a day each to finish, and now all of the three khana sections have been completed. I would suggest wearing gloves when you work with the rope. For the first hour, I didn't have gloves on, and I started to get blisters on my hands from constantly pulling the rope tight. Then I found some leather gloves, and they made everything less painful, but I felt a little more clumsy due to the loss of feeling in my hands.

As I was starting the third khana section, the gas in my Bic lighter ran out. I had another lighter (generic from Ace Hardware) which I used to melt the ends of the strings, but the flame sucked. It was small, not as hot, and generally weak (even though it still had a lot of gas in it). I didn't think that there would be such a difference between cheap-o lighters, but apparently there is. It was perfect timing that Romy was coming back from school just as I was getting sick of the generic lighter, so I called him and asked him to pic me up a Bic on his way home. When he brought it home, I was soooooo happy because the Bic was 100 times better!


First Khana Section
The first khana section completed.

Second Khana Section
The second khana section completed.

Third Khana Section
The third khana section completed.


The two khana sections that attach to the door are mirror images of each other and use the same piece dimensions. When I was cutting all of the pieces, I just doubled the amount I made. However, the middle section (the second khana section) is slightly different. It has no 'corners' because part of it will overlap the other two sections when you join them together. I will post a detailed picture of this soon, when I raise the frame for the first time.

I think the pictures I provided here are detailed enough to go off of if you wanted to make your own. The dimensions are all in Paul King's book, however I think the photos I took are better than his hand drawing (its tiny in his book, and has an error). But I must warn you, there is one mistake in my third khana section! Can you spot it!?

Sunday, January 03, 2010

Putting Together the First Khana Section

This morning I was sooooooo excited to see that the varnish dried on the khana pieces earlier than I expected. So that meant that I could start tying together the khana pieces into the three khana sections which make up the wall of the yurt. I used Paul King's book as a guide. My friend, John (who has his own tent and sunshade making business) let me know about an error in Paul King's diagram for the khana. It was a good thing he let me know about it, because I was kinda confused when I saw the wrong version in Paul's published book. I used the corrected version.

The long khana pieces go together criss crossed. I used 1x2 inch douglas fir for the khana pieces. They are joined with a nylon braided polyester cord 1/8" thick string. There are 8 full length pieces in each direction for each khana section, and for my yurt, I need to make three sections. In addition, there are also progressively shorter and shorter pieces that need to be included to make the ends square. The following pictures are a step-by-step guide to how to put a khana section together. As I mentioned in my previous posts, the holes where the string goes through to connect khana pieces together have already been drilled prior to today, and I also cut each piece to size, sanded them, and varnished them.


Step 1
Step 1: Push the string from the top to the bottom and out. Sometimes it helps to fashion a 'needle' out of a stick or something similar. Knot the end and burn it with a lighter so that the end of the string doesn't unravel. I used synthetic string, but if you are using natural fiber, you shouldn't burn it.

Step 2
Step 2: Pull the string hard and tight so that the knot on the other end seats. Make sure the two khana pieces are aligned how you want them to be.

Tie the Knot With Plyers
Step 3: Keeping the string tight, use pliers to help tie the knot at the top. Try to make the knot as close to the wood as possible.

Step 3
Step 4: After tying the knot, cut off the excess string. Finish it by burning the end so that the string doesn't unravel.


I had this vision this morning that I would finish all three khana sections today. In one khana section, there were a total of 76 'joints' and 152 knots to tie and burn! Needless to say, it took me all day to complete just one khana section, even when Romy helped me for an hour or so! That means I still have two more days to go making the sections, and one more day to make the door frame.


Starting to Tie Khana Together
The start of putting a khana section together. This is a view of the corner.


My dad thought that the khana might not bend enough to create a circle without the pieces breaking, so I tested it out. It bends really well, and the actual pieces don't bend as much length-wise because they are at an angle. I was happy when I saw that! Anyways. . . here are some more pictures I took over the course of the day (and night).


Romy Helping With the Khana
Romy helping to make the khana sections.

Jenn Tying Khana
Me making the khana sections. It is getting towards evening. Romy took this picture from the balcony above the garages.

First Khana Section Complete
The completed khana section. Its dark outside so the picture blurred a little.

Folded up Khana Section
Me holding up the khana section when it is all folded up. Its not as big as I thought!

Jenn and the Khana
I look all tired! But the first section is all done. Yay!

Saturday, January 02, 2010

Done Varnishing the Khana

After inhaling a bunch of fumes, I finally finished varnishing all 85 pieces of khana which will make up the three sections of the lattice yurt wall. Since I had so many pieces and not much space in the garage for them to dry, I built a small functional drying rack. The weather here has been playing games with me. The weather report said it was going to rain for the whole past week, so I felt hesitant to start varnishing with all of the possible humidity. But then I said, what the heck!? I will just varnish in the garage and if it takes longer for the khana to dry, so be it, at least I will get it started.


Varnished Khana
About 2/5ths of all of the khana pieces drying on the rack I built.


It turned out to be nice, sunny, and warm during most of the days this week. It only rained at night. I varnished with spar varnish, normally used for marine or boat applications. I applied one thick coat. I didn't want to put more on it, since the khana will be slightly bent when the yurt is standing. I figured if I layered it on any thicker, the varnish might crack under the stress.


Jenn Varnishing the Khana
Me varnishing in the garage. It looks like the baja is looking at my butt and smiling!


The next step now, after the last batch of khana pieces are dry, is to join them all together into the lattice sections. I think I will do this two days from now. I also forgot about making a door frame! I will do that tomorrow, I think, while the last batch of khana dry.