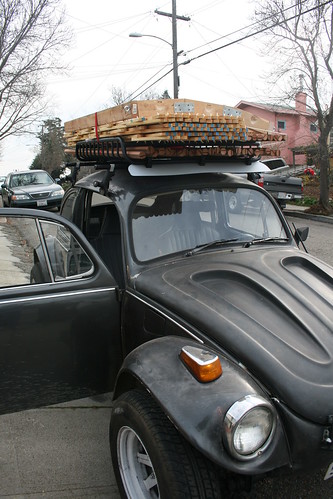
Packing up the yurt on the baja roof rack.
The whole yurt frame fit nicely on the roof rack. When we got to the park, we unpacked and walked the pieces of the frame onto the grassy field. The first part of the set up was getting the khana sections stretched out and connected together and connected to the door frame.
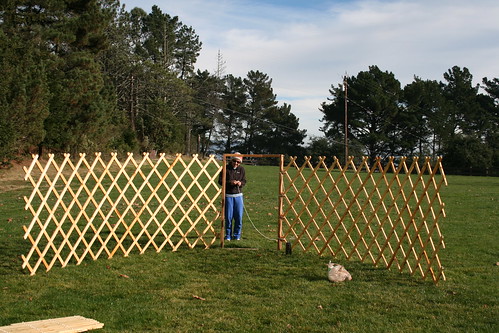
Jenn is stretching out the khana sections and connecting them to the door frame.
Romy is connecting khana sections together with rope.
The khana sections connect to each other by rope. They slightly overlapped each other so that they could form a stronger link. The khana connected to the door frame with rope also. If this was a permanent yurt, the pieces would be bolted or screwed together. The rope, surprising, worked really well. I guess, why wouldn't it? That's how the yurts are traditionally put together.
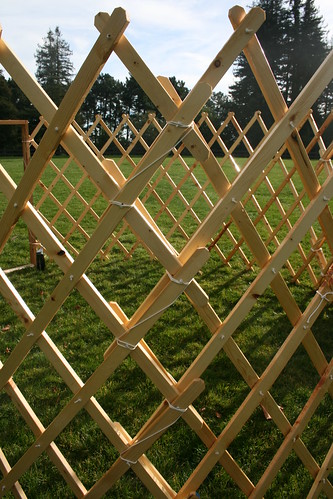
A close up of how the khana sections overlap and are tied together.
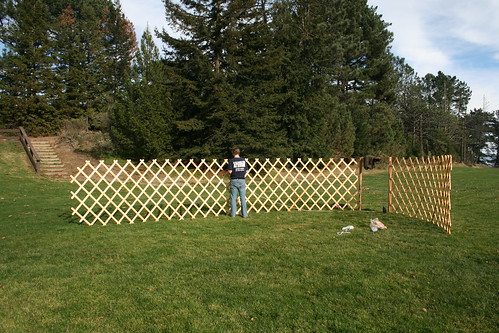
After the khana sections are connected, the next step is to band the khana into a circle. This was tricky, because every time we moved one part of the circle to fix it, another part went out of shape! We spent a lot of time trying to get this right, because if the yurt frame isn't in a perfect circle, then the roof poles will not sit right. When it looked all in place, we measured out the diameter to see if we had set it correctly to 12 feet. Amazingly, it was just 2 inches shy of 12 feet.
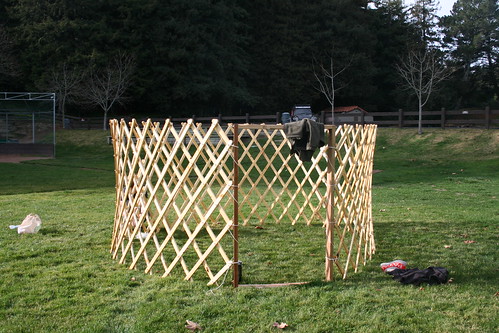
We finally got the walls of the yurt into a perfect circle.
Next it was time to raise the roof! It is a Mongolian yurt building superstition that the roof must be raised from within the yurt. You can NEVER pass a pole over the walls (or you will have bad luck with your yurt, or maybe bad luck in general). You have to have them inside and raise them upwards. So that's what we did. The roof poles are connected to the walls by a cable that remains under tension, which is tied around the circumference of the yurt and rests on top of the walls.
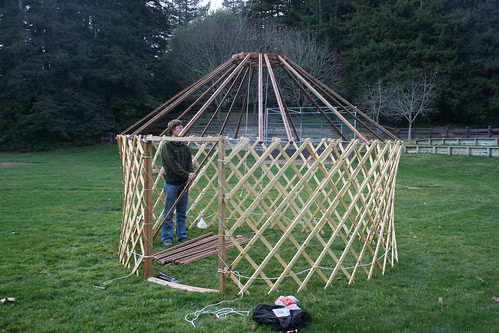
The yurt roof and crown stands with less than half of the poles in place.
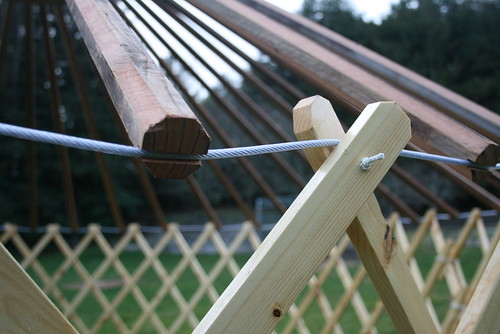
A close up picture of how the roof poles connect to the tension cable on top of the khana walls.
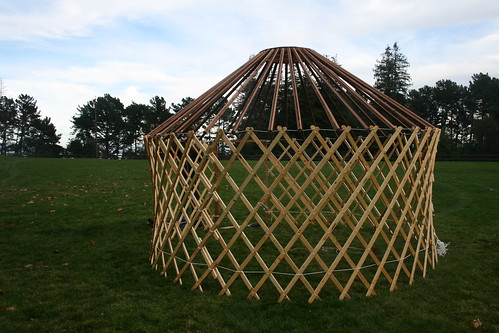
All of the roof poles are in place.
In addition to the tension cable, which serves dual purpose to hold up the roof poles and keep the khana from spreading outward from the weight of the roof, there is also a belly rope I weaved through the wall towards the bottom to support the khana there too. The final test to see if the roof poles and crown are properly seated is to hang from the crown. This was by far the scariest and the most fun part about the frame raising! But no matter how much we tugged down on the crown, it didn't want to come down lower. We didn't measure the angle of the roof, but to me, the roof seems to be sitting at slightly too sharp of an angle. I designed it to sit at 32 degrees, but it seems more like 35 degrees.

At first conservatively, Romy hung from a rope slung over the crown.
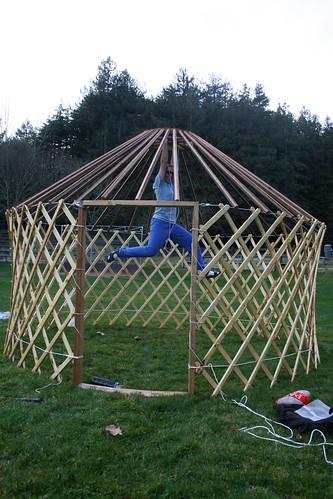
Then Jenn was hoisted up and hung directly from the crown. Weeeeee!
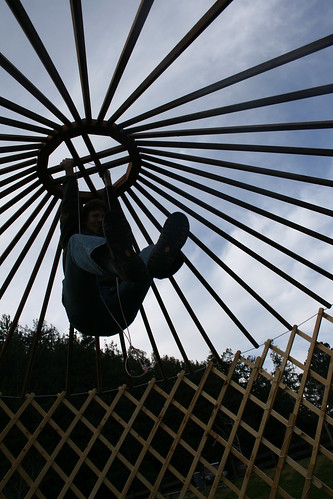
Romy hanging from the yurt crown.
After having lots of fun hanging from the crown, we took more measurements which we will need to started making the canvas cover. We didn't find any odd things, which is good. Everything was just as it was designed to be! Some tricky things that happened when we were putting up the roof poles, was that some of them seemed too short. But Romy later discovered that they weren't really too short, but the yurt was not in a perfect circle. Also, some of the roof poles that seemed short were not coming out of the crown at the correct angle. Once we shifted them left or right, they reached the tension cable with no problem. Here are more pictures from the frame raising (and even more here):

Its a bit dark, but this is another view of how the roof poles connect to the walls.
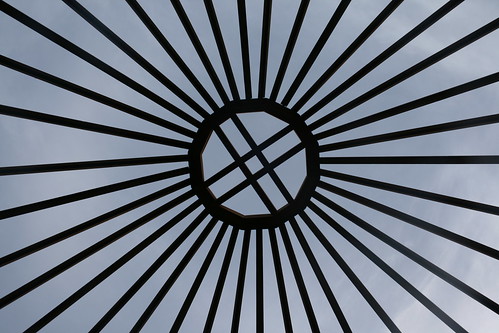
View of the crown from inside the yurt looking up.
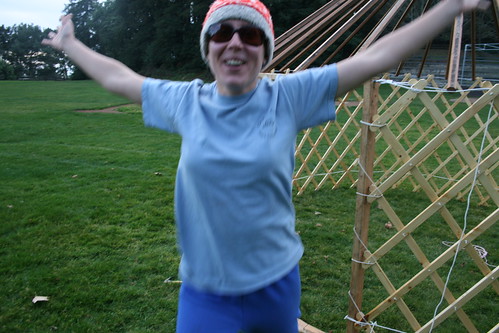
Jenn really happy that the yurt went up smoothly! Success!

0 comments:
Post a Comment