Sunday, November 15, 2009

Update on my Yurt

I spent this weekend working on my yurt again. I got a lot done, and I'm really happy about that! But I've also been working on it sporadically during the past few weeks after I get home from school. After I finished putting together the crown, I sanded it down to even all of the jumps out of the wood, then filled in the holes and gaps. I got a type of wood putty that resembled tile grout, but it was light brown. It was hard putting the putty into the gaps, since it was very course and sandy (not like putty at all) and at first I was really upset at myself for not opening the little bottle up at the store to check its consistency. But the stuff dried very fast, and sanded down well, and didn't crack or anything yet. So overall I'm pretty happy with how the grout/putty turned out.


Sealing the Yurt Crown
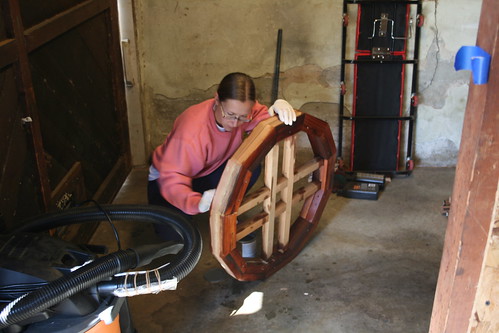
I am sealing the crown after I sanded and puttied it.


Since last time, I decided to paint the crown in a traditional Mongolian design, bright red, orange, blues, pinks, and yellows. That is why I am sealing it instead of varnishing it, because I will paint right over it in the next few weeks. Come to think of it, I may hold off on painting it until I finish the frame of the yurt and put it up once as a test.

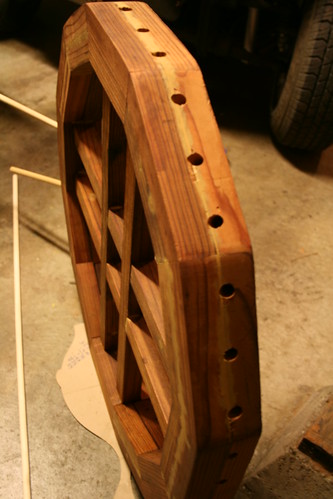
After the wood sealer was dry on the crown, I drilled holes into it for the 36 roof poles to slide into. The roof angle is 30 degrees, so all of the holes had to be drilled at an angle, and made for quite a hard time fighting with the drill press. One hand was turning the wheel to bring the drill down, the other hand was holding the angle finder to make sure I was drilling at the correct angle, and both my legs were bent, supporting the wheel securely. Too bad Romy wasn't there to take a picture. I must of looked funny!


Yurt Crown with Drilled Holes
The yurt crown with 36 holes drilled into it.


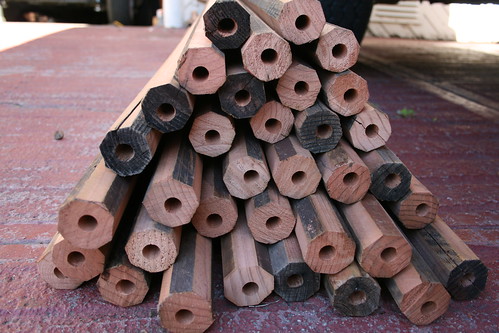
The crown now is basically finished, except for some decorative touches (like the painting and some bowed sticks I will add later to support the rain dome). So next I moved on to finish the roof poles. Since they were still rough (all I did last time was round them out), I had to cut each of them to 6 ft. This wasn't too hard, but it was time consuming. Some ends were split, so those were the ends I cut off. Other ends had knots in them, so I also chose to cut those off too.


Yurt Poles Cut to 6ft
All 36 roof poles are now 6 ft long.


To attach the roof poles to the crown, I decided to go with a 3 inch long dowel pin that is 1/2 inch thick. I cut those to size from a long dowel rod I bought at OSH (a hardware store). That was much cheaper than ordering real fluted dowel pins from a supplier. I only needed about 40 dowel pins, but usually large dowel pins like that are sold in bags of 100! Anyways, 2 inches of the dowel pin goes inside the end of the poles, and 1 inch will stick into the crown. The dowel pins are now part of the roof poles. But to make drilling easier for myself, I first drilled a 2.5 inch deep hole into one end of each pole (1/2 inch thick) and then cut the same end off each pole at an angle, to accommodate the slope of the roof. In the process, about 1/2 and inch was sheared off, which is why I had to drill the hole 2.5 inches deep at first instead of 2 inches. It is much easier to drill into a perpendicular surface than into one that is angled at 30 degrees!


Yurt Poles with Holes
The holes for the dowel pins are drilled into each end of the yurt roof poles.


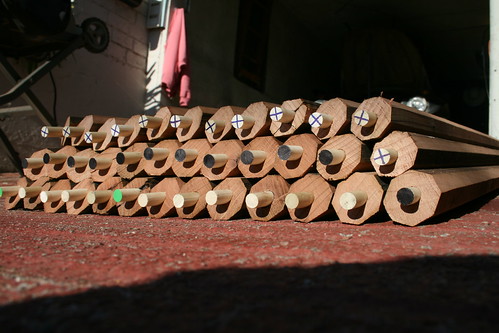
As an added complication, since the yurt crown is a polygon instead of a true circle, some of the poles come at an angle to the crown (I'm not talking about the angle of the roof slope). There is only one roof pole per polygon side that comes in straight on, and that's the one right in the middle of each polygon section. The other two come in at opposing 10 degree angles. So I had to cut each pole either straight on with a 30 degree slant, or +10 degrees with a 30 degree slope, or -10 degrees with a 30 degree slope. Consequently, I labeled the end of each pole so that it will be easier to build it.


Yurt Poles with Dowels
Each roof pole is labeled and cut with its corresponding angle.


I also cut a notch into the other end of the poles for the wall attachment, but I will save explaining that for another post.

Tuesday, November 10, 2009

Natural Hot Springs of the Eastern Sierra

We first heard of the secret natural hot springs in California a few weeks ago when our friend from the vwcamperfamily group, Melissa, told everyone at the Ocean Cove camp-out about a place she went to on the eastern side of the Sierra Nevada mountains. Up on the mountainside, she said she found a place called Buckeye Hot Springs where she dipped in a hot creek, a geothermally heated source of water which drained down the slope creating a creek. Local people in the past made small hot tub-sized pools to retain some of the hot water so that it is nice and convenient to sit and bathe or soak in the nature. After she told us about this place, she pulled out a book which was a sort of guide to Buckeye and 100 other natural hot springs, most of them along the eastern Sierras and in the state of Nevada. We bought our own copy when we got home after that weekend off Amazon.com, and it arrived at our door the next week. We were ready to go find some of those secret soaking spots ourselves!
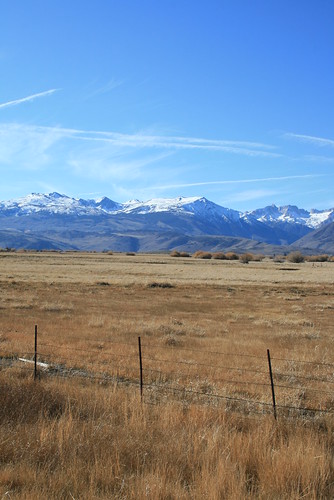

The Sierra Nevada
The eastern Sierra Nevada from Hwy 395


We intended to go last weekend, but the bus was having issues staying running, so we waited until my birthday weekend to go. All week Romy fixed up the bus and we cleaned and got it ready for the big trip over the mountains. We left Friday afternoon from Oakland, and our goal was to make it to Reno by dinnertime for a cheap prime rib dinner special at the Cal-Neva. We've been there before with Nicole and Marcel, so we knew it was good. We got so much food for so little money! We ended up packing half of it up in a doggie bag and stuffed it in the fridge inside the bus. Then we continued driving south to Carson City. We were looking for a place to sleep, and we remembered that in Carson City there was a 24 hour Wal-Mart on the south end of town. It ended up being extremely quiet and there were plenty of spots off to the side of the parking lot which were dimly lit and level. For those of you who have never tried it, 24 hour Wal-Marts are a great way to go stealth camping (but not in a tent, of course)!
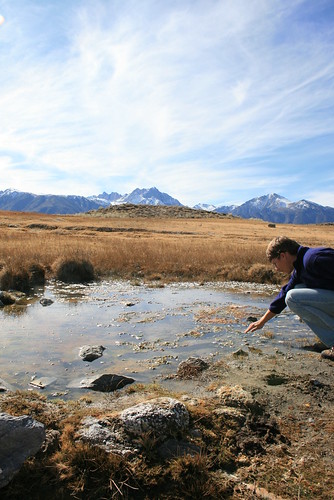

Shepherd's Hot Spring
Romy is testing the water temperature of the source of Shepherd's hot spring.


The next morning we woke up and hit the road. Many of the hot springs we wanted to visit were near the Mammoth Lakes area, a big ski resort and summer recreation place on the eastern Sierras. My favorite part about the eastern Sierras are how, after steadily climbing higher and higher from the west, they seem to plunge down back to earth dramatically, creating a tall wall of jagged peaks. To the east lie a chain of valleys (still at high elevation, roughly 5,000ft on average) and further east rise even more peaks which continue on into Nevada. In the long narrow valleys, there are many natural hot springs, formed when water, which percolates down into the earth, is heated from within and is forced to rise back up through cracks in the earth's surface. Some hot springs are spewing hot water than once fell as rain thousands of years ago! When you bathe in these natural springs, its like you are bathing back in time.
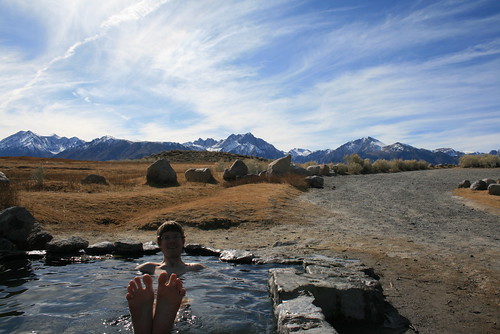

Shepherd's Hot Spring
Romy soaking in the tub at Shepherd's hot springs.


Most of the natural hot springs are located on public lands, so anyone can go and soak in them, as long as you can find them. Each have their own source, the spot where the hot water comes out of the ground (usually very hot). Like in Buckeye, in the past, some local people created tubs, usually out of rocks and concrete, and plumbed in the hot water from the source to the tub by PVC pipe or simply digging a small ditch which channels hot water into the tub. All are very primitive, but they are wild and free. Developed resorts and spas basically do the same thing, except they build a fancy building and large swimming pools, and charge a lot of money to go swim in "their" hot spring fed pools. It almost seems silly after visiting and soaking in the natural springs because you are so far removed from the natural phenomenon. It is hard to tell if you are swimming in a heated pool, or if the pool is really fed by the hot spring. Swimming at a resort looses its ambiance a little.
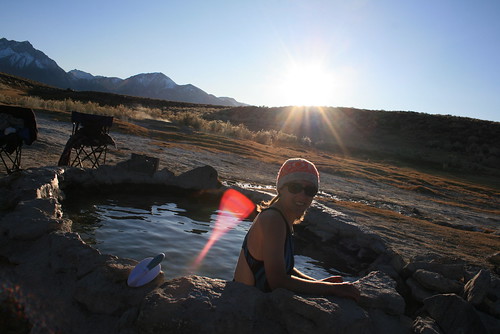

The Crab Cooker Hot Spring
Jenn in the Crab Cooker as the sun sets.


The first hot spring we went to was called Shepherd's hot spring. Supposedly, some shepherds from the valley built the tub out of rock and concrete, so it was named after them. The tub was a little green, with algae stuck to the sides. It needed to be scrubbed out, but it wasn't horrible. The algae is not harmful. The second hot spring we went to towards the afternoon was not too far away, about a quarter mile to the south. It was called the Crab Cooker, because the water at the source is so hot, you can literally cook crab in it! When we found the tub, it had been drained and scrubbed, so it was extremely clean (as clean as a rock and concrete tub can get in the great outdoors). We found the valve and opened it to let the hot water from the source flow in. The tub was within 30 feet or so of the source, so when it flowed into the tub, it was still crazy hot! It burned the flesh, so we had to wait almost 3 hours for the water to cool down once the tub was filled up. We jumped in right before sunset, to our relief, because as the sun dropped behind the mountains, the temperature started to plummet. We were toasty warm in the 105F water, while the air temperature was hovering just above freezing. And this hot spring had one of the best views of the mountains all around us!
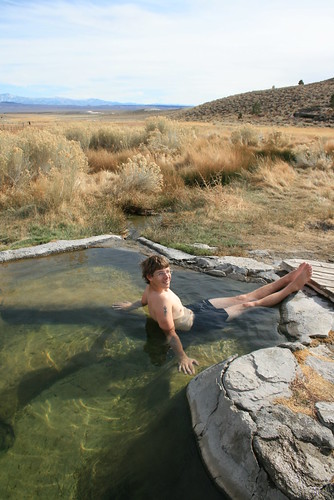

Little Hot Creek
Romy relaxing in the tub at Little Hot Creek.


Being Saturday night, other people were also visiting the hot springs, so we were joined by a group of 4 people from the LA area. They stayed for a while, and we chatted in the tub, and before it got dark, they left. Me and Romy were left to watch the stars in the sky, and the milky way was right above us. When it was time to get out, we realized that it was really cold outside. . . our towels being moist from going in and out before were now frozen stiff in the shape that they were draped over the folding chairs! We quickly shook them out, dried off, and ran back to the bus. Since it was really cold, we pulled out the propane catalytic heater, but sadly found out that we were low on propane, so the heater was putting out minimal heat. So to warm up, we cooked some chili and jumped into the sleeping bags. It was well below freezing, but we were warm in the sleeping bags, finally.
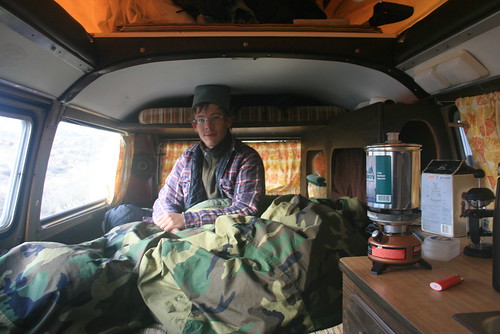

Freezing Morning in the Bus
Making morning coffee in the bus.


The next morning, after eating breakfast and making coffee, we searched for a hot spring that the people who joined us last night in the Crab Cooker told us about. It was called Little Hot Creek, and they said it was pretty secluded, far down a dirt road to the north. We headed that way and eventually found it, although it was pretty well hidden behind tall sage brush on the other side of the Little Hot Creek which was the source for the tub. There were also good camp spots right up the hillside.
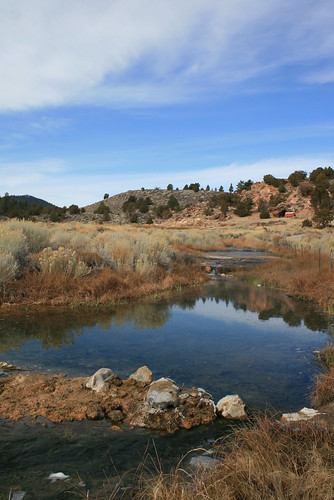

Little Hot Creek
Little Hot Creek looks like a normal creek, but it is really warm!


After soaking in the Little Hot Creek tub, we moved on to see another famed hot spring called Wild Willy's. It was a short hike down a wooden boardwalk to the source of Wild Willy's. There used to be a man made tub there, but it was removed in order to restore the hot spring back to completely natural. But where the pool used to be, there was still a dug out area where people could bath, although the bottom is more "rough." We didn't swim here because we wanted to start heading back north towards Carson City again, to check out more hot springs in a different area. So far we stayed within a 10 miles radius and saw 6 different hot springs already!


Wild Willy's Hot Springs
The natural pool at Wild Willy's hot spring.


The last hot spring we visited was right out of the town of Bridgeport, California (the coldest place in California) and was the most popular. It was called Travertine hot springs, and was named after the travertine formations that form as minerals in the water are deposited (similar to stalagmites or stalactites). There were multiple sources at this hot spot, and there were 3 sets of pools dug out here. The most spectacular were right under the travertine, where locals carved tiny channels to flow into pools which had been recessed into the ground.
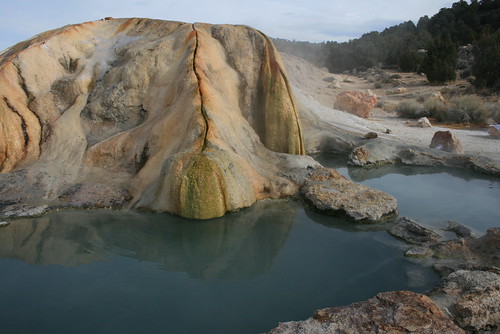

Travertine Hot Springs
The pools at Travertine hot springs.


We met an interesting man named Lincoln and spent most of the night bathing and relaxing, talking to him, and other people (mostly locals who dropped in every once in a while all through the night). The temperature dropped pretty quickly, so we basically stayed in the pools were we were almost too hot at some times, even bringing our pots, pans, stove, and cutlery pool-side to cook dinner! As the sun dropped, the sky became bright with stars. There were so many shooting stars out, I couldn't believe it (it wasn't even during a meteor shower)! It was awesome!
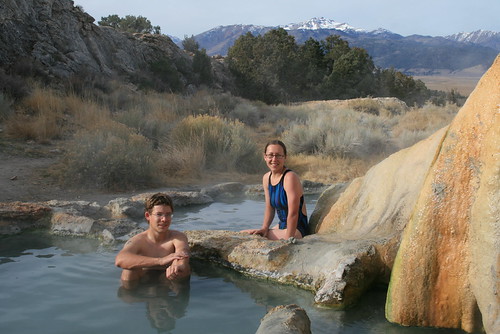

Travertine Hot Springs
Romy and I at Travertine hot springs.


We finally convinced ourselves to get out of the pools at about 10pm or so, and we quickly jumped into our sleeping bags in the bus. That night was the coldest. The next morning, when we woke up, we made some coffee, poured it into our travel mugs, and hit the hot spring to warm up! I never enjoyed a morning cup of coffee in a better location (and it was my birthday!). A local who was walking his dogs walked by and started talking to us. He said that the overnight low was 15F, and that the area around Bridgeport had 10 times as many wild cougars as the rest of the state. I don't know if that was an exaggeration, but maybe. He also said that that morning was the annual cattle drive, where farmers and wanna-be cowboys drive cattle from the valley over the mountains into Nevada where they graze for the winter months. It started getting later and later in the morning, and we didn't want to leave, but sadly, we had to go back home that day. So out we went, dried off, and hopped back into the bus. We will be back!
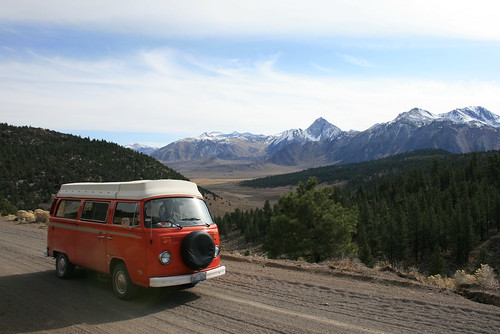

Bus on CA203
Headed home.

Sunday, November 01, 2009

Yurt Crown Almost Finished

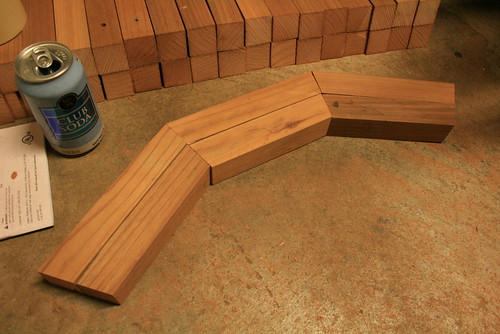
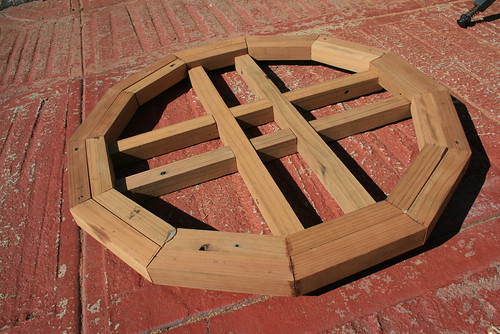
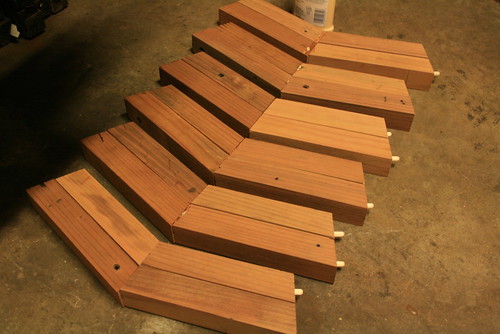
Today I spent almost all day finishing up the crown. The crown consists of two rings, each with 24 individual pieces which are held together in a ring form by wooden dowels and glue. This by itself isn't strong enough, so I made a inner supporting cross brace thing, in the shape of a tic-tac-toe.


Yurt Crown Peice
6 of the 24 pieces that make up the double ring of the crown


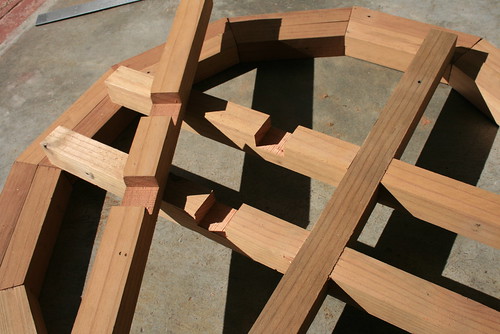
I made the inner crossbars by cutting four pieces of the salvaged redwood 2x2's slightly larger than the inner diameter of the ring. I cut grooves into these pieces so that they would snap into each other.


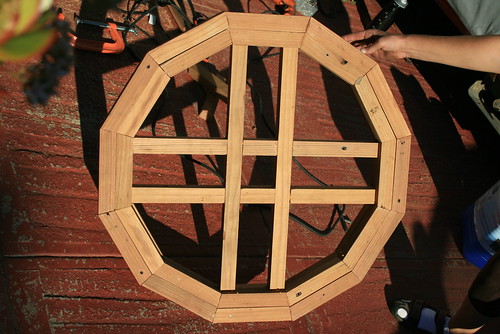
The Yurt Crown
The inner crossbars of the crown.


Next, I recessed the 8 spots where the crossbars meet the ring with a router tool. I then made the corners square with a small bit on the Dremel tool. The crossbars sink half way into each ring, and the rings sandwich the crossbars in.


The Yurt Crown
The crown crossbars are recessed half way into the top ring.


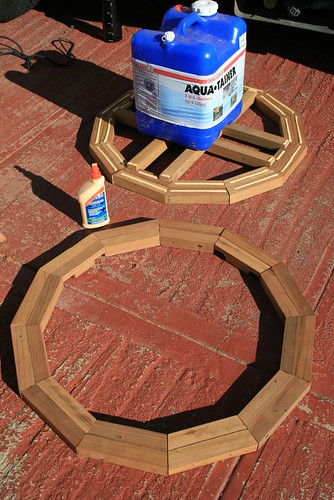
After cutting notches in both the top and bottom rings, it was ready to be glued together, sandwiching the crossbars in the middle. Each notch had to be traced out and measured individually.


Gluing The Yurt Crown
Getting ready to glue the top and bottom rings together.


After the rings were pressed on top of each other, I used long wood screws to screw them together, for added strength, to make sure the sandwiched pieces wouldn't come apart. These were the only screws in the entire structure of the crown.


Me and The Crown
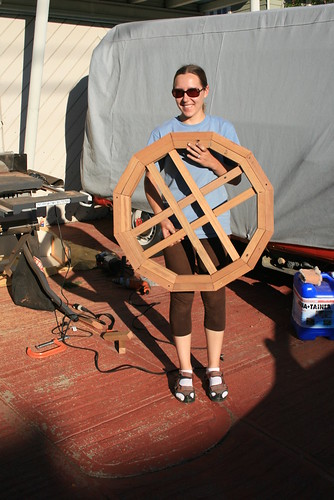
Me and the crown all put together!


The crown is pretty strong! The crossbars really made a great difference in its strength. I am letting it dry overnight, and the next thing I need to do is sand all of it again to even out any bumps or jumps (some pieces didn't join exactly flush).


The (almost finished) Yurt Crown
A closer look at the crown.


Its not perfect, but after sanding and filling in any gaps with wood putty, I think it should look a lot better. I am debating whether or not to just varnish and leave it natural, or paint it in a colorful, traditional Mongolian pattern, like this:

Saturday, October 31, 2009

Yurt Roof Poles

Here's an update on how the yurt is going. Last night we were supposed to leave in the bus to go visit the natural hot springs on the east side of the Sierra Nevada mountains, along hwy 395, for the weekend. But the bus wasn't running right, and we were in the middle of changing out all of the window seals in the baja so we couldn't take the baja either :-(

So we decided to just stay at home this weekend and work on the VWs and I would work on getting the yurt roof poles done. This morning, I set up the table saw and began choosing 36 2x2's that weren't cracked at the knots. I used John LaTorre's method of making poles which he outlines in his book, The Pavilion Book, a complete guide to buying, maintaining, and living in a Medieval-style tent. I met John at the vwcamperfamily camp-outs that we go to in the VWs. His book is awesome! I recommend buying it if you plan on making a tent or yurt, or even a tipi, because he gives a lot of good insider's tips.


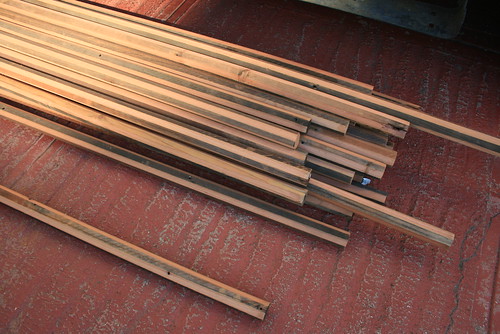
36 Yurt Roof Poles
36 yurt poles which I cut on the table saw


To make the poles, I cut the corners off to make a octagonal pole. Each pole went through the table saw four times, once for each corner to be cut off. I made 42 poles total, but ended up rejecting 6 of them because they had knots or splits that made the pole weak and bendy. In the picture, the poles look striped, but this is because the redwood was exposed to the sun for a while which made them brown. When I cut the corners off to round the poles, the red, "fresh" inside was exposed. I think it looks cool like that, but I'm not sure if the brown parts would do well being coated with some spar varnish.


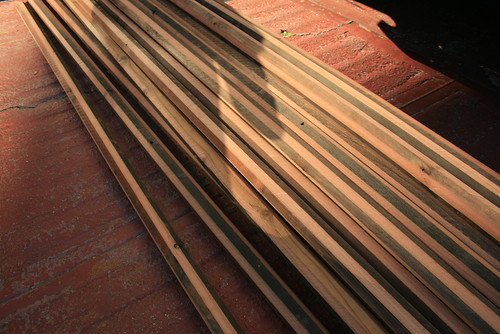
36 Yurt Roof Poles
Another picture of the poles


The next thing I need to do is cut the poles to size. Since I am making a 12ft diameter yurt, the roof poles need to be 6ft long. The roof angle will be 30 degrees, thus making the crown 2.5ft in diameter. I will also need to taper the roof poles to make them easier to stick into the crown.

Wednesday, October 28, 2009

The Beginnings of My Yurt

So I decided to start building my own yurt. I've been thinking about buying one for a while, for long term camping. Maybe one day I would live in one, but not yet. Many of the modern yurts made in America are meant to be permanent structures, although they were originally built and designed by nomadic people, like the Mongolians, and meant to be moved around a couple of times a year. Pacific Yurts is a large company that makes modern yurts, but they are expensive and heavy. The smallest one they make (12ft diameter) is close to 900 lbs! And it costs about $5000, just for the base model. There is another company, GoYurt, which makes a small lightweight (250 lb.) yurt which is meant to be taken camping and stuff. But that yurt costs $4000! Being cheap, I decided to make my own. My plan is to use as many salvaged materials as possible, with out sacrificing quality. I will spend money where I have to, but I think I can make the whole thing comfortably under $1000, including all of the tools I have to buy.


A traditional Mongolian yurt. Hopefully, my yurt will come out looking like this when I'm all finished!


I found a guy on craigslist who was giving away a bunch of 2"x2"x12ft pieces of redwood. He took apart a gigantic deck awning, and salvaged the redwood pieces. Most people who do this charge for the wood because it is pretty valuable, even used! Redwood has a lot of tanin compound in it naturally, which gives it a high resistance to rot and resistance to insects. Thats actually why redwood trees live for thousands of years. Anyways, I picked up about 20 pieces of the 2"x2"x12ft sections, and I am keeping them to make the roof rafters. Since I have so many, I will also attempt to make the crown of the yurt out of them as well.

I've also found a good website for learning how to make a yurt: simplydifferently.org. They had a nice picture of how the yurt is set up:


The way a yurt goes together.


So I've spent the past week beginning to build the crown of the yurt using the salvaged redwood. I bought a power sander off of craigslist, too, and a table saw from Sears. Romy already had a drill press, which came in very handy so far. Here are just a few pictures:


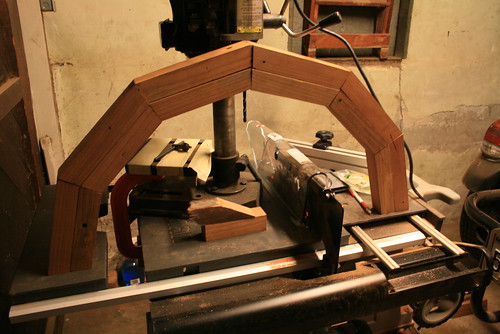
Yurt Crown Peices
These are pieces of the crown that I cut out of the 2"x2"s and dowel pinned together. They are drying out after being glued in pairs. After that is dry, I will glue them on fours.

Half Yurt Crown
This is what half of the main structure of the crown looks like. It isn't glued yet, so its a little rickety.


The yurt crown will be 2.5ft in diameter, and it will have cross members across the center, as well as a domed section. It will look something like this, but instead of being circular, it will be a 12-sided polygon, with 36 roof rafters.


A yurt crown.

Monday, October 26, 2009

VW Campout at Del Valle

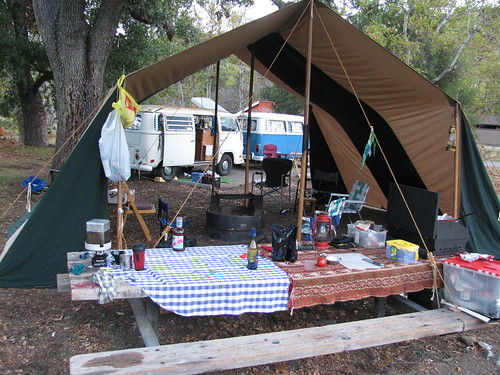
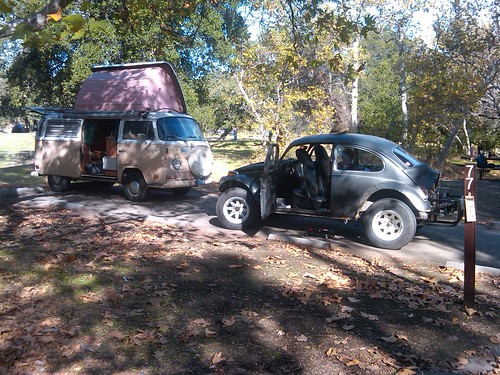
There have been a bunch of VW campouts this month! This past weekend there was one at Del Valle, an East Bay regional park near Livermore, CA. It was very relaxing. I got to read John's book, about making tents, and I also read the Yurt Handbook. I forgot to bring the camera with, but other campers took photos and posted them online. Here are some pictures:


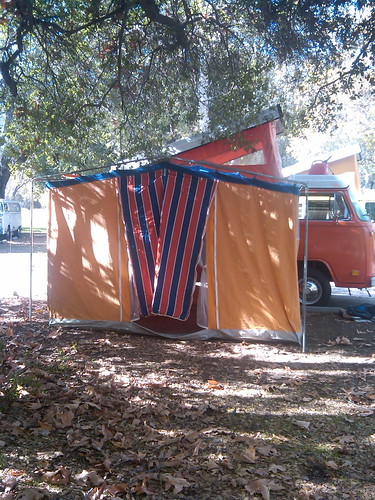
The group's camping station. The tent is a sunshade that John made. You can buy one, hand made, at Dragonwing Tents.


Romy and Aaron working on Aaron's orange bus. The green one is Regis's.


Our baja and John's dorm-mobile bus.


Aaron's original VW side tent.


Peter's red bus.