I used a 13oz water, mildew, and fire resistant canvas, which was dyed turquoise for the walls. The roof canvas was also a natural 13oz canvas, but was only treated for water and mildew resistance. The fire resistant coating makes a huge difference in the way the fabric looks and feels (and smells). The turquoise fire resistant canvas is stiffer and kind of shiny. The natural canvas is more flexible and easier to handle in the machine.
I also bought a 20 gauge clear plastic "fabric" for the yurt windows. It was really clear, and cost about $10/yd. There is no need to go any heavier, unless you are making large windows. I limited the width of each window to about 2.5ft so that the windows didn't take too much of the weight of the walls. We made 5 windows total, two of them were long (spanned almost the whole height of the wall), and two of them were medium length.
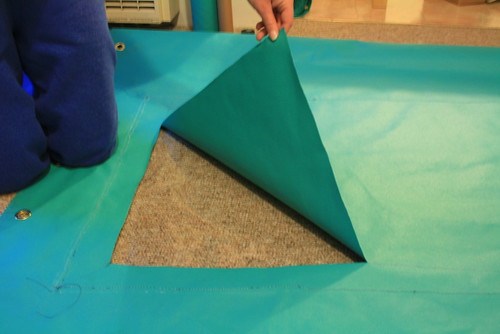
Cutting out the fabric behind the window.
To sew the windows on the walls, we first sewed the plastic onto the side of the fabric which will be the inside of the wall. Once it was sewn in place, we cut the back of the fabric away, exposing the window. In the picture above, you can't see the plastic window, but its there, believe me! We left about 2.5 inches of scrap so that it was easy to fold it back to make a nice border around the window. The corners were left exposed (they had no border), but we decided that it can be covered by a small triangle shaped trim I'll sew over it later.
Sewing the flaps into a nice border around the windows.
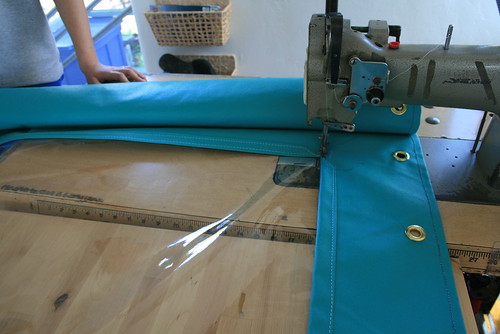
We also placed brass spur grommets at the top of the wall every 7.25 inches. Why 7.25in? I don't know, I just made that number up. I thought that spacing would be good to support the wall. The total amount of grommets was about 60, I think, supporting a wall 36ft long. I used 1/2inch spur grommets (#4), which required a special tool. The tools, called a die set, and hole puncher, are specific to the grommet size, so you will have to buy the same size tools and hole puncher as you do grommets. I ordered my tools and grommets from Sailrite.
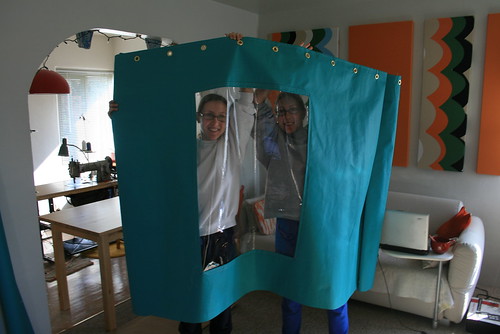
Me and Nicole (my twin sister) with a finished window. You can also see the grommets.
Once the windows and grommets were done on the wall, that was about all that needed to be done (for now). So next we moved on to finishing the roof. We first sewed together the final seam which completed the cone shape of the roof. Then we cut off the scraps which hung over the sides to make the roof circular. Then we sewed a roof band along the circumference of the roof to make a tight roof line. On the inside of this roof band, we sewed a series of rope loops which were spaced at 7.25 inches, the same as the grommets. The loops of rope fit through the grommets at the top of the wall to join them together.

The rope loops sewn on the underside of the roof, along the circumference.
Just getting to this point took us almost two days. The wall was still not completely done, because we still had to sew on the bottom band, a strip of vinyl or plastic material (not canvas) which will be in contact with the ground and be tucked underneath the khana (the wooden part of the wall). This band is there because you don't want the canvas to be in contact with the ground because it will absorb water and possibly start to rot. Plus we didn't make a door flap yet. But at this point we were really excited to get the yurt built to see if what we sewed so far was okay or not.

11 comments:
ohhh! I've just found yoru blog and have spent most of the day following it, up to this point... I can hardly wiat to hear how the raising of it went.... so excited to know! glad i found you.. .I will be following you!
we are moving to a yurt for our full time residence, so this is all very exciting for me!
Wow! How big is the yurt that you are moving into! How exciting!
Jenn, Found you on VW family thank you and Romy joined our Facebook Fan page yesterday (YesWeCan CamperVan). Your blog is amazing. So much care and attention to detail in what you write and your photos are beautiful, too. Love these posts about your yurt and also the hot springs last year. Thank you very much.
nước aquafina quận 6<br /
great thanks you very much
nước aquafina quận 7
Mineral water is water from a mineral spring that contains various minerals, such as salts and sulfur compounds. Mineral water may be effervescent (i.e., “sparkling”) due to contained gases.
Traditionally mineral waters were used or consumed at their spring sources, often referred to as “taking the waters” or “taking the cure.” In areas such as spas, baths, or wells, cities developed. The term “spa” was used for a place where the water was consumed and bathed in; “bath” where the water was used primarily for bathing, therapeutics, or recreation; and “well” where the water was to be consumed.
nước aquafina quận 8
Today it is far more common for mineral water to be bottled at the source for distributed consumption. Travelling to the mineral water site for direct access to the water is rare, and in many cases not possible (because of exclusive commercial ownership rights). There are more than 3,000 brands of mineral water commercially available worldwide.
nước aquafina quận 9
“Mineralized” water is water that may come from drinking water source and to which minerals are added; therefore obtaining its mineral properties artificially, whereas Mineral Water gets its distinction through a natural processes and not by human intervention.
Cku Người đề nghị bỏ con gấu pán đa đó đi giá yến sào khánh hòa
I realized that if I made the floral silk fabric into a slip dress, I could make a flowy cropped top with the blue polka dot fabric that could be worn over top of the dress. That way I could still mix the two prints together. beginner sewing machine
I got a fairly large custom order and it came out so well I wanted to post some pictures. I made two sets of bumper pads, two baby quilts, two crib dust ruffles, a valance and curtain, and a diaper organizer to hang from the crib.http://sewingmachinejudge.com/sewing-machine-the-easiest-way-to-use-it/
Today it is far more common for mineral water to be bottled at the source for distributed consumption. Travelling to the mineral water site for direct access to the water is rare, and in many cases not possible (because of exclusive commercial ownership rights) best electric can opener.
Post a Comment