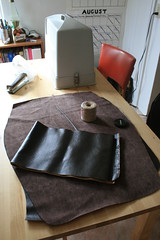
My sewing station.
I started by making a pattern out of two original seat covers from John's bus in Colorado. He sent them to us after we went and visited the family and Romy helped them out on their project restoring their bus (see the Rocky Mountain National Park post in July). When the seats arrived, I took the covers off carefully, and split them at the seams. Then I traced the outline onto some cardboard and cut out the cardboard pattern. The original seats were half vinyl and half cloth, and I thought it would be best to try to stick to the original design (since my previous corduroy idea wasn't so hot), so at the fabric store I bought velvet brown cloth and dark brown vinyl.
At the fabric store, there were so many options to choose from for the vinyl. But after looking at most of them, I noticed that there were only two price ranges: really expensive and cheap. I was immediately temped to go the cheap route, until I did the "stretch test." Since I knew that the seats will be stretched a lot, the material I chose had to be strong. When I stretched the cheap vinyl (it looked like an outdoor table cloth) the material permanently stretched out and the plasticy part looked all grainy and almost ripped. Not good! When I did the same test to the expensive vinyl, it rebounded back to its original shape, and the backing was super strong, like leather. I decided to buy the later, having no other choice. I was later very glad that I bought it, although it cost $30/yd!
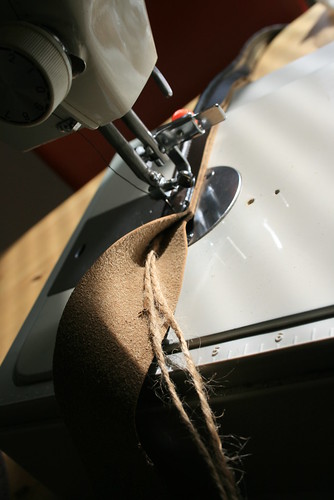
To make the piping, I sewed two strings of twine into long strips of vinyl. To make thicker piping, just add more twine.
The original seats covers also had piping along the seams, and I had been meaning to try making something with piping, but I wasn't exactly sure how. So then I went to the book section of the fabric store and read some of the upholstery books (how convenient!) to see if they had any instruction on how to do piping. I found one book that did, and all it is is a few strings of twine sewn into a long strip of cloth. It looked super easy, so I bought a little extra vinyl to do the piping as well.
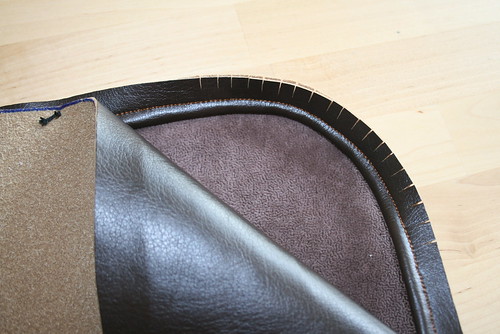
Sewing together the velvet, piping, and vinyl.
The next thing was to start sewing. After fighting with my old sewing machine (taking apart the bobbin assembly, putting in the needle backwards, etc. . .) I finally got it going. I was horribly scared that I would screw up and end up wasting all of the money I spent on materials (although I spent only half the amount I would've if I bought custom made seat covers from VW specialty shops, like sewfine). But it wasn't that bad, and once the machine was going, it was pretty quick to make all four sections of the seats.
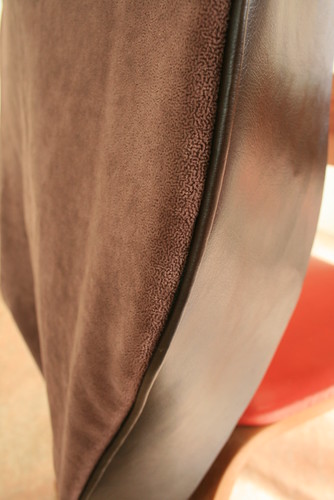
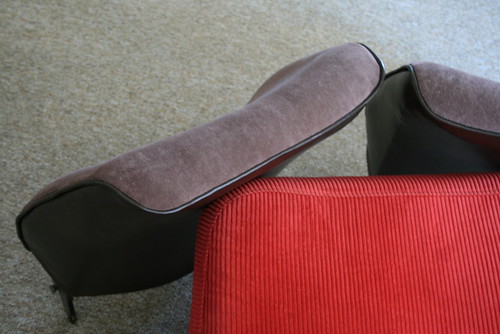
One of the finished seat backs. The piping makes the seams look better and also adds strength to the seams.
We bought pre-shaped foam and felt cloth from the busdepot (who actually get it from TMI) about a week beforehand and when it arrived, we were ready to put the seat covers on the frame. After many trials and errors, Romy and I figured out that it was best to secure the felt around the seat frame with string, then stuff the seat cover with the foam, before slipping the seat cover over the frame. The aftermarket foam made it a little over-stuffed, so the seat covers were hard to pull on and secure with the original metal hanger bar-and-hooks system. But after a lot of sweat (seriously it was really hard to pull) we finally got the seat covers on and they really look great!
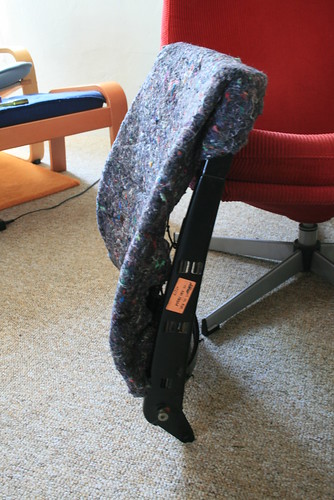
We first covered the seat frames with felt so that the metal springs wouldn't tear into the foam or the seat cover fabric.
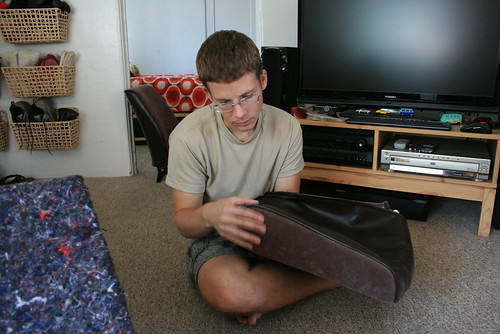
Romy is stuffing the seat-back cover with the foam before slipping it onto the felt-covered frame.
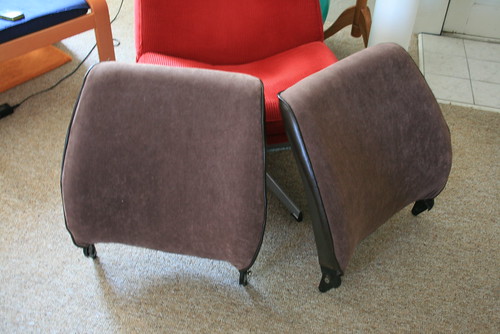
The two seat-backs are all finished! The front and. . .
The backs and top.
I am still working on the seat bottoms. . . to be continued.

3 comments:
I know this is an old old post, but you don't happen to still have the pattern you made for your seats, do you?
No sorry I don't! The seats that I used as the pattern were really old and in bad shape. I think I threw the pattern away when I was done.
Best material of table cloths for party and events
Table Cloth Hire
Post a Comment