Saturday, August 22, 2009

Re-reupholstering the Front Bucket Seats in the Bus

After two years, the corduroy on the front bucket seats in the VW bus were starting to wear down. When I first did the reupholstery, I guess I chose a bad fabric for it. Not only that, but I didn't have the correct pattern for the seats, and our old seat frames were deteriorating, with broken springs and hooks. So now that the prelim exams at Berkeley are over, I had time to re-reupholster the front bucket seats!

Bus Reupholstery
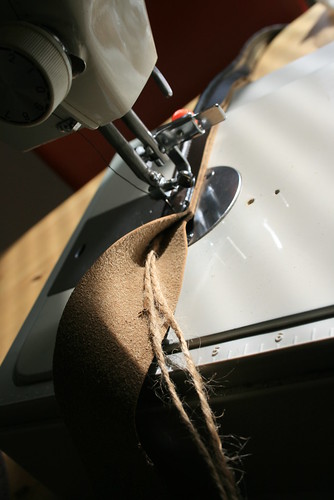
My sewing station.


I started by making a pattern out of two original seat covers from John's bus in Colorado. He sent them to us after we went and visited the family and Romy helped them out on their project restoring their bus (see the Rocky Mountain National Park post in July). When the seats arrived, I took the covers off carefully, and split them at the seams. Then I traced the outline onto some cardboard and cut out the cardboard pattern. The original seats were half vinyl and half cloth, and I thought it would be best to try to stick to the original design (since my previous corduroy idea wasn't so hot), so at the fabric store I bought velvet brown cloth and dark brown vinyl.

At the fabric store, there were so many options to choose from for the vinyl. But after looking at most of them, I noticed that there were only two price ranges: really expensive and cheap. I was immediately temped to go the cheap route, until I did the "stretch test." Since I knew that the seats will be stretched a lot, the material I chose had to be strong. When I stretched the cheap vinyl (it looked like an outdoor table cloth) the material permanently stretched out and the plasticy part looked all grainy and almost ripped. Not good! When I did the same test to the expensive vinyl, it rebounded back to its original shape, and the backing was super strong, like leather. I decided to buy the later, having no other choice. I was later very glad that I bought it, although it cost $30/yd!
Bus Reupholstery
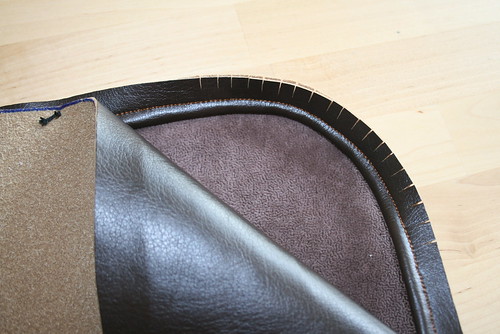
To make the piping, I sewed two strings of twine into long strips of vinyl. To make thicker piping, just add more twine.


The original seats covers also had piping along the seams, and I had been meaning to try making something with piping, but I wasn't exactly sure how. So then I went to the book section of the fabric store and read some of the upholstery books (how convenient!) to see if they had any instruction on how to do piping. I found one book that did, and all it is is a few strings of twine sewn into a long strip of cloth. It looked super easy, so I bought a little extra vinyl to do the piping as well.
Bus Reupholstery
Sewing together the velvet, piping, and vinyl.


The next thing was to start sewing. After fighting with my old sewing machine (taking apart the bobbin assembly, putting in the needle backwards, etc. . .) I finally got it going. I was horribly scared that I would screw up and end up wasting all of the money I spent on materials (although I spent only half the amount I would've if I bought custom made seat covers from VW specialty shops, like sewfine). But it wasn't that bad, and once the machine was going, it was pretty quick to make all four sections of the seats.

Bus Reupholstery
One of the finished seat backs. The piping makes the seams look better and also adds strength to the seams.


We bought pre-shaped foam and felt cloth from the busdepot (who actually get it from TMI) about a week beforehand and when it arrived, we were ready to put the seat covers on the frame. After many trials and errors, Romy and I figured out that it was best to secure the felt around the seat frame with string, then stuff the seat cover with the foam, before slipping the seat cover over the frame. The aftermarket foam made it a little over-stuffed, so the seat covers were hard to pull on and secure with the original metal hanger bar-and-hooks system. But after a lot of sweat (seriously it was really hard to pull) we finally got the seat covers on and they really look great!

Bus Reupholstery
We first covered the seat frames with felt so that the metal springs wouldn't tear into the foam or the seat cover fabric.
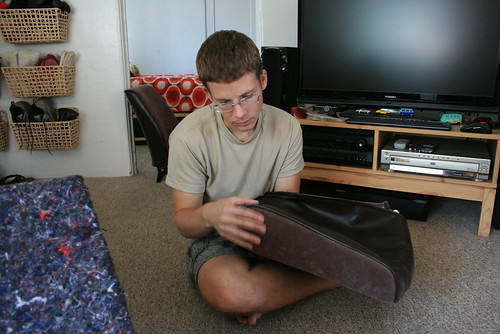
Bus Reupholstery
Romy is stuffing the seat-back cover with the foam before slipping it onto the felt-covered frame.

Bus Reupholstery
The two seat-backs are all finished! The front and. . .

Bus Reupholstery
The backs and top.


I am still working on the seat bottoms. . . to be continued.

Wednesday, August 12, 2009

Soda Siphon Fail!

The story goes far back in time to when Nicole used to live in Daytona Beach, Florida. I visited her one time with my dad, and she took me to an antique shop near the beach. It had a lot of junk in it, but I found something really cool - a 1920s art deco style soda siphon! It was around $10, so I thought, what the heck, I'll buy it and see if it works. When I got home, the soda siphon confused me, because I knew you had to buy CO2 bombs for it, but none of the ones the stores and restaurant supply shops sold were threaded, and there was thread on the section where the CO2 was supposed to attach. That actually stumped me for a while, so I put the thing in a cabinet in the kitchen and forgot about it until now.


Antique Sparklet Soda Siphon
My 1920s soda siphon.


A few weeks ago, I took a fresh look at the soda siphon, and it all of a sudden dawned on me that the CO2 bomb doesn't have to be threaded, because there must be something else that holds it tight onto the bottle. Once I got that idea, a quick search on the internet solved the mystery. There really is something, called a charge holder, that cups the CO2 bomb and screws onto the soda siphon, forcing the bomb to be pierced open. The CO2 then rushes out of the bomb and pressurizes the water in the soda siphon bottle. Gas gets forced into the water and carbonates it, while also creating pressure so that the soda will stream out of the soda siphon when you open a valve.

The next problem was finding parts for my antique soda siphon. Many modern ones exist, but I guess there is a small cult which collects and uses antique soda siphons. What a relief it was when I found some parts on http://prairiemoon.biz, a beverage company. The siphon needed new rubber gaskets, a charge holder, CO2 bombs, and a special tool to unscrew the part where the CO2 bomb attaches.


Antique Sparklet Soda Siphon
Romy screws in the CO2 bomb in the charger holder.


The UPS truck came today with all of the parts from Prairie Moon. Romy and I were so excited, we opened the package right away and started putting the new gaskets on the soda siphon and basically revamping it. When we did everything we could, we decided to go ahead and try making our first liter of bubbly water! Fearing that the thing might explode or something, we took it to the back porch steps outside and attached the CO2 bomb in the holder, screwed it in, and . . . .


Antique Sparklet Soda Siphon FAIL!
No!!! A leak!


There was a small pop and then a rush of gas into the bottle. The water bubbled like crazy, and the air inside turned all cloudy with CO2. But then all of a sudden, a steady stream of water started leaking from the most unexpected place - the valve handle! We thought that we replaced all of the seals! And in fact, it didn't leak from anywhere but the valve handle, and we weren't even aware that there was a gasket there, but apparently there is and it went bad sometime in the past 80 years!

After all of the pressure escaped, we opened it up to try to find a way to access the gasket, but it appears that there is a permanent cap of soft metal covering the area, like a lid. The only way to get to the valve and gasket is to remove the metal cap, but we will have to destroy it to do so. I guess that is what we will have to do, and then we'll have to make a new lid when we're done.

I'm so happy that we at least got it going!

Sunday, August 02, 2009

California, The Golden State

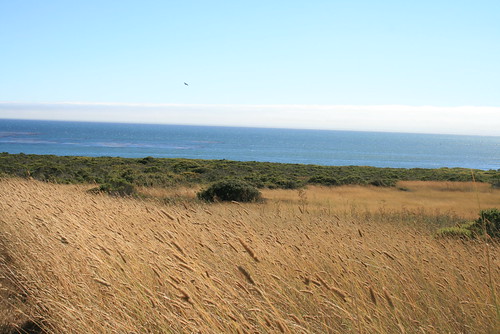
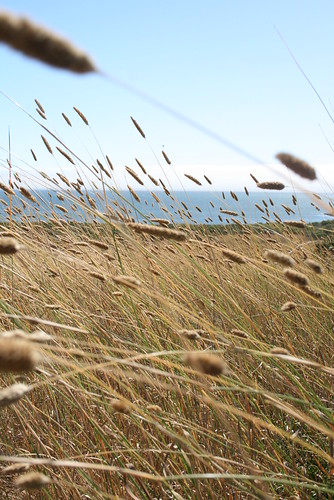
It is now the middle of the summer here in California, and the state has fully turned golden! When we first moved here last year in July, all the grass-covered hills were dry and golden, which seemed strange to me. As the time passed into the rainy winter, all of the hills sprang into life, as new tiny buds of grass transformed the hill sides into a bright fresh neon green. By January, California was the green state. Then, in April, the green started giving way to gold again, with the hill sides completely turning golden by July. Here are some pictures I took of the golden wild grasses this past weekend:


The Golden State
The redwoods in the mountains of Castle Rock State Park contrast with the golden hill sides of wild grasses.

Wild Grasses IV


Blue and Gold
The Pacific Ocean at Ano Nuevo State Reserve.

Wild Grasses III
Wild grasses blow in the ocean breeze at Ano Nuevo State Reserve.

Wild Grasses II

Wednesday, July 15, 2009

Rocky Mountain National Park and Golden, Colorado

After visiting back home in Berwyn and before we came back to our California home, we made a quick stop to Denver. It gave us a chance to visit Romy's relatives, Jeraline and John and their daughter Joanna, who live in Golden, Colorado, and also to meet up with Courtney and her mom to go hiking around Rocky Mountain National Park.


The Thurston's Deck
View from the Thurston's deck in Golden Colorado. Beyond the trees you can see more snow-capped mountains.


Romy's relatives in Golden, recently (in June, I think) acquired a 1976 VW Westfalia Bus. The whole Thurston and extended family has started restoring it so that it could get back on the road. John plans to drive it to Door County in Wisconsin in October or September for a bike ride through the county. When we arrived at their place on July 11th, Romy helped them do some minor work. But then it was time for lunch, and we went to Buffalo Bill's and had a buffalo burger. Mmmmmmm.


The Thurston Bus
The 'dragon wagon' which the Thurston family is fixing up.


In the afternoon, Romy continued to help here and there with the bus, and then we went on a drive through the local mountains in John's Miata convertible. Sadly, we had to leave that evening, but we would be back a few days later to help and get the bus running (which it did on Tuesday)! We went off to pick up Courtney and her mom at the airport, and then we all drove to Rocky Mountain National Park that night. We camped in the KOA in Estes Park.

The next morning, Courtney, Romy, and I packed up all of our stuff and headed to the back-country permit office for the national park. We picked up our back-country camping permit, and bear vault to store our food in, and hit the Fern Lake trail head to hike the Bear Lake Loop on the East side of the park.


Rocky Mountain NP
Me, Courtney, and Romy starting our hike to Fern Lake.


When we started hiking, it was sunny and warm, but afternoon thunderstorms were rolling in. We hiked through an aspen and pine forest, with abundant wild flowers and wild roses for about an hour before we made it to "The Pool," where it started raining. Although we didn't like the rain, it wasn't too bad, so we stopped under some trees out of the rain, and had our sandwiches that we packed for lunch. This was the last time we would see a good amount of other people until the end of the hike at Bear Lake. When the rain stopped and we finished our lunch, we continued on the trail. The next leg to Fern Falls was really tough because it was constantly uphill. We were breathing pretty had because of the elevation. We were over 8,000 ft. and climbing through pine forested mountainsides.


Rocky Mountain NP
Courtney and Romy hiking to Fern Lake.


When we reached Fern Falls, we took a short break, but soon continued on the uphill climb to our back-country campsite at Fern Lake, which stands at roughly 9,500 ft. We were getting more and more tired, although the hiking would have been pretty easy at sea level. By the time we reached the campsite, it was still cloudy and drizzling. All three of us set up camp in the forest, and made sure to hide the bear canister with all of food and toiletries far away, at least 70 feet away from the tents. The bears can still smell the food inside, but it is near impossible for them to open it up to get to the food. The bear eventually gives up and leaves the canister and your camp alone. Once a bear learns that it can get free food at a campsite, the bear becomes dangerous because it will always come back. Bears that never learn that they can get food from humans at campsites will stay healthy and wild and will most likely not bother anyone camping in the back country unless they feel threatened.


Rocky Mountain NP
Our campsite at Fern Lake.


Once we set up camp, we hiked an off-shoot trail to Spruce Lake, another small subalpine lake. When we got there, the thunderstorm clouds started clearing out and gave way to blue skies. This made us really happy! In the area, the stream we followed had a lot of trout in it. I tried poking one with a stick to see if it would be easy to spear one like the Man vs Wild episode, and the fish didn't move! I poked it and it didn't even care!


Rocky Mountain NP
The next morning we woke up to clear skies. Me, Romy, and Courtney in front of Fern Lake.


That evening, when we returned to the campsite, we ate and then checked out Fern Lake. There we met two other campers from Ohio and helped them cook their dinner. Once it got dark, we hurried back to camp and fell asleep. We were pretty tired. We hiked a total of about 5 miles that day.


Rocky Mountain NP
Romy and I at Odessa Lake.


Rocky Mountain NP
Another view of Odessa Lake at 10,020 ft.


The next morning, we continued our hike another 0.8 miles uphill to Odessa Lake, which stood at 10,020 ft. This lake was more picturesque because of the larger mountains in the background. Some people we saw there jumped in for a quick dip, but although it was hot out, the water was still too cold for us! We only stayed for a few minutes to enjoy the views, and then went back on the trail where were kept going up, up, and up!


Rocky Mountain NP
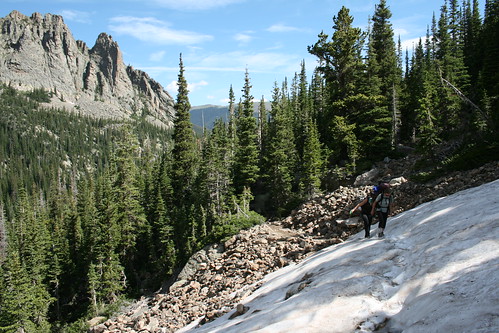
After Odessa Lake, the trail took us high enough that we had to hike over some snow!


The hike after Odessa Lake was my favorite part. We climbed up near the edge of the treeline at over 11,000 ft. The views were spectacular, and we saw snow covered peaks with waterfalls, tundra and wild flowers, and sweeping views of some valleys below us. We even had to cross some patches of snow which didn't get a chance to melt yet, although it was mid-July. The trail became pretty exposed with little tree cover in some areas, but the weather was fine and we hiked on at a leisurely pace.


Rocky Mountain NP
Jenn taking a break at over 11,000 ft between Odessa Lake and Bear Lake.


At roughly the halfway point for our hike that day, about 2.5 miles on the trail, we stopped and ate lunch on a small boulder field. Squirrels and Chipmunks ran around us and we even saw a Pika scurry past! At that point the trail began to go downhill and the hiking got way easier. Not only that, but we began seeing more people hike past as we got nearer to Bear Lake, the end of our hike and also one of the most popular places in the national park. There were more mountain meadows and small creeks that we passed, full of wild flowers until we finally got to Bear Lake.


Rocky Mountain NP
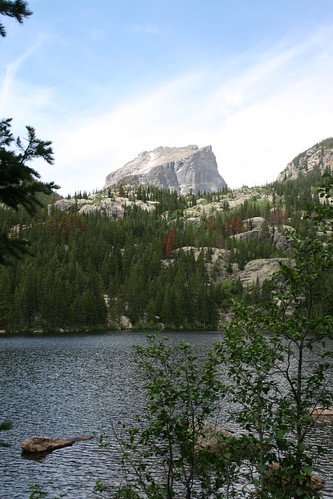
The popular Bear Lake.


We squeezed through the masses of people as we hiked past the lake and tried to find the closest shuttle bus. Since we started our hike at Fern Lake, and ended it at Bear Lake, we needed to get back to the car by shuttle bus. Luckily one left right away, so we hoped on it and it felt good to be sitting down on a cushioned seat. The shuttle drove down the road to a main station (Park and Ride) where we transferred to a smaller shuttle. It took us back down another road where we parked our car the day before at the Fern Lake trail head. We got to the car just as it started to rain on us! Like clockwork, the afternoon thunderstorms rumbled over us.


Rocky Mountain NP
The afternoon thunderstorms roll in as we made it to the Fern Lake trail head.


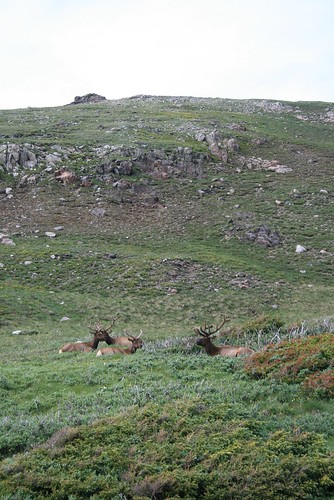
The storms passed quickly and we were already on our way to Old Fall River Rd., a dirt road which climbed to over 12,000 ft up to Trail Ridge Road (Hwy 34), the highest continuously paved highway in the US. On the way we saw Elk and Marmots, and beautiful mountain views. Then we spent the rest of our last day in the park driving the Trail Ridge Road back to Estes Park, where we camped out for one last night before going back to Denver and Golden.


Rocky Mountain NP
Elk resting at nearly 12,000 ft on Old Fall River Rd.


Rocky Mountain NP
Tundra, wild flowers, and huge mountains off Trail Ridge Rd.


Rocky Mountain NP
The top of the world.

Tuesday, July 07, 2009

Hanging out in Eastern Michigan

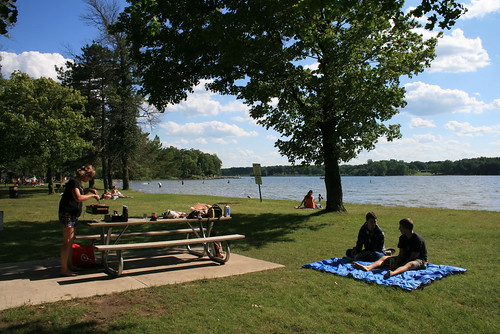
After 4th of July, we went to visit Mark and Emma in Ann Arbor, Michigan. On Sunday we checked out Mark's new house in Hamburg, MI and then we ordered the most interesting pizza I ever ate - a BLT pizza that had mayonnaise instead of pizza sauce, cheese, bacon, and diced lettuce on top. It was tasty but messy! On Monday, after Mark got off work, we headed to Big Portage Lake to have a swim and a BBQ. Here are some pictures:


Michigan
Setting up the BBQ pit.

Michigan
Emma tends to the brats while Mark and Romy relax on the blanket. When the sun went away behind the clouds it got cold.

Michigan
Me and Romy at the lake, with a fat woman in orange walking behind us.

Friday, July 03, 2009

Picking up the gold Buick

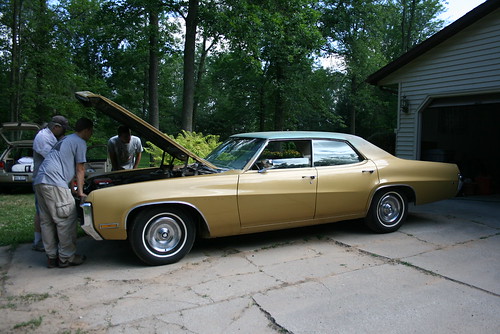
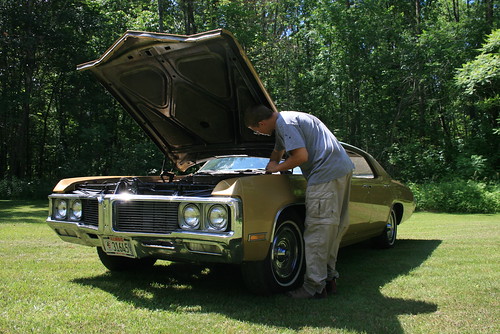
The gold Buick LeSabre 4 door, which Romy's grandma purchased in 1970, has been kept in Romy's family. Over the years, it has had a few coats of paint put on it and some rust developed since it was kept in Berwyn. Romy decided to start restoring it and part of the job included getting the body work done to get rid of the rust and then get a new paint job. Romy contacted a guy up in Green Bay Wisconsin who paints old Buicks and other old cars to do the body work and paint (Scott Scheffen - dscheffen@aol.com). He did a great job!

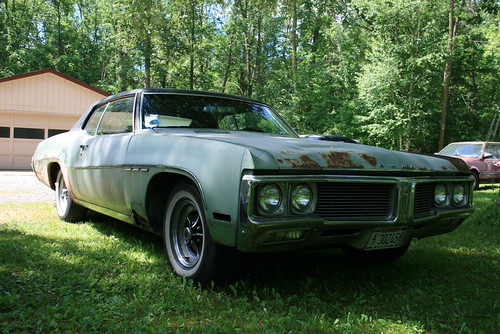
Romy also has a second 1970 Buick LeSabre, but it is a green (actually multi-colored) 2 door, which he also decided to get painted by the same guy, Scott. So on Thursday afternoon, we all packed up the 2 door Buick with camping gear and spare parts, and headed off to Green Bay. We didn't have any problems getting there, except that we arrived after dark. Scott let us camp in his huge yard, so we set up our tents and were very excited to see the car in the sunlight the next morning. Scott also made a nice fire in his campfire pit, and we had some drinks and sat around the fire.

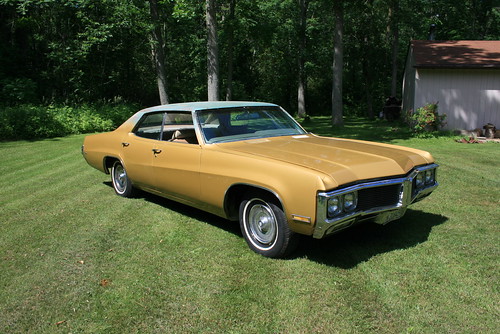
Here are some before and after pictures of the 4 door gold Buick:


The Gold Buick before it was painted in the garage.

The Gold Buick
The 'new' Gold Buick after Scott did all of the body work and paint. It was painted with the original color, Cornet Gold Poly, and had a metallic sheen.

The Gold Buick
The rear of the Gold Buick. The black vinyl roof will be put on soon, but for now, Scott just sanded it and primed the roof in preparation for the vinyl roof to be put on later.

The Gold Buick
Romy put a rebuilt 455 engine in before it got painted.

The Gold Buick
The Gold Buick on Scott's lawn.

The Gold Buick
The Gold Buick shines in the Wisconsin sun.

The Gold Buick
Romy gets the Gold Buick ready to hit the road back to Berwyn.

The Brown Buick
The Green Buick will be painted by Scott next.

The Gold Buick
Camping out in Scott's yard.