Tuesday, January 12, 2010

Yurts Are Hyperboloids

Today, Mark turned me on to the connection between yurt walls, and a hyperboloid, which is a 3D geometrical surface. But what is special about the surface is that you can create it, although it is curved, using only straight lines!

A hyperboloid 3D surface. Source: www-lm.ma.tum.de


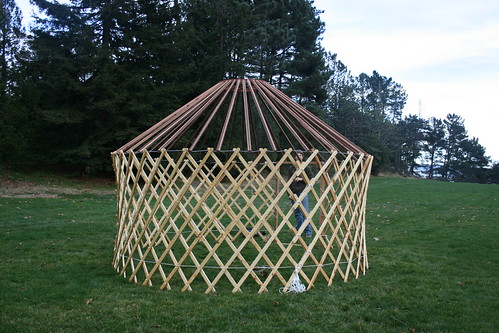
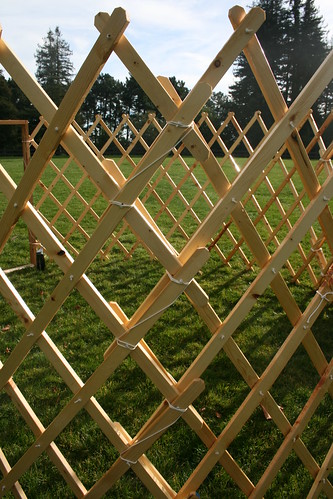
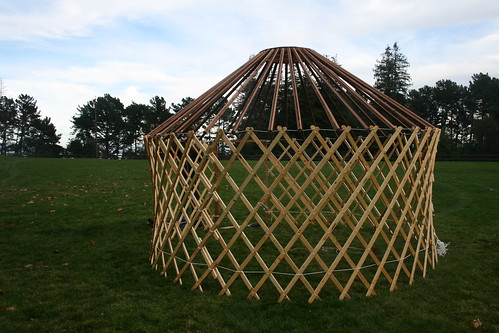
This is exactly how the walls of a yurt are put together! The individual long khana pieces are not bent, although it creates a round wall. Compare the 3D surface to the yurt:


Yurt Frame Raising
The yurt.


On wikipedia, it says that since the hyperboloid shape can be built with straight beams, it allows minimization of wind cross-section while retaining structural integrity with minimal material.

Other structures which are made of the same shape are cooling towers.

A power plant cooling tower.

Thursday, January 07, 2010

Yurt Frame Raising

The day has finally come - This morning I finished making the door frame, the last piece in the wooden frame of my yurt. Now that everything is done, Romy and I were ready to take it to the park and put it up to see if everything worked. The park we chose to go to was Roberts Regional Park, just a mile or two up the hill from where we live. It has a nice flat field cleared out surrounded by redwood trees.


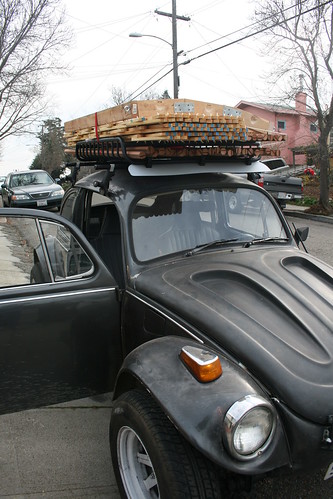
Baja with Yurt on Roof Rack
Packing up the yurt on the baja roof rack.


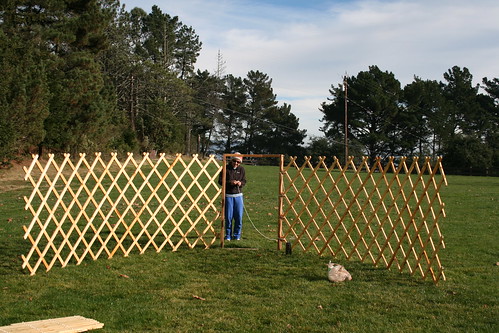
The whole yurt frame fit nicely on the roof rack. When we got to the park, we unpacked and walked the pieces of the frame onto the grassy field. The first part of the set up was getting the khana sections stretched out and connected together and connected to the door frame.


Spreading out the khana
Jenn is stretching out the khana sections and connecting them to the door frame.

Connecting the khana
Romy is connecting khana sections together with rope.


The khana sections connect to each other by rope. They slightly overlapped each other so that they could form a stronger link. The khana connected to the door frame with rope also. If this was a permanent yurt, the pieces would be bolted or screwed together. The rope, surprising, worked really well. I guess, why wouldn't it? That's how the yurts are traditionally put together.


Khana Connection
A close up of how the khana sections overlap and are tied together.


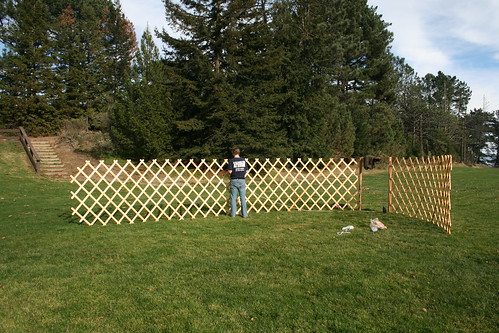
After the khana sections are connected, the next step is to band the khana into a circle. This was tricky, because every time we moved one part of the circle to fix it, another part went out of shape! We spent a lot of time trying to get this right, because if the yurt frame isn't in a perfect circle, then the roof poles will not sit right. When it looked all in place, we measured out the diameter to see if we had set it correctly to 12 feet. Amazingly, it was just 2 inches shy of 12 feet.


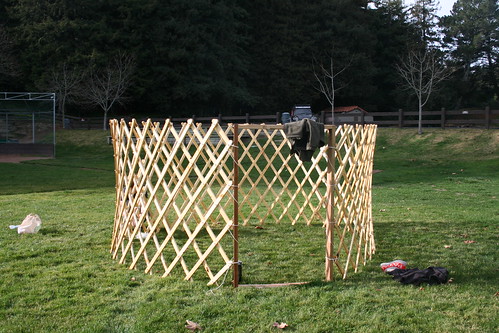
Khana in circle
We finally got the walls of the yurt into a perfect circle.


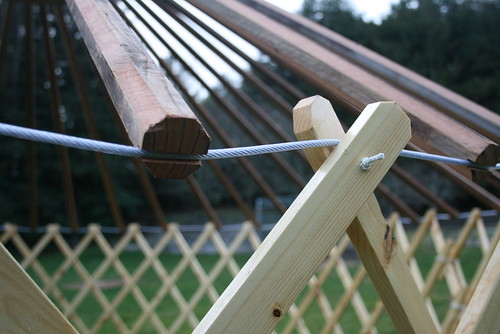
Next it was time to raise the roof! It is a Mongolian yurt building superstition that the roof must be raised from within the yurt. You can NEVER pass a pole over the walls (or you will have bad luck with your yurt, or maybe bad luck in general). You have to have them inside and raise them upwards. So that's what we did. The roof poles are connected to the walls by a cable that remains under tension, which is tied around the circumference of the yurt and rests on top of the walls.


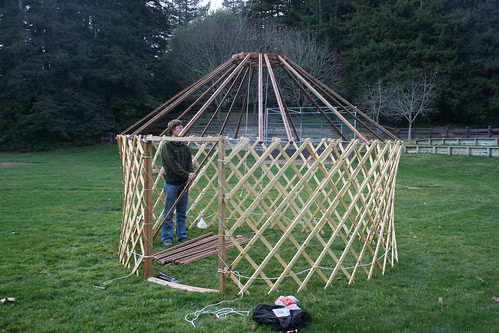
Romy putting up poles
The yurt roof and crown stands with less than half of the poles in place.


Yurt Frame Raising
A close up picture of how the roof poles connect to the tension cable on top of the khana walls.


Yurt Frame Raising
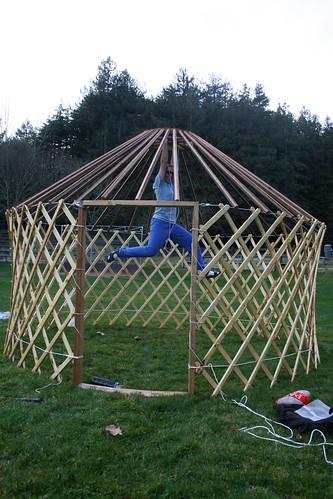
All of the roof poles are in place.


In addition to the tension cable, which serves dual purpose to hold up the roof poles and keep the khana from spreading outward from the weight of the roof, there is also a belly rope I weaved through the wall towards the bottom to support the khana there too. The final test to see if the roof poles and crown are properly seated is to hang from the crown. This was by far the scariest and the most fun part about the frame raising! But no matter how much we tugged down on the crown, it didn't want to come down lower. We didn't measure the angle of the roof, but to me, the roof seems to be sitting at slightly too sharp of an angle. I designed it to sit at 32 degrees, but it seems more like 35 degrees.


Romy Hanging!
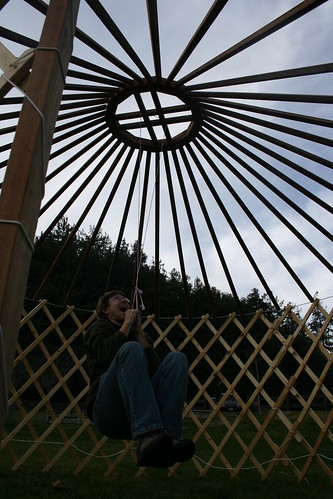
At first conservatively, Romy hung from a rope slung over the crown.


Jenn Hanging!
Then Jenn was hoisted up and hung directly from the crown. Weeeeee!


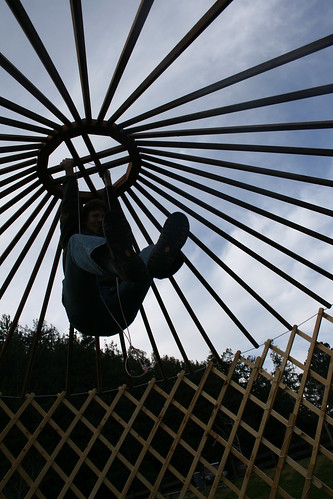
Romy Hanging!
Romy hanging from the yurt crown.


After having lots of fun hanging from the crown, we took more measurements which we will need to started making the canvas cover. We didn't find any odd things, which is good. Everything was just as it was designed to be! Some tricky things that happened when we were putting up the roof poles, was that some of them seemed too short. But Romy later discovered that they weren't really too short, but the yurt was not in a perfect circle. Also, some of the roof poles that seemed short were not coming out of the crown at the correct angle. Once we shifted them left or right, they reached the tension cable with no problem. Here are more pictures from the frame raising (and even more here):


Yurt Frame Raising
Its a bit dark, but this is another view of how the roof poles connect to the walls.

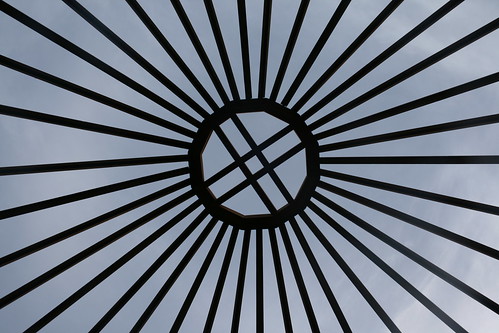
Yurt Crown
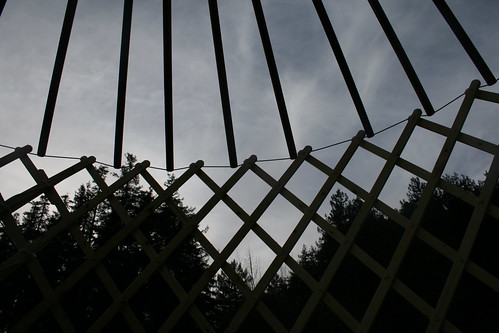
View of the crown from inside the yurt looking up.

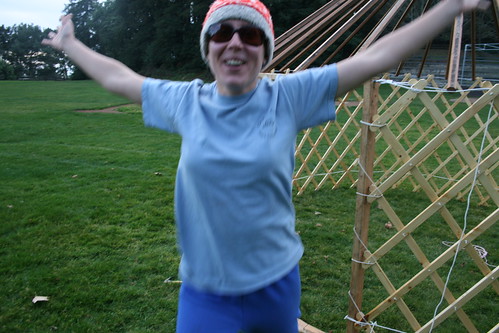
Jenn Really Happy!
Jenn really happy that the yurt went up smoothly! Success!

Tuesday, January 05, 2010

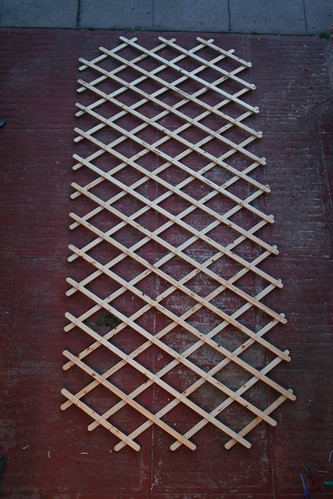
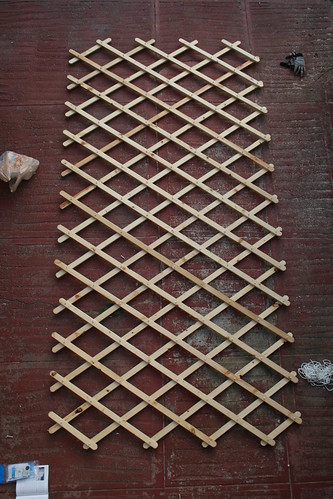
Second & Third Khana Sections Finished

It took a day each to finish, and now all of the three khana sections have been completed. I would suggest wearing gloves when you work with the rope. For the first hour, I didn't have gloves on, and I started to get blisters on my hands from constantly pulling the rope tight. Then I found some leather gloves, and they made everything less painful, but I felt a little more clumsy due to the loss of feeling in my hands.

As I was starting the third khana section, the gas in my Bic lighter ran out. I had another lighter (generic from Ace Hardware) which I used to melt the ends of the strings, but the flame sucked. It was small, not as hot, and generally weak (even though it still had a lot of gas in it). I didn't think that there would be such a difference between cheap-o lighters, but apparently there is. It was perfect timing that Romy was coming back from school just as I was getting sick of the generic lighter, so I called him and asked him to pic me up a Bic on his way home. When he brought it home, I was soooooo happy because the Bic was 100 times better!


First Khana Section
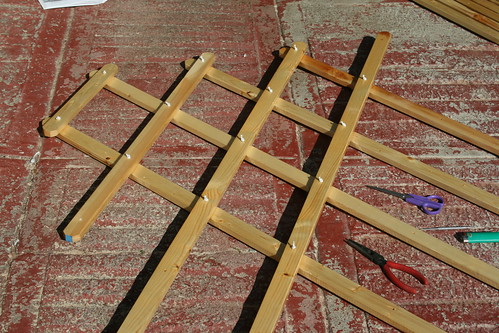
The first khana section completed.

Second Khana Section
The second khana section completed.

Third Khana Section
The third khana section completed.


The two khana sections that attach to the door are mirror images of each other and use the same piece dimensions. When I was cutting all of the pieces, I just doubled the amount I made. However, the middle section (the second khana section) is slightly different. It has no 'corners' because part of it will overlap the other two sections when you join them together. I will post a detailed picture of this soon, when I raise the frame for the first time.

I think the pictures I provided here are detailed enough to go off of if you wanted to make your own. The dimensions are all in Paul King's book, however I think the photos I took are better than his hand drawing (its tiny in his book, and has an error). But I must warn you, there is one mistake in my third khana section! Can you spot it!?

Sunday, January 03, 2010

Putting Together the First Khana Section

This morning I was sooooooo excited to see that the varnish dried on the khana pieces earlier than I expected. So that meant that I could start tying together the khana pieces into the three khana sections which make up the wall of the yurt. I used Paul King's book as a guide. My friend, John (who has his own tent and sunshade making business) let me know about an error in Paul King's diagram for the khana. It was a good thing he let me know about it, because I was kinda confused when I saw the wrong version in Paul's published book. I used the corrected version.

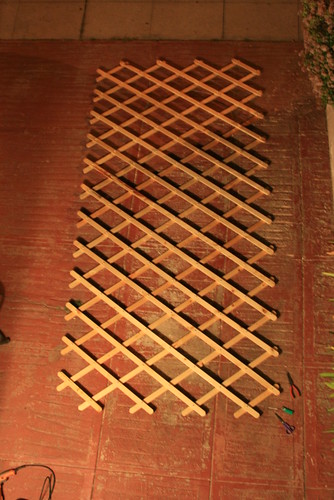
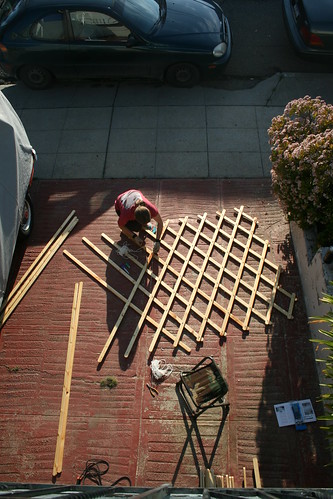
The long khana pieces go together criss crossed. I used 1x2 inch douglas fir for the khana pieces. They are joined with a nylon braided polyester cord 1/8" thick string. There are 8 full length pieces in each direction for each khana section, and for my yurt, I need to make three sections. In addition, there are also progressively shorter and shorter pieces that need to be included to make the ends square. The following pictures are a step-by-step guide to how to put a khana section together. As I mentioned in my previous posts, the holes where the string goes through to connect khana pieces together have already been drilled prior to today, and I also cut each piece to size, sanded them, and varnished them.


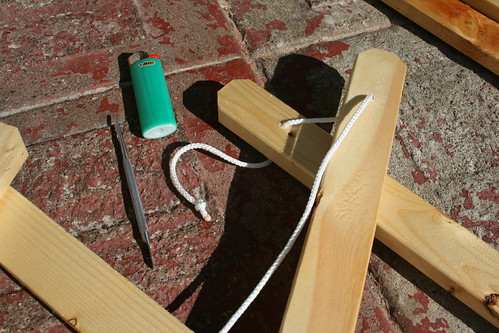
Step 1
Step 1: Push the string from the top to the bottom and out. Sometimes it helps to fashion a 'needle' out of a stick or something similar. Knot the end and burn it with a lighter so that the end of the string doesn't unravel. I used synthetic string, but if you are using natural fiber, you shouldn't burn it.

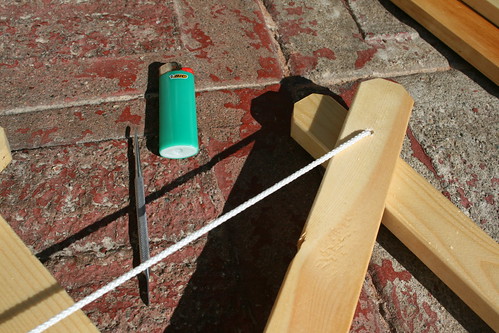
Step 2
Step 2: Pull the string hard and tight so that the knot on the other end seats. Make sure the two khana pieces are aligned how you want them to be.

Tie the Knot With Plyers
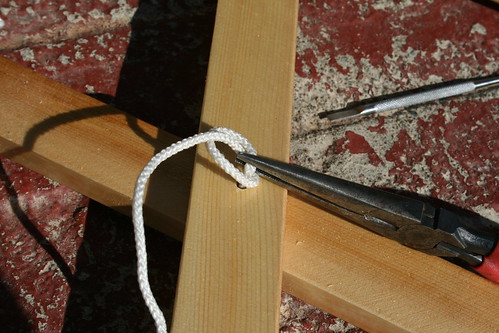
Step 3: Keeping the string tight, use pliers to help tie the knot at the top. Try to make the knot as close to the wood as possible.

Step 3
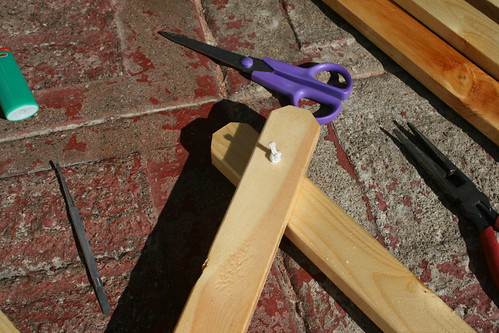
Step 4: After tying the knot, cut off the excess string. Finish it by burning the end so that the string doesn't unravel.


I had this vision this morning that I would finish all three khana sections today. In one khana section, there were a total of 76 'joints' and 152 knots to tie and burn! Needless to say, it took me all day to complete just one khana section, even when Romy helped me for an hour or so! That means I still have two more days to go making the sections, and one more day to make the door frame.


Starting to Tie Khana Together
The start of putting a khana section together. This is a view of the corner.


My dad thought that the khana might not bend enough to create a circle without the pieces breaking, so I tested it out. It bends really well, and the actual pieces don't bend as much length-wise because they are at an angle. I was happy when I saw that! Anyways. . . here are some more pictures I took over the course of the day (and night).


Romy Helping With the Khana
Romy helping to make the khana sections.

Jenn Tying Khana
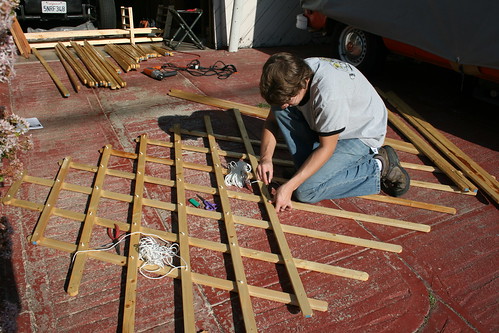
Me making the khana sections. It is getting towards evening. Romy took this picture from the balcony above the garages.

First Khana Section Complete
The completed khana section. Its dark outside so the picture blurred a little.

Folded up Khana Section
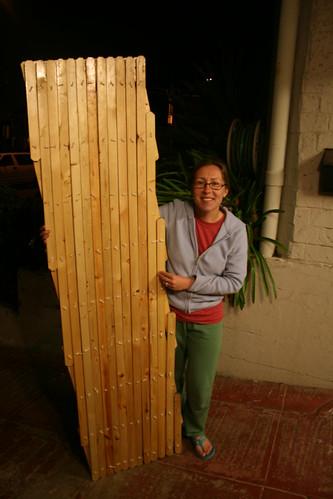
Me holding up the khana section when it is all folded up. Its not as big as I thought!

Jenn and the Khana
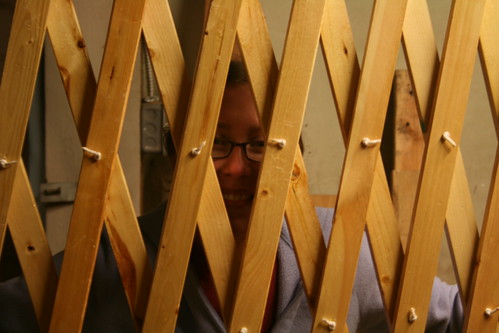
I look all tired! But the first section is all done. Yay!

Saturday, January 02, 2010

Done Varnishing the Khana

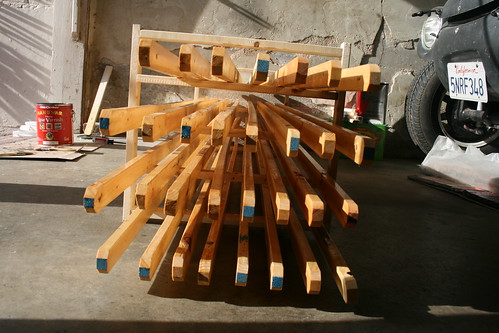
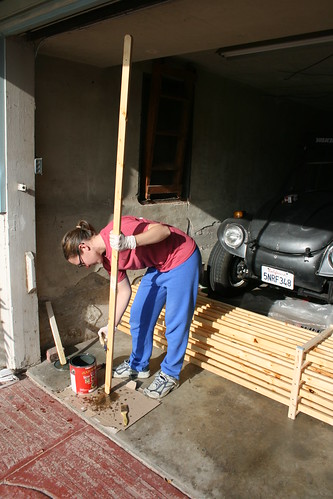
After inhaling a bunch of fumes, I finally finished varnishing all 85 pieces of khana which will make up the three sections of the lattice yurt wall. Since I had so many pieces and not much space in the garage for them to dry, I built a small functional drying rack. The weather here has been playing games with me. The weather report said it was going to rain for the whole past week, so I felt hesitant to start varnishing with all of the possible humidity. But then I said, what the heck!? I will just varnish in the garage and if it takes longer for the khana to dry, so be it, at least I will get it started.


Varnished Khana
About 2/5ths of all of the khana pieces drying on the rack I built.


It turned out to be nice, sunny, and warm during most of the days this week. It only rained at night. I varnished with spar varnish, normally used for marine or boat applications. I applied one thick coat. I didn't want to put more on it, since the khana will be slightly bent when the yurt is standing. I figured if I layered it on any thicker, the varnish might crack under the stress.


Jenn Varnishing the Khana
Me varnishing in the garage. It looks like the baja is looking at my butt and smiling!


The next step now, after the last batch of khana pieces are dry, is to join them all together into the lattice sections. I think I will do this two days from now. I also forgot about making a door frame! I will do that tomorrow, I think, while the last batch of khana dry.

Thursday, December 31, 2009

Hot Spring Fever

I’ve come down with hot spring fever! Ever since that book Melissa showed us at the Ocean Cove VW camp out, I’ve been going crazy about visiting hot springs (but only the natural ones). I don’t know what it is exactly that makes me all into it. I think I like the comfort of the hot water when its cold outside, and the awesome views that you usually have while soaking. Since most of the hot springs exist in areas of the earth which are tectonically active or mountainous, there is some crack allowing heated groundwater to rise up to the surface quickly. This means there are usually mountains around and nice scenery.

One hot spring which Romy and I have been searching for lately is one just north of Steep Ravine Beach within Mt Tamalpais State Park, right on the shore of the ocean. We heard about it from a guy at another VW camp out, this time at Bothe-Napa Valley State Park. The hot spring lies almost on top of the San Andreas fault, by Stinson Beach. At Stinson Beach, there is piece of land called Point Reyes, which is on the other side of the fault (the west side) which has been moving northwards, slowly creeping. Its origins are from far south, meaning that the chunk of land which we know today as Point Reyes was once next to L.A., and going farther back in time, it was probably further south by Mexico or something. Anyways, the hot spring there is under water most of the time. It is only exposed during the lowest of tides. The tide must be -0.5ft or lower for the source of the spring to be exposed. The area has a few sources, actually. The highest of the sources lies within the rocks along the shore. A small pool is formed within the rocky shoreline, which is slightly overhanging, creating a cave of boulder ceilings. As the tide makes the cold Pacific Ocean waters recede, the spring water bursts out, filling the pool with hot water. Somehow people discovered it, and have been bathing there when low tide makes it possible. The other sources come up underneath the sand along the shore. Beyond the rocky shoreline, there is a flat expanse of sandy bottom which is exposed only during the most low tides (at least -1.0ft or lower). Hot water bubbles up from below, and you can bath in it by bringing a shovel or bucket and digging into the sands which lie above the various sources. When we visited on Dec 30th, the tide wasn’t low enough to expose those sources, but we read that you can tell if they are exposed because the sands will have bubbles rising up and out to the surface. Digging into the sand will create a personal pool, which you can soak in for a little while before the ocean comes back and swallows it up again.


The tide chart on the day we went hunting for the hot springs.


Not knowing what to expect when we went, we brought a bucket, as well as towels and small beach chairs. According to what the guy told us (at the VW camp out), we drove down HWY 1 until we got near the Steep Ravine Cabins (which we rented a few weeks before – awesome) and parked the car. Then we walked down to the cabins along the paved road. We took the long way around, as we later discovered there was a much more direct way straight down the mountainside down to the ocean from right where we parked the car, but oh well. . . . Anyways, we got to Steep Ravine Beach, and he told us you have to go north a bit. We scrambled past the rocks, just north of the beach, and started smelling sulfur, a tell-tale sign. But the tide was only at 0 ft, so we waiting until the springs would be exposed. The tide was supposed to be getting down to -1.0ft that evening at 5pm, but it was only 4:15pm. After 20 minutes of nothing, we decided to move more northwards. Maybe we didn’t go far enough? As we walked, we saw a bunch of starfish clinging to the rocks which were normally under the water. One had a double foot. It had 6 feet!!! Gross.


Starfish we saw along the way to the hot springs. One of them has 6 feet!


We walked and scrambled over the rocks. I didn’t see anything. And I didn’t smell sulfur anymore, so I thought we were going way too far north. But then, all of a sudden, we saw cloths on a rock ahead. We kept going towards the cloths and found more and more cloths! Then we saw backpacks, and steam coming from in between some of the rocks near the shore. We saw naked people behind the boulders, and we knew we were in the right place. We had reached the famed hippy nudist hot springs!!! The actually pool was tucked in a cave, so it was hard to see how many people were inside. According to the shear amount of cloths on the rocks, we knew there were quite a lot of people. Nothing prepared me for what I saw next, as I peeked towards the pool. There we at least 20 to 25 naked people squished into the pool, which was the size of our VW bus. Holy crap this was about to get cozy.

We drove about an hour to get here, and hiked another 45 minutes, so we weren’t about to just give up now. We were going in! A nice (naked) man welcomed us, and told us there was still room, so we ‘dived in.’ The water was just the right hot-tub temperature. The bottom of the pool was a mix of large boulders and smaller rocks. All were soft and smooth. The ocean surf surrounded us, and the boulders above our heads had a bunch of mussels glued to the rocks. There were a bunch of older hippy-looking people crammed inside the pool. Mostly there were men (sausage fest), some with dred-locked hair, some with long hair and beards, some with dorky looking glasses. Some were the quiet type, while others were very social. A few women were there, and they looked normal to me. There was only one other woman with a bathing suit. Romy was the only guy with swimming trunks on. I went in with my suit on, which was not the norm there. But even with all those people in there, the pool was extremely peaceful. You could tell right away you were surrounded with people who were there because they loved nature, life, etc. The guy next to us, named Freddy, talked to me and told me a lot about the spring. We also talked about other natural hot springs. He told me how this particular spring deterred a lot of the wrong people – due to the dangerous trails, lack of personal space, and the ‘self-policing’ of the regulars. He said we were pretty mellow, and normally he didn’t encourage newcomers, but he liked us so he invited us back. I swear we were the youngest people there.

Freddy told us we looked conservative because of our glasses, but were probably pretty liberal (due to the whole coming to the hot springs thing). He said that was better than him, who looked pretty liberal but was really a conservative. These are the type of conversations that happened. He told us there was no alcohol allowed. He said everyone in the hot spring can smell the alcohol on somebody’s breath if they were drinking and that was shunned. The only smoke allowed was cannabis smoke, not tobacco (and of course the steaming smoke from the hot water). All in all, it was a great place and a great experience.

What made it special to me was the fact that it is so temporary. The spring is exposed for a maximum of 3 hours once (maybe twice) a month. At this time, the people gather and sit in cramped quarters to enjoy nature and life, comfortably warmed by the hot springs, whose heat source is deep within the earth. Cleaned naturally by the crashing waves of the ocean, the rocks are smooth and welcoming. It is hidden in a nook, hard to find. It’s the type of place you only know about because a friend told you about it. It’s not for everybody.

But I guess you can say the same thing about most natural hot springs. They are not for everybody. You have to be willing to drive far from civilization, sometimes hike a bit, deal with ghetto-rigged piping systems (sometimes), tolerate a bunch of algae or other slimy stuff (sometimes baby fish) and freezing temperatures (not the water of course). But if you love that, then I would suggest going on a natural hot springs hunt. Find a spring near you and go!